This post may contain affiliate links. Please read our disclosure policy.
Letter Recognition: Pre-K
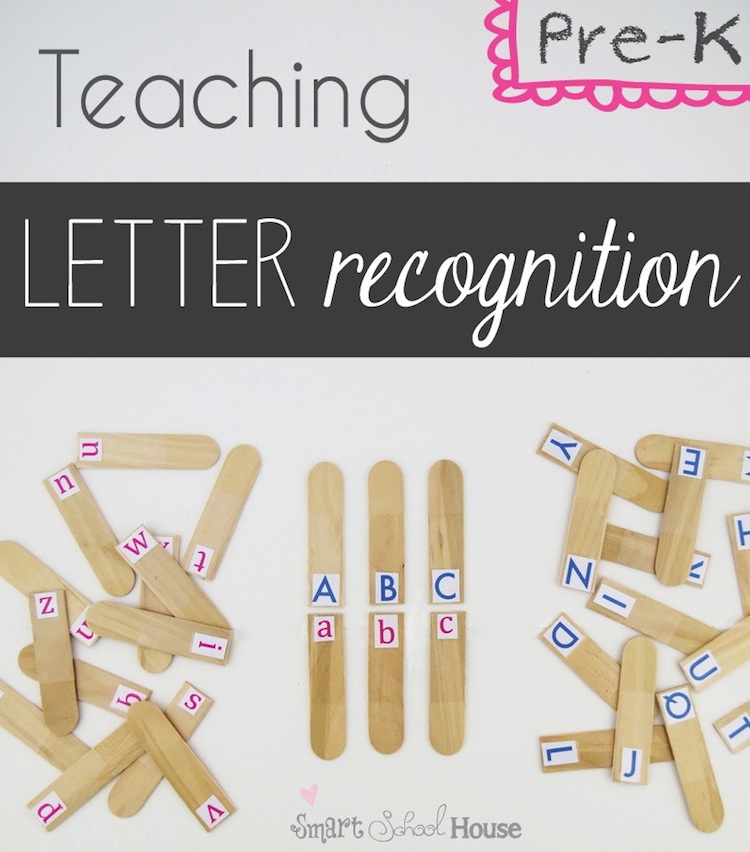
Today I’m sharing a creative DIY project to help teach your Pre-K child letter recognition! This activity focuses on matching uppercase and lower case letters. All you need are a few simple supplies that you most likely already own.
Is your child older than Pre-K but still learning to recognize their letters? That’s ok! This activity can be fun for older (or younger) kiddos too! This activity can also help your child if they are showing signs of letter reversal. What is letter reversal? Letter reversal is when children reverse letters. For example, they will write an “e” backwards. It’s a common thing that young children do when they are young. You might also see letter reversals with several other letters in the alphabet (s, p, q, r, etc).

I started this activity with my 3 year old. She can recognize most of her letters, but I felt like it was a good time to introduce the concept of upper case and lower case letters! The popsicle sticks are set up so that little hands can match big letters to little letters.
First, you need popsicle sticks. I happened to have the jumbo size popsicle sticks on hand. You also need sticker paper. Don’t have sticker paper? Neither did I! But, I have a ton of blank address labels and those work perfectly. You also need some scissors and clear packaging tape.
The first thing you will do is simply cut the popsicle sticks in half:

Next, print off the alphabet. I printed mine on address labels and then cut them down to size. Choose a font that is bold and not too fancy. Make all of the uppercase letters one color and pick a different color for all of the lower case letters. Then, you stick the letters onto the sticks as shown below. You want the uppercase letter and the lower case letter to be placed on the sticks so that they match like so:

NOTE: Cover the ends of the sticks with clear packaging tape! Why? Well, somehow the fingers of little ones are always sticky and messy! You want your popsicle stick alphabet to last so they can be played with over and over. So, it’s best to cover themk with heavy tape:) I simply wrapped tape around the sides and onto the back of the sticks.

Is your child 3 or younger? Start with just a few letters at a time! You can help by placing a few upper case lettered sticks across the table. Then, let them find the coordinating lower case letters and place them together with the sticks you laid out.
Is your child in Pre-K? Have them recite the letters they are picking up and matching. They don’t have to say, “Upper Case R” like we do. They can say, “Big R / Little R” instead. For Pre-K aged kiddos, you might still want to layout either the upper case or lower case sticks first and allow them to match one set at a time (to avoid learning frustration!).
If your child is older than Pre-K but needing extra practice mastering letter recognition? Focus on which letters they know and which letters they need help with. If they have mastered the letter A, then take the A out of the collection of sticks. Spend time working on the letters they need help with (or are reversing).
Remember, it’s also important to teach your little ones how to
Are you looking for more educational DIY activies that you can create at home?
Check out my gallery of
You’ll find more pretty inspirations like this:

Like my DIY Learning Activities? Click here to find out where you can chat with me!


Going to try this! TY!