This post may contain affiliate links. Please read our disclosure policy.
Deck the Halls! Oh My Goodness, I Simply Cannot Wait to Decorate This Year! Just for Fun, I Created These Gorgeous Styrofoam Christmas Trees and They are Sparkling Beautifully in Our Home. Because We’re Spending More Time at Home This Year, We Are All About Holiday Crafts and Recipes. These Little Trees are Especially Fun for the Older Kids, Teens, and Adults. Light the Fire, Turn on Christmas Music, Pour Some Hot Chocolate, and Let’s Get Crafting!
Styrofoam Christmas Tree
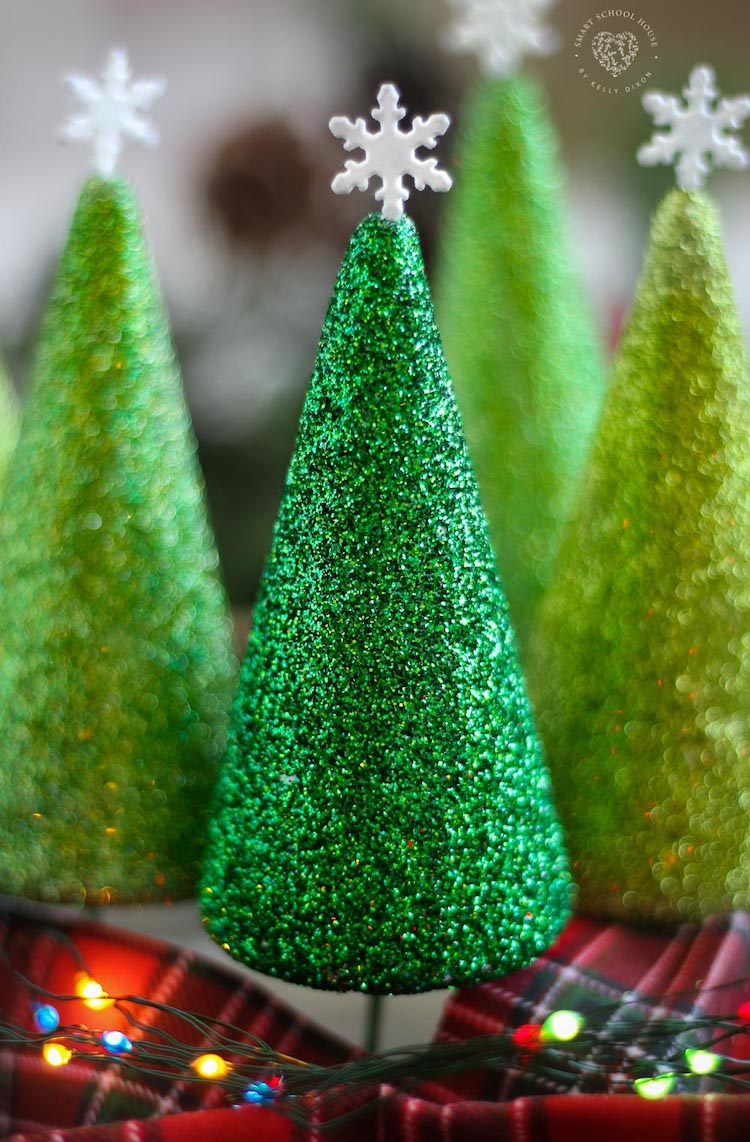
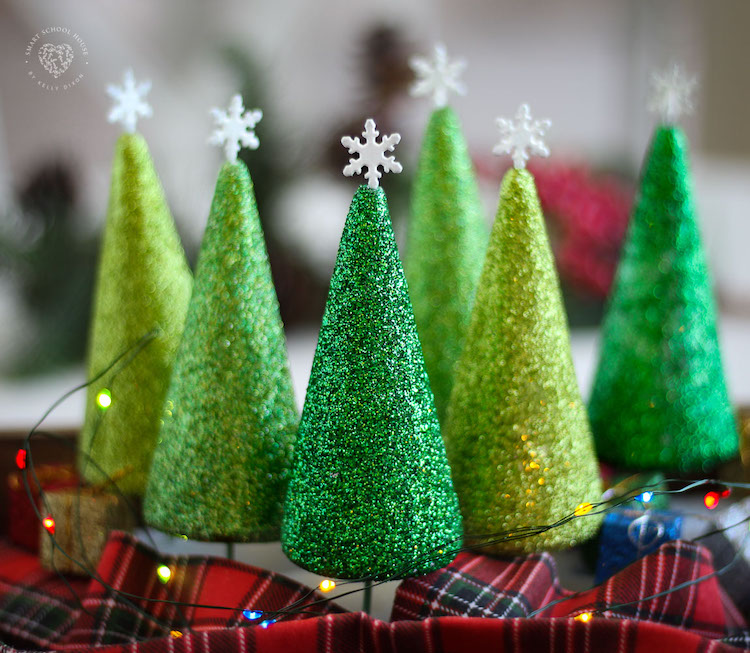
This Christmas Tree Craft is easy, inexpensive, and each tree comes out looking completely unique. They look so amazing and impressive, and are perfect for holiday decorating. The glitter shimmers in both the sunlight and nearby Christmas lights (or tiny fairy lights as I use in the photos).
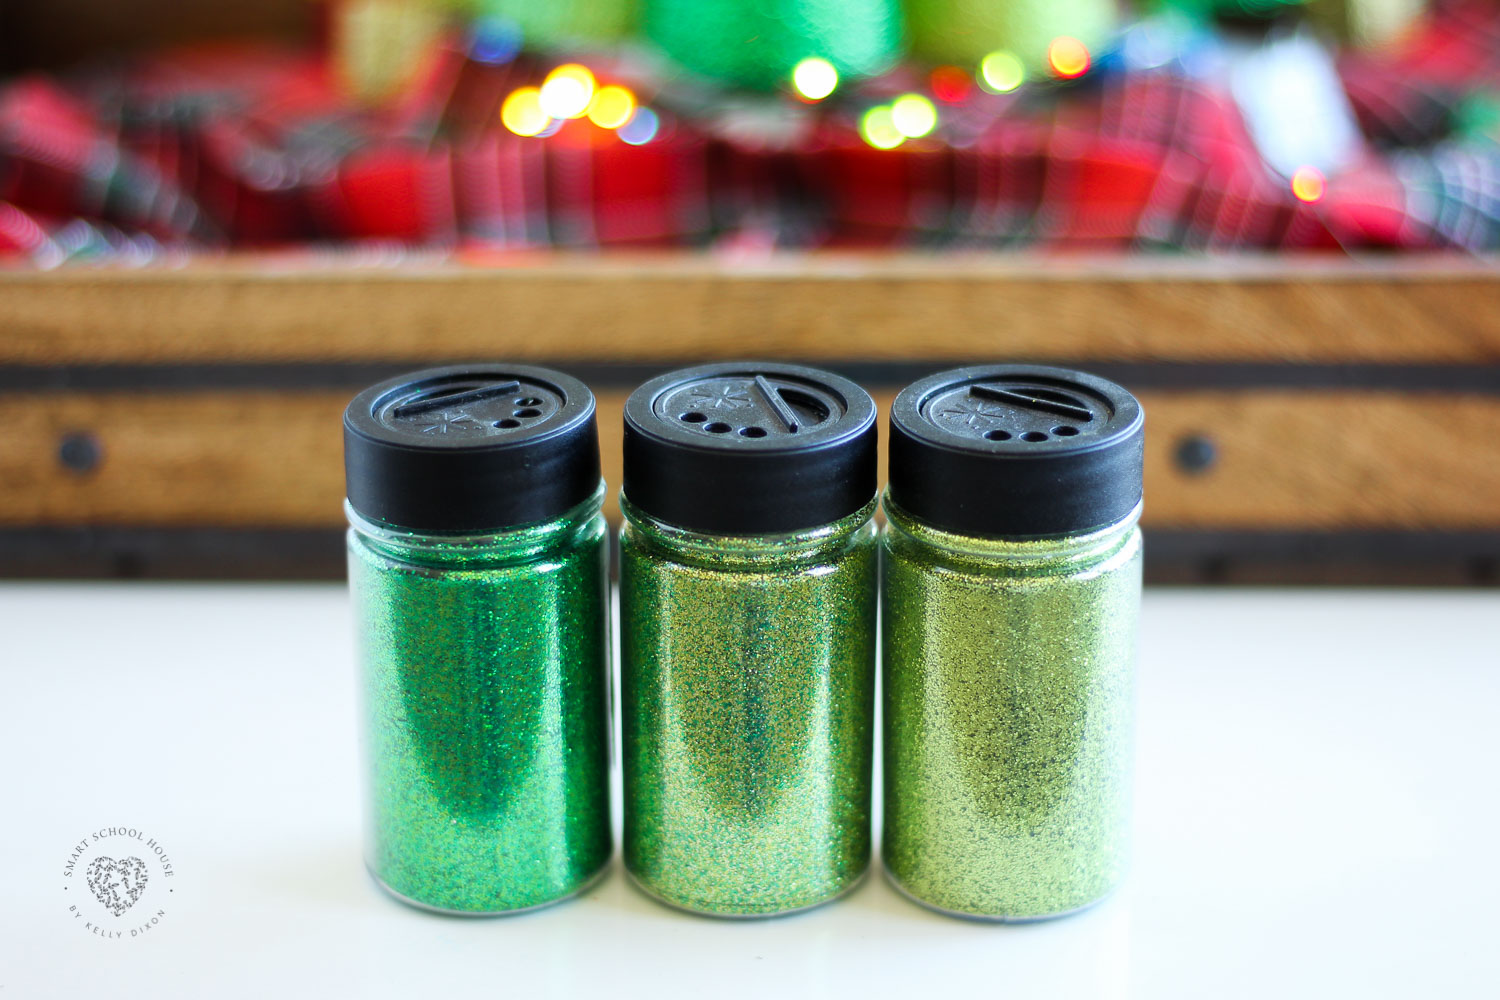
To get started, you will need ultra fine glitter. Getting ultra fine glitter is what makes all the difference with this craft. The trees get a smoother sparkle appearance compared to chunkier glitter. Bonus, I find extra fine glitter easier to wipe up:)
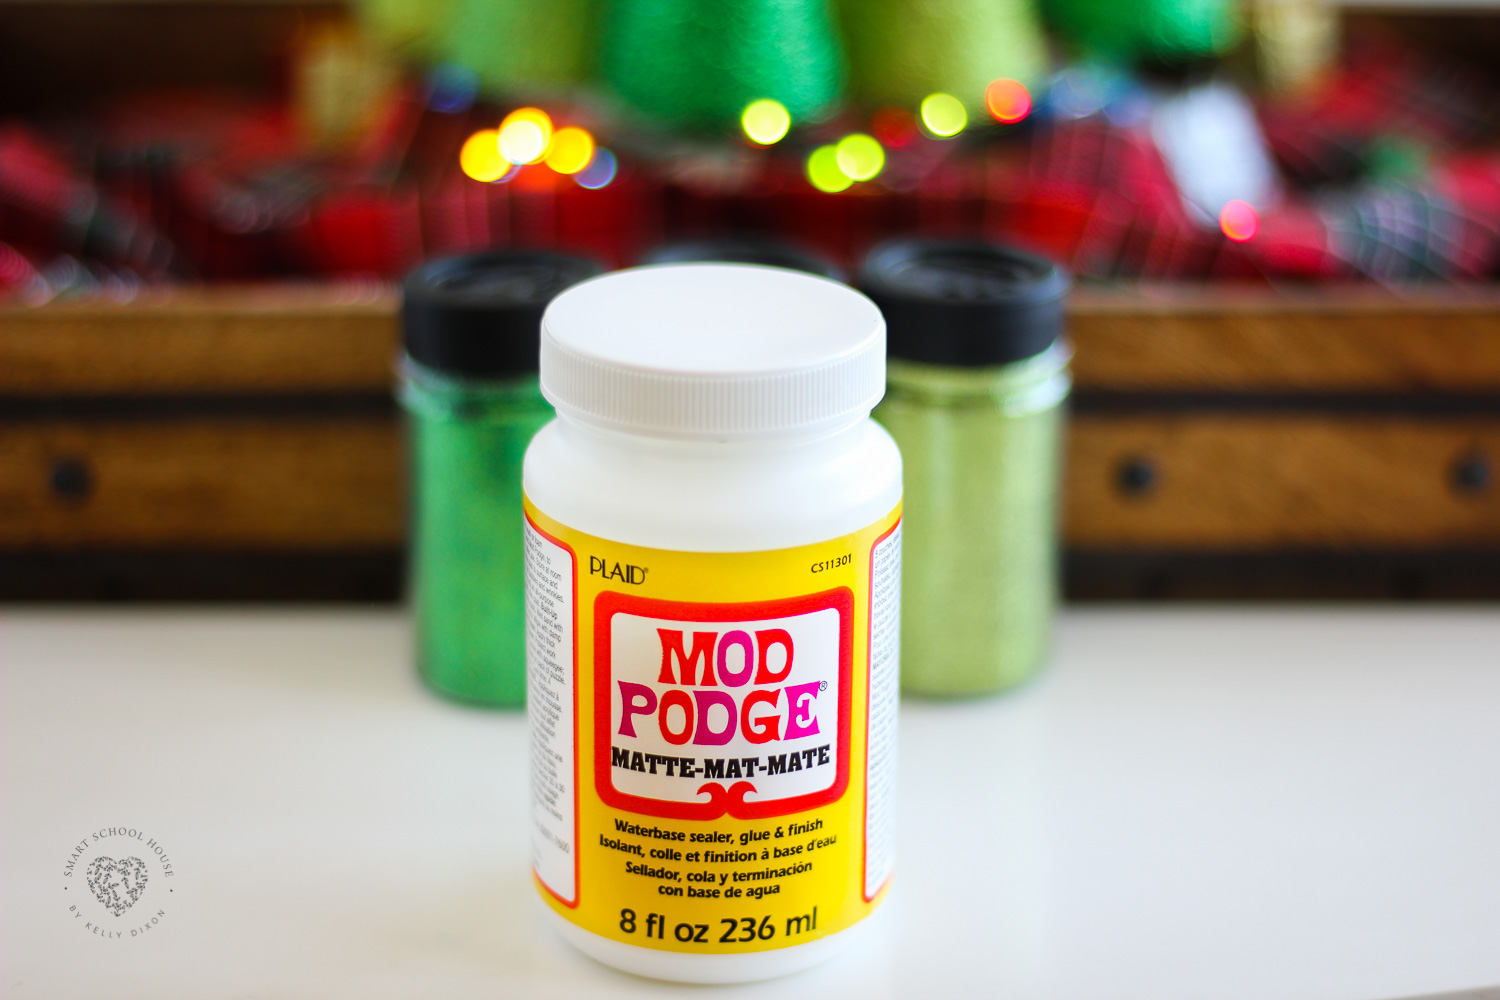
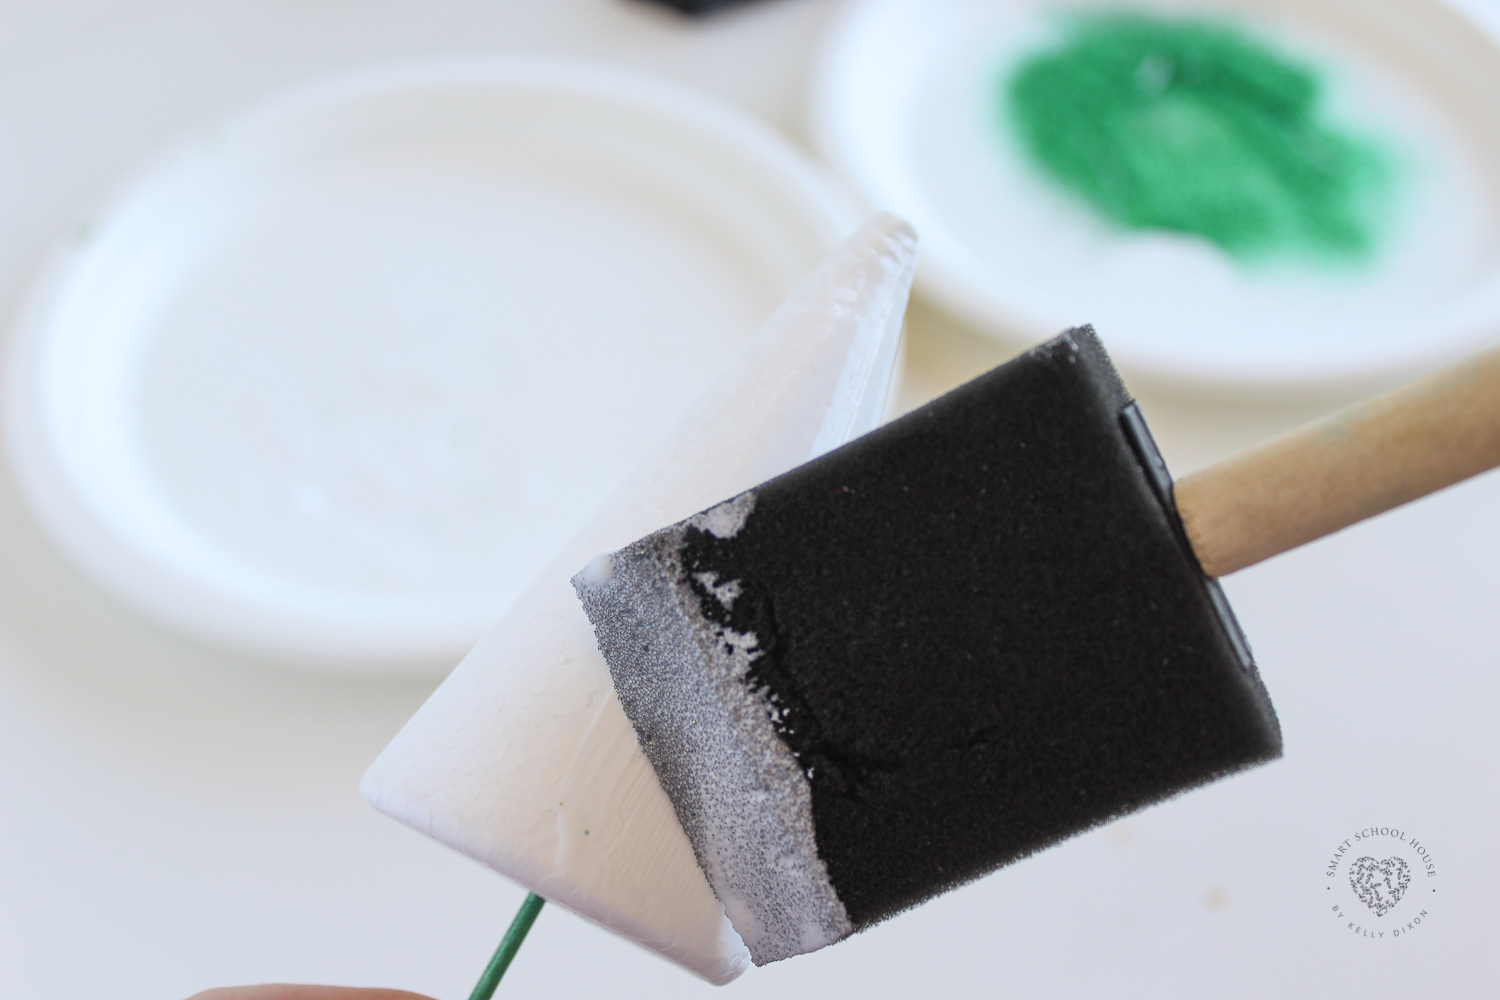
Next, you’ll need some basic glue. My favorite to use is Mod Podge but regular Elmer’s or tacky glue works too. Why do I like Mod Podge? It’s so versatile, extremely easy to use, it dries clear, and it dries quickly. It’s a good craft glue to have on hand and it’s very affordable.
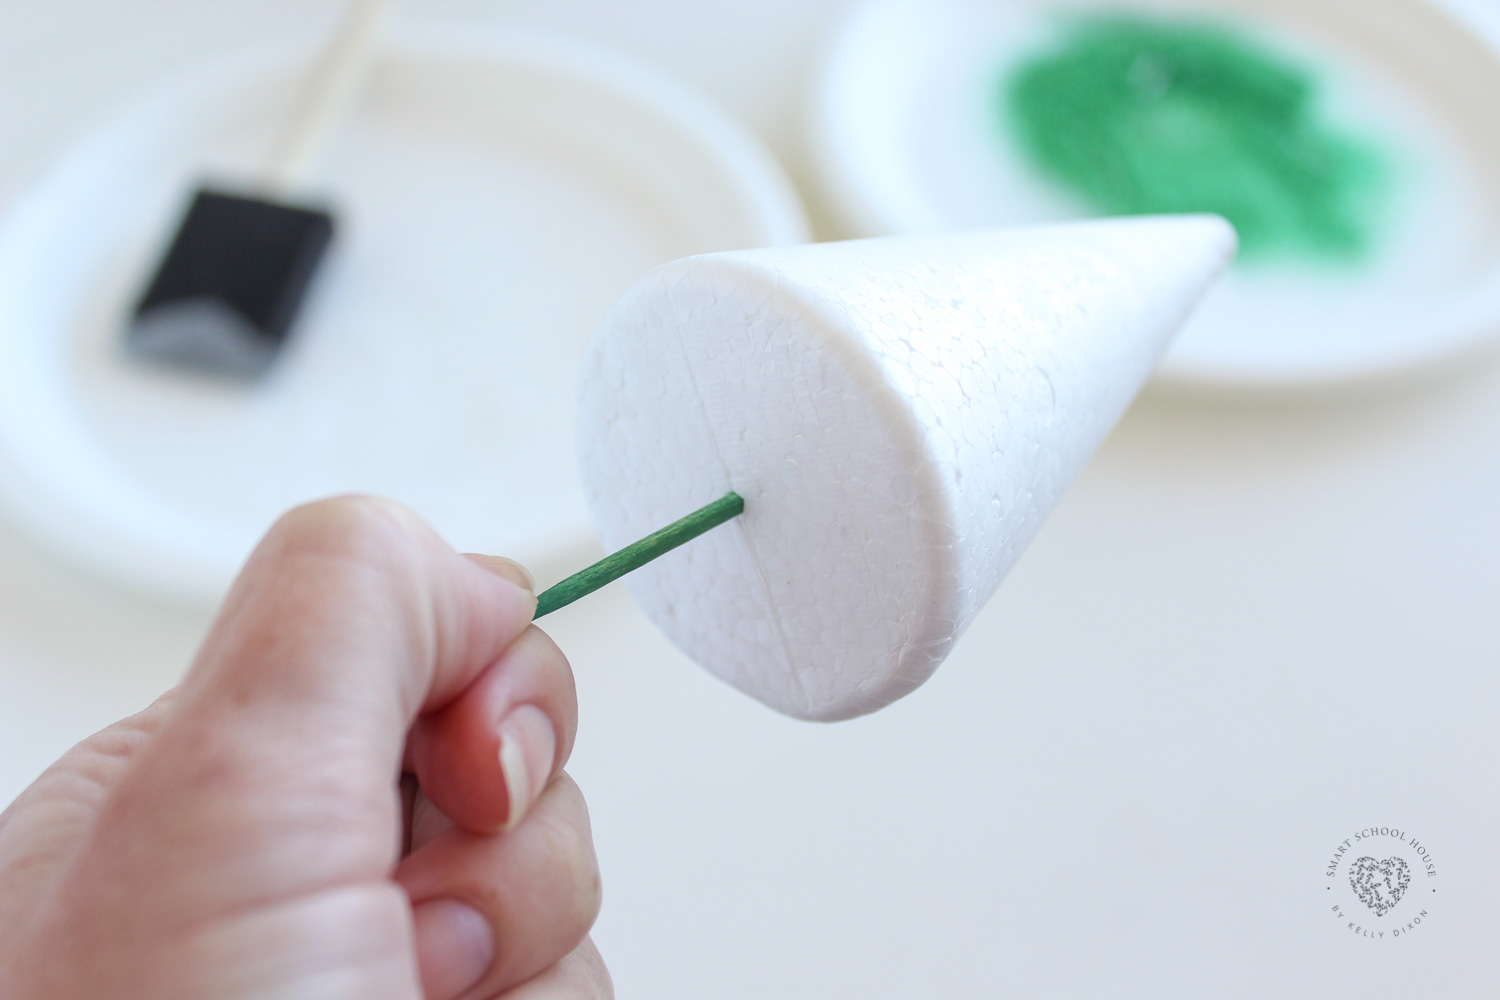
I started by sticking a green toothpick into a small styrofoam cone. I got the colored toothpicks at the grocery store and I know they have them at Walmart too. Green isn’t necessary, but I think it looks cute. The regular brown toothpicks makes complete sense too if you plan to leave the toothpicks in after they dry because it looks like a real tree trunk!
How to Make A Sparkly Styrofoam Christmas Tree
The purpose of the toothpick allows for easy application of the glue and glitter to the styrofoam Christmas trees. You can spin the toothpick around using the toothpick without getting your fingers sticky.
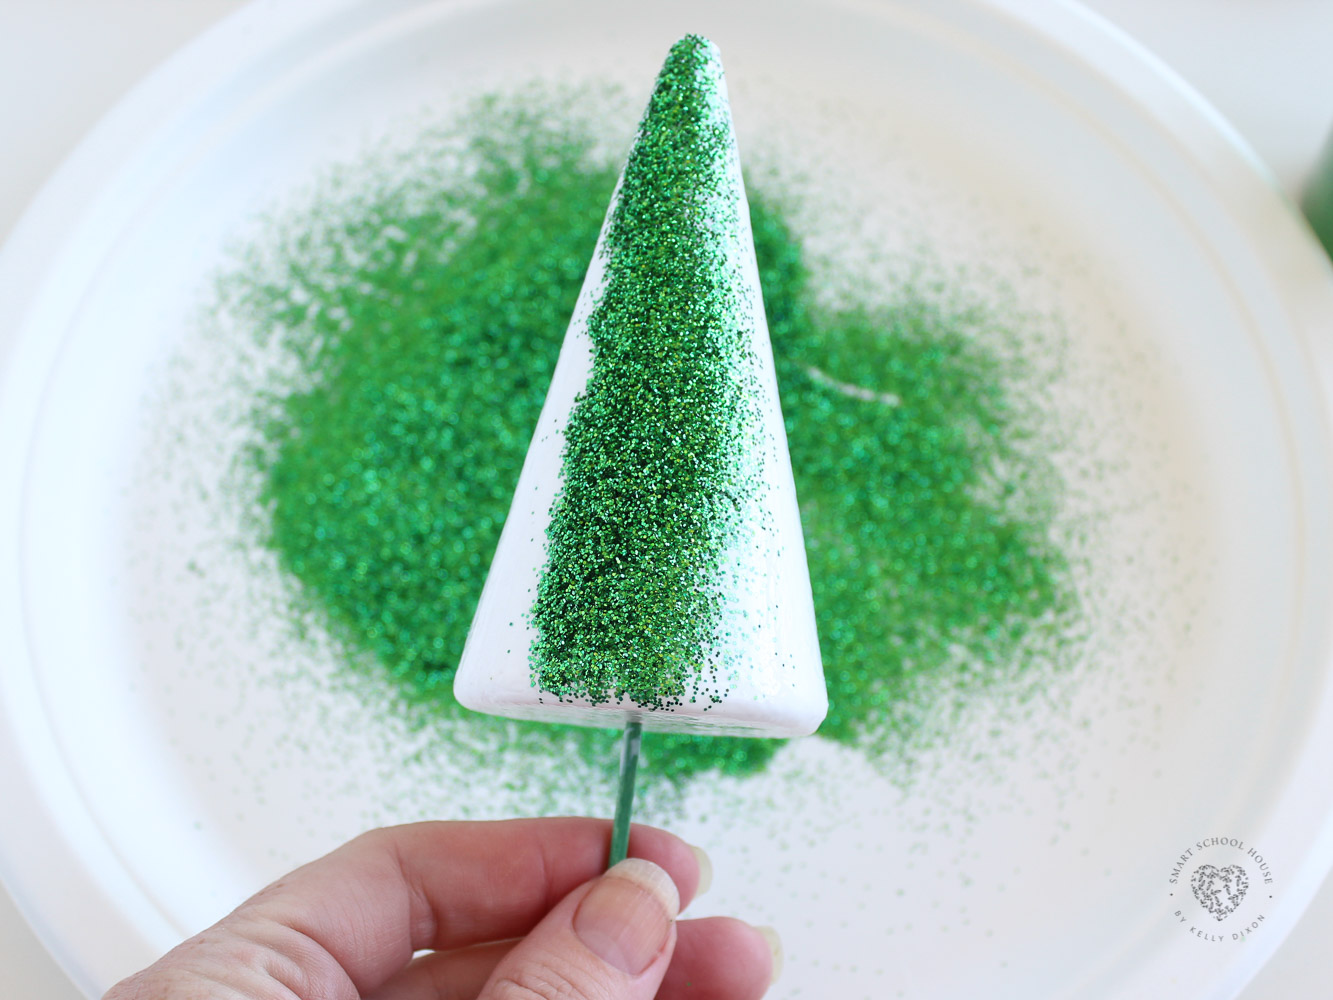
After the glue is applied, it’s time to add the glitter. Now, I know some people are afraid of crafting with glitter, but I love it and I have NO shame admitting that glittery sparkly crafts always put a smile on my face. The MOST IMPORTANT THING TO DO when working with glitter is to prepare your workspace first. Have paper plates ready for each different color, spread the supplies out before getting started, open the glitter container tops before starting, and move slowly. Rushing over an unprepared workspace with glitter is where messes can happen.
I decided to glue and glitter the bottom of the styrofoam Christmas trees, but this part is totally optional! You actually don’t have to keep the toothpick trunks in the trees once they’re done drying. How you plan to decorate with the sparkly trees will determine whether or not you need to add glitter to the bottom portion. If you keep the toothpicks in, you’ll also need styrofoam for displaying the trees in addition to styrofoam for drying. Floral form also works great for this!

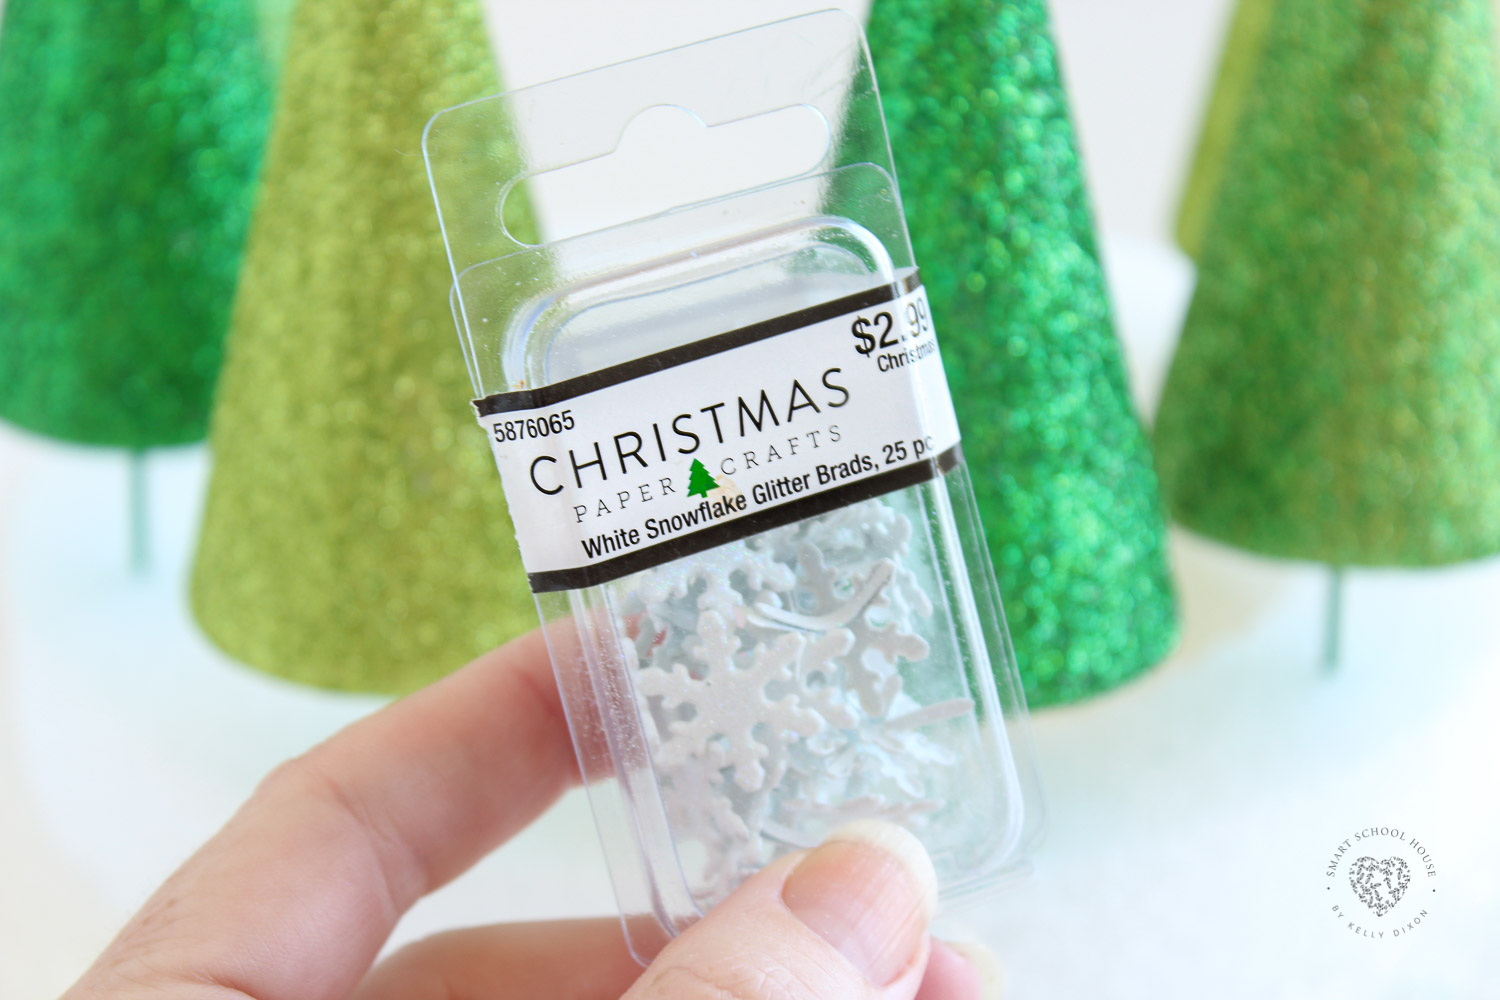
The pretty little snowflakes on top are these are glittery craft brads I found at the craft store. This is another place where you can get totally creative! The brads have tiny metal pieces in the back that can be pushed into the top of the styrofoam Christmas trees. However, you could easily glue on a craft star, bow, or anything else! The miniature ornament section of a craft store as well as the holiday craft aisles is a place to look for tree toppers.
Styrofoam Christmas Tree
If you look closely, you can tell that I used 3 different colors of green glitter. I like the contrast it adds to my sparkly styrofoam holiday forest:) I added Christmas fairy lights, some festive fabric, and displayed the trees in foam. There are so many ways you can style this craft to decorate your home!
More DIY Christmas Crafts by Smart School House:
-
Shatter Proof Light Bulb Snowman
-
Doily Christmas Trees
-
Snow Globe Christmas Cookies
-
Candy Train
-
Giant Christmas Ornaments
-
DIY Ornaments Made with a Ball
-
Paper Plate Lollipops
-
Cardboard Box Snowman
-
Candy Cane Reindeer
-
Candy Sleigh
Styrofoam Christmas Trees

You Will Need
- Ultra fine glitter in colors of choice
- Toothpicks
- Mod Podge Glue or any craft glue
- Paint brush (I think a sponge brush works well with glue)
- Styrofoam cones in desired size
- Styrofoam or floral form to allow the trees to dry
- Tree toppers: craft supplies like brads or miniature ornaments work well for this
Optional Supplies:
- Paper plates for the glitter
- Christmas colored fairy lights
- Styrofoam for displaying the trees
- Holiday fabric (for embellishing the display)
Directions
- Prepare your work surface before starting! This is important when working with glitter. Open the glitter bottles in advance, set them in a place where you won’t easily knock them over, and setting plates out for each color of glitter you plan to use. I pour the paint out on a separate plate to use with a sponge paint brush. It helps to have damp paper towels prepared in advance as well. Have the styrofoam drying base in place.
- Press a toothpick into the styrofoam cone
- Paint the cone with a thin layer of paint
- Over a paper plate, sprinkle the fine glitter over the layer of paint
- You might need to add a tiny bit of glue to missed spots
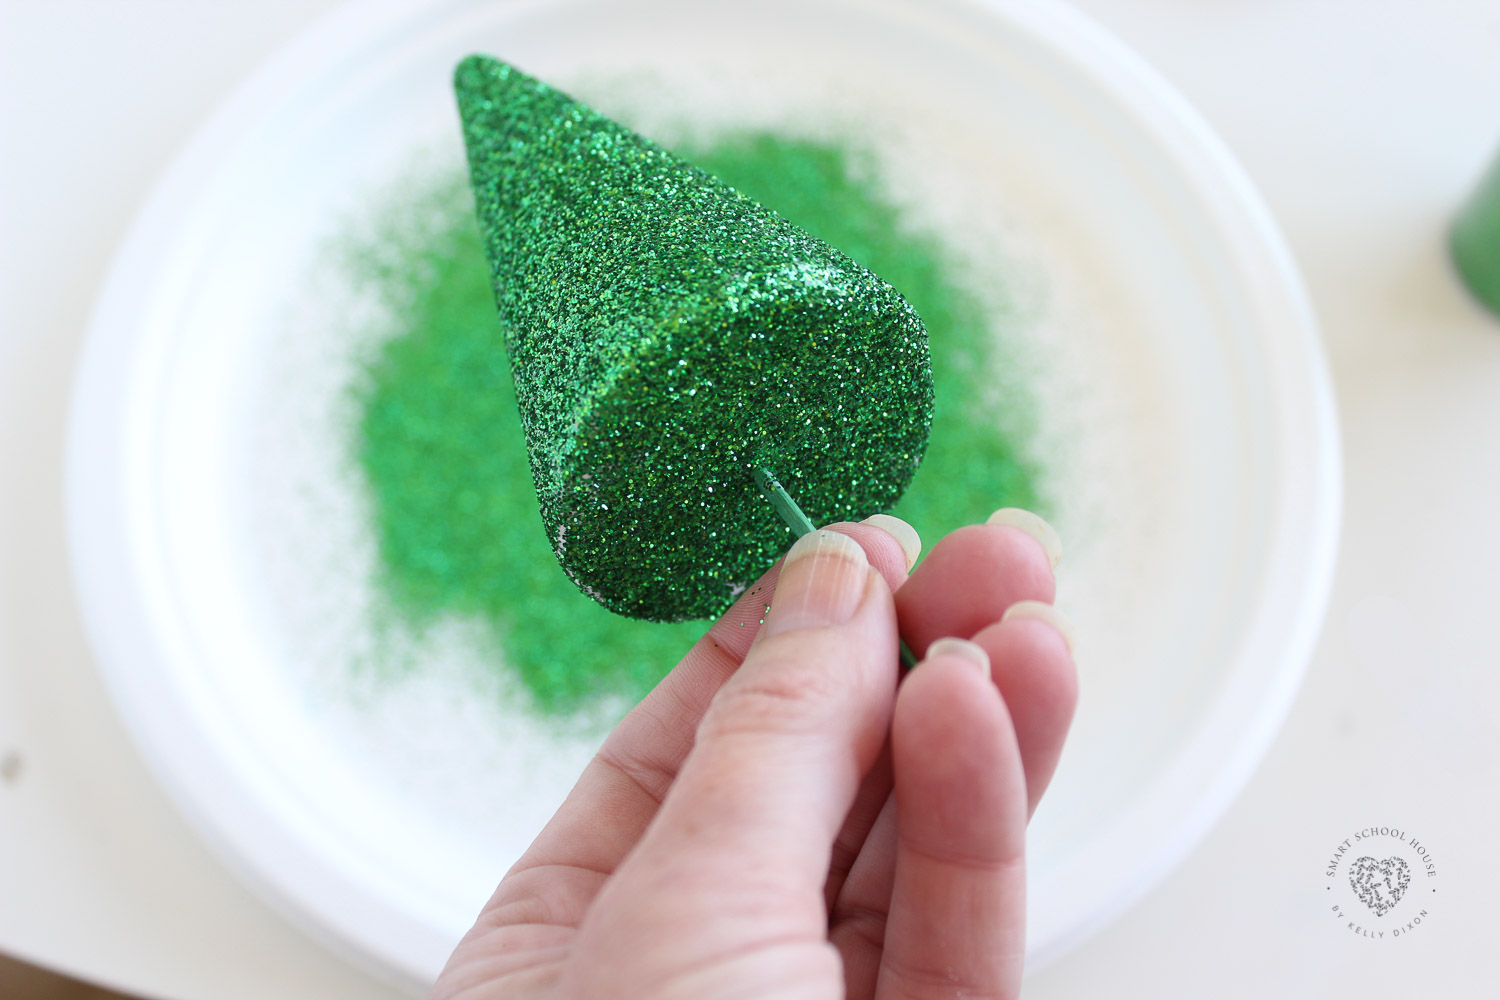
- Once done, you can pour the extra unused glitter on the paper plate back into the glitter containers.
- Press the tree into a piece of styrofoam to dry
- Once dry, add a tree topper and then display the trees with other holiday embellishments like fairy lights and fabric. The opportunities are endless!


I had to chuckle when you said that some people are afraid to craft with glitter!! Hahaha it still makes me laugh!!
I also have a love for glitter and openly embrace the chaos of glitter love that comes with it!!
Thanks for brightening my day!!