This post may contain affiliate links. Please read our disclosure policy.
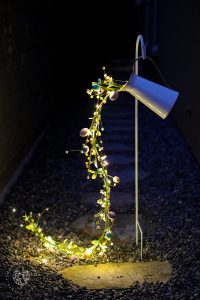
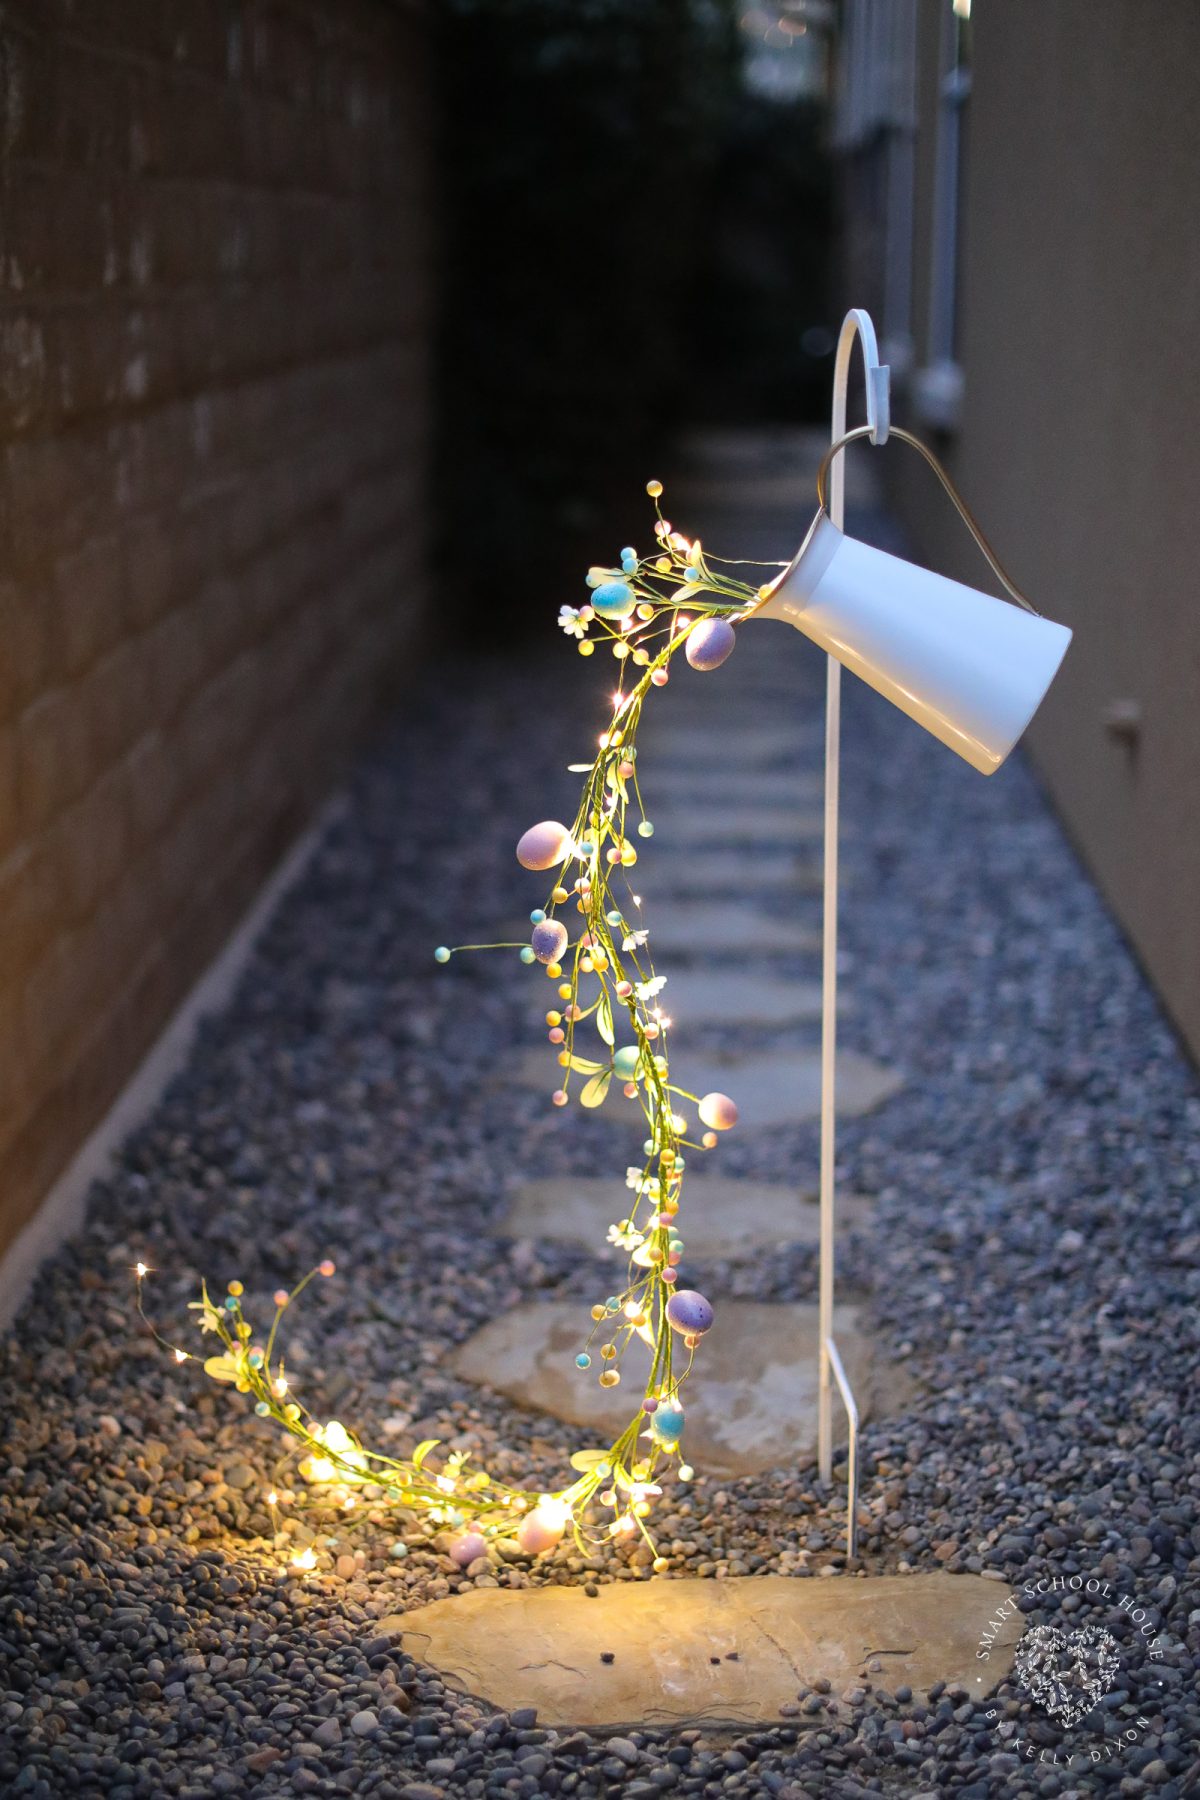
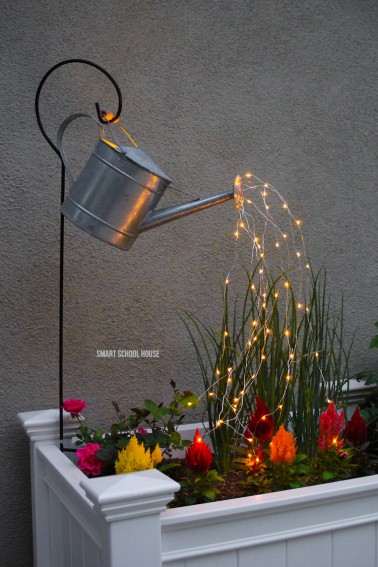
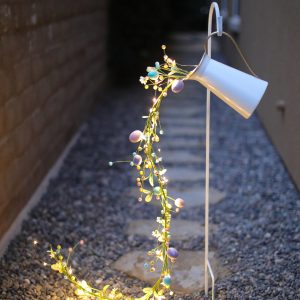
This Pouring Easter Garland is a unique spring decor idea that feels straight out of a storybook. Designed to look like a pitcher magically pouring out glowing Easter eggs and greenery, this project is perfect for patios, walkways, porches, or even indoor spring displays. It’s a creative way to elevate your seasonal decor and a fun project for anyone who loves Easter crafts for adults and eye-catching DIY Easter crafts.
Pouring Easter Garland
If you love decorating for spring and Easter, this Pouring Easter Garland is about to steal your heart. It looks like a pitcher frozen in time, magically pouring out glowing Easter eggs and greenery. The best part? It’s much easier to make than it looks.
Pin this now to save it for later
Pin It Now
Why You’ll Love This Craft
Creates a stunning “floating” illusion
Perfect for spring and Easter decorating
Looks high-end but uses simple supplies
Works indoors or outdoors
Easy to customize with colors and lighting
This is one of those DIY Easter crafts that instantly makes people stop and stare. Whether you place it along a walkway, on your porch, or in the garden, it adds that cozy, whimsical spring feeling we all love. Fairy lights give it a soft glow at night, while the pastel eggs keep it playful and fun during the day.
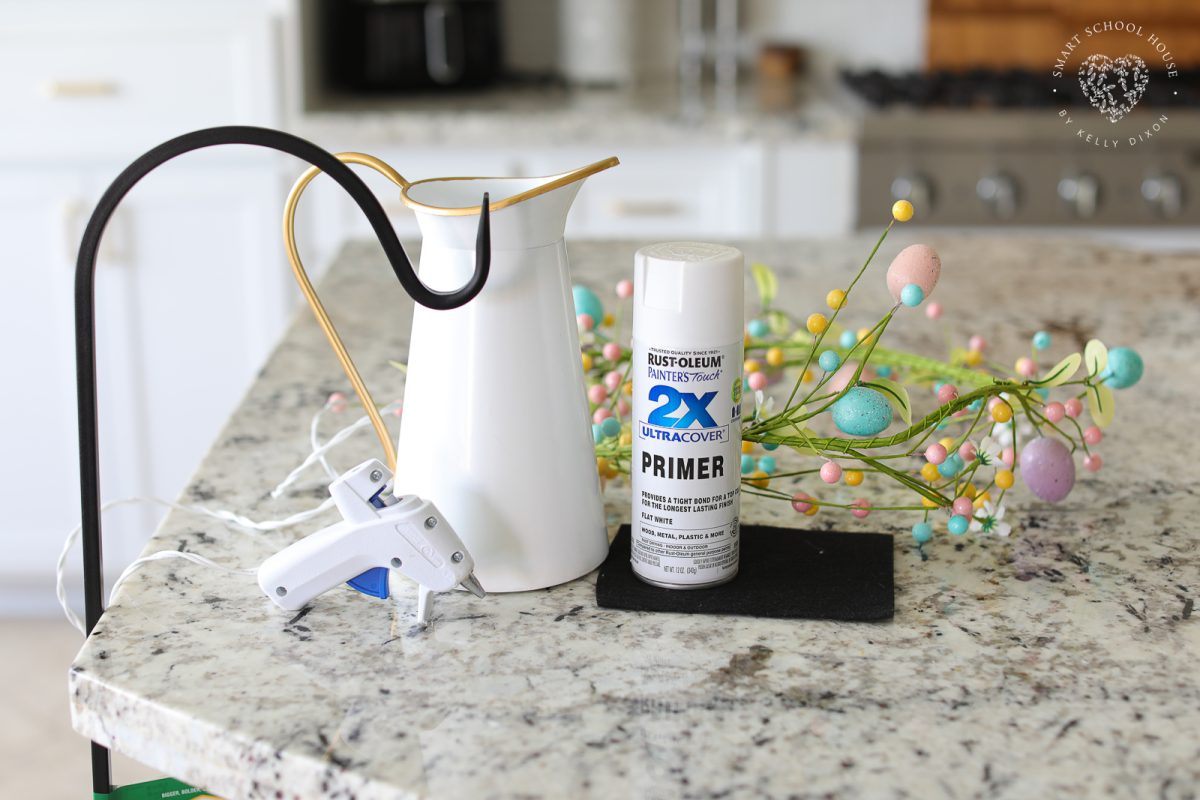
Supplies Needed
- Easter egg garland
- Pitcher or watering can
- Fairy lights
- Craft felt
- Duct tape
- Hot glue
- Scissors
- Shepherd’s hook
- White primer spray paint
How to Make a Pouring Easter Garland
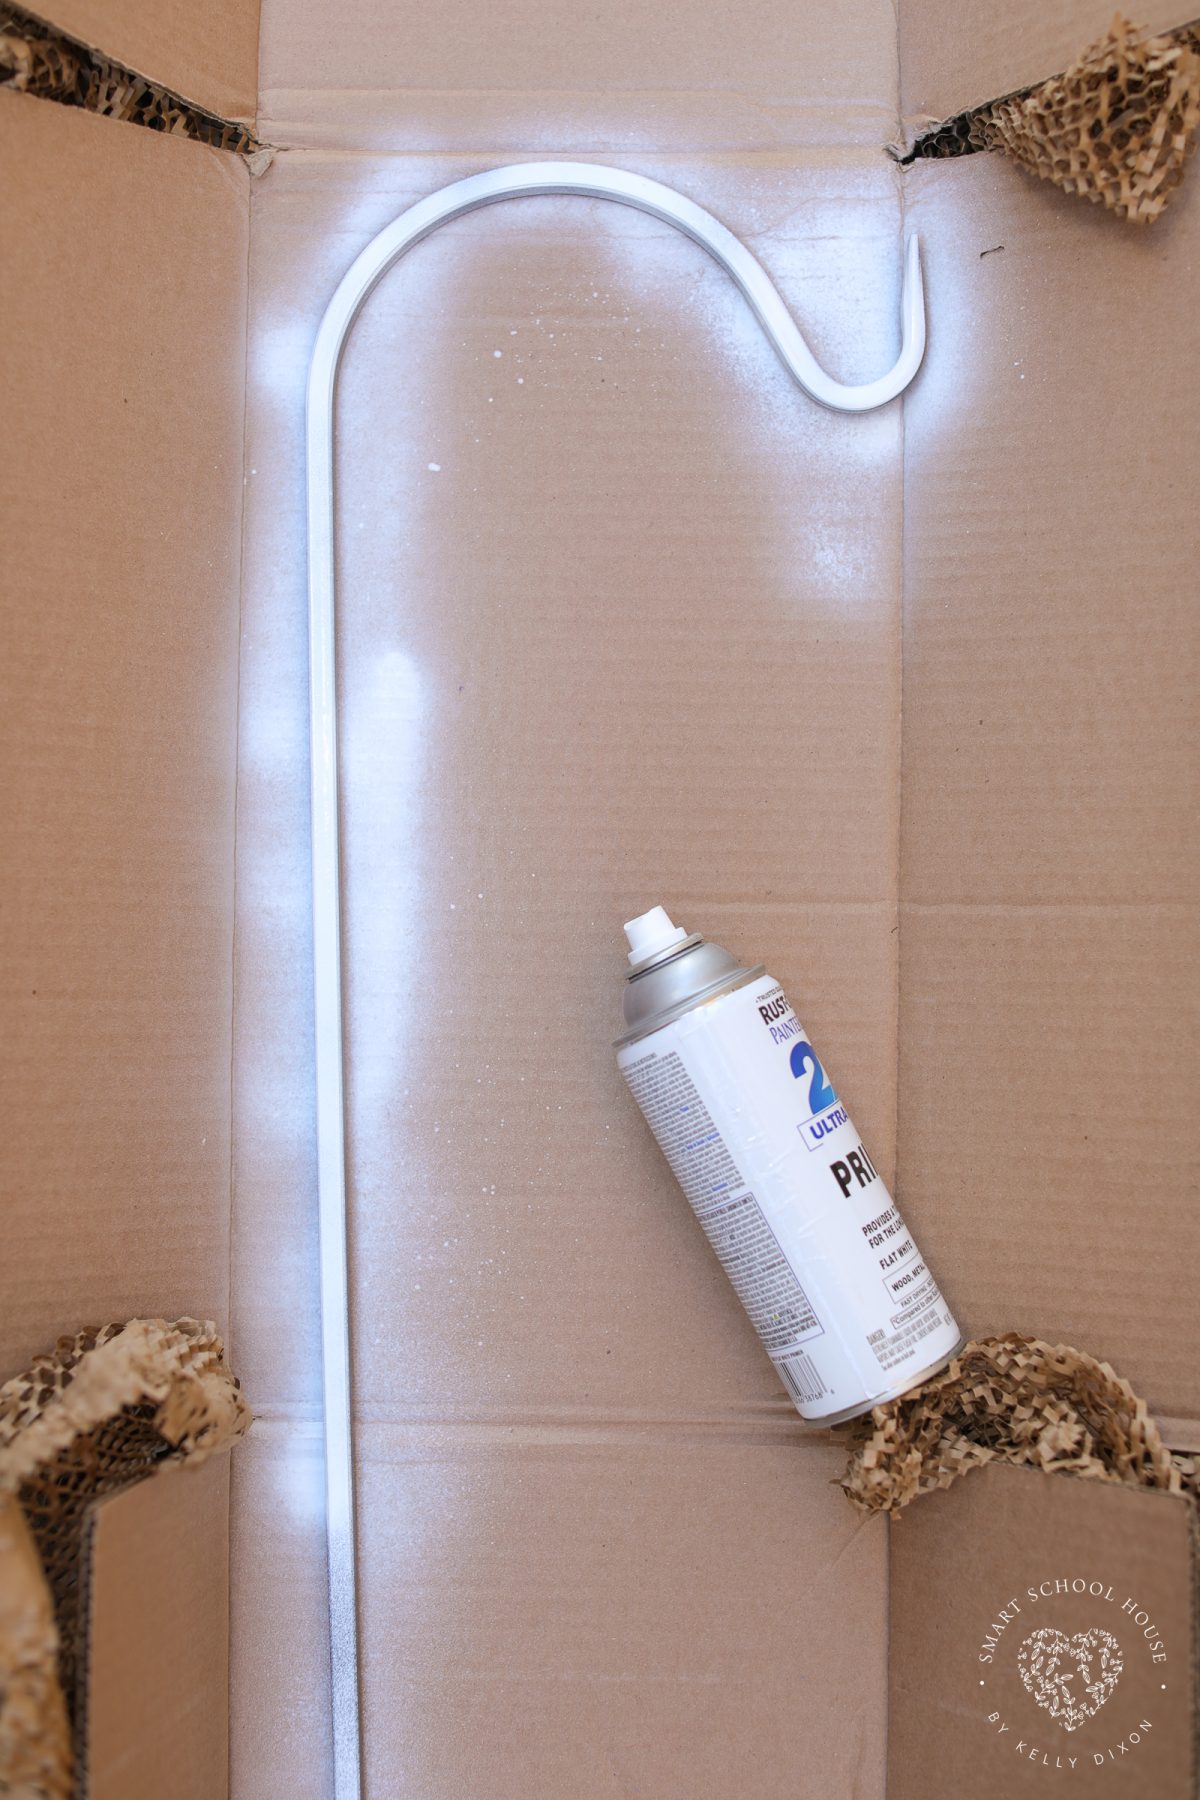
Step 1: Prepare the Shepherd’s Hook
Start by spray painting your shepherd’s hook with white primer. This gives it a clean, neutral look that fits perfectly with spring decor. Let it dry completely before assembling.


Step 2: Strengthen the Base
Strengthen the base of the Easter garland by wrapping it with craft felt and adhering it with hot glue. This step is not essential, but I find that the felt creates a more sturdy base with more surface area to adhere to the pitcher.


Step 3: Add the Garland and Lights
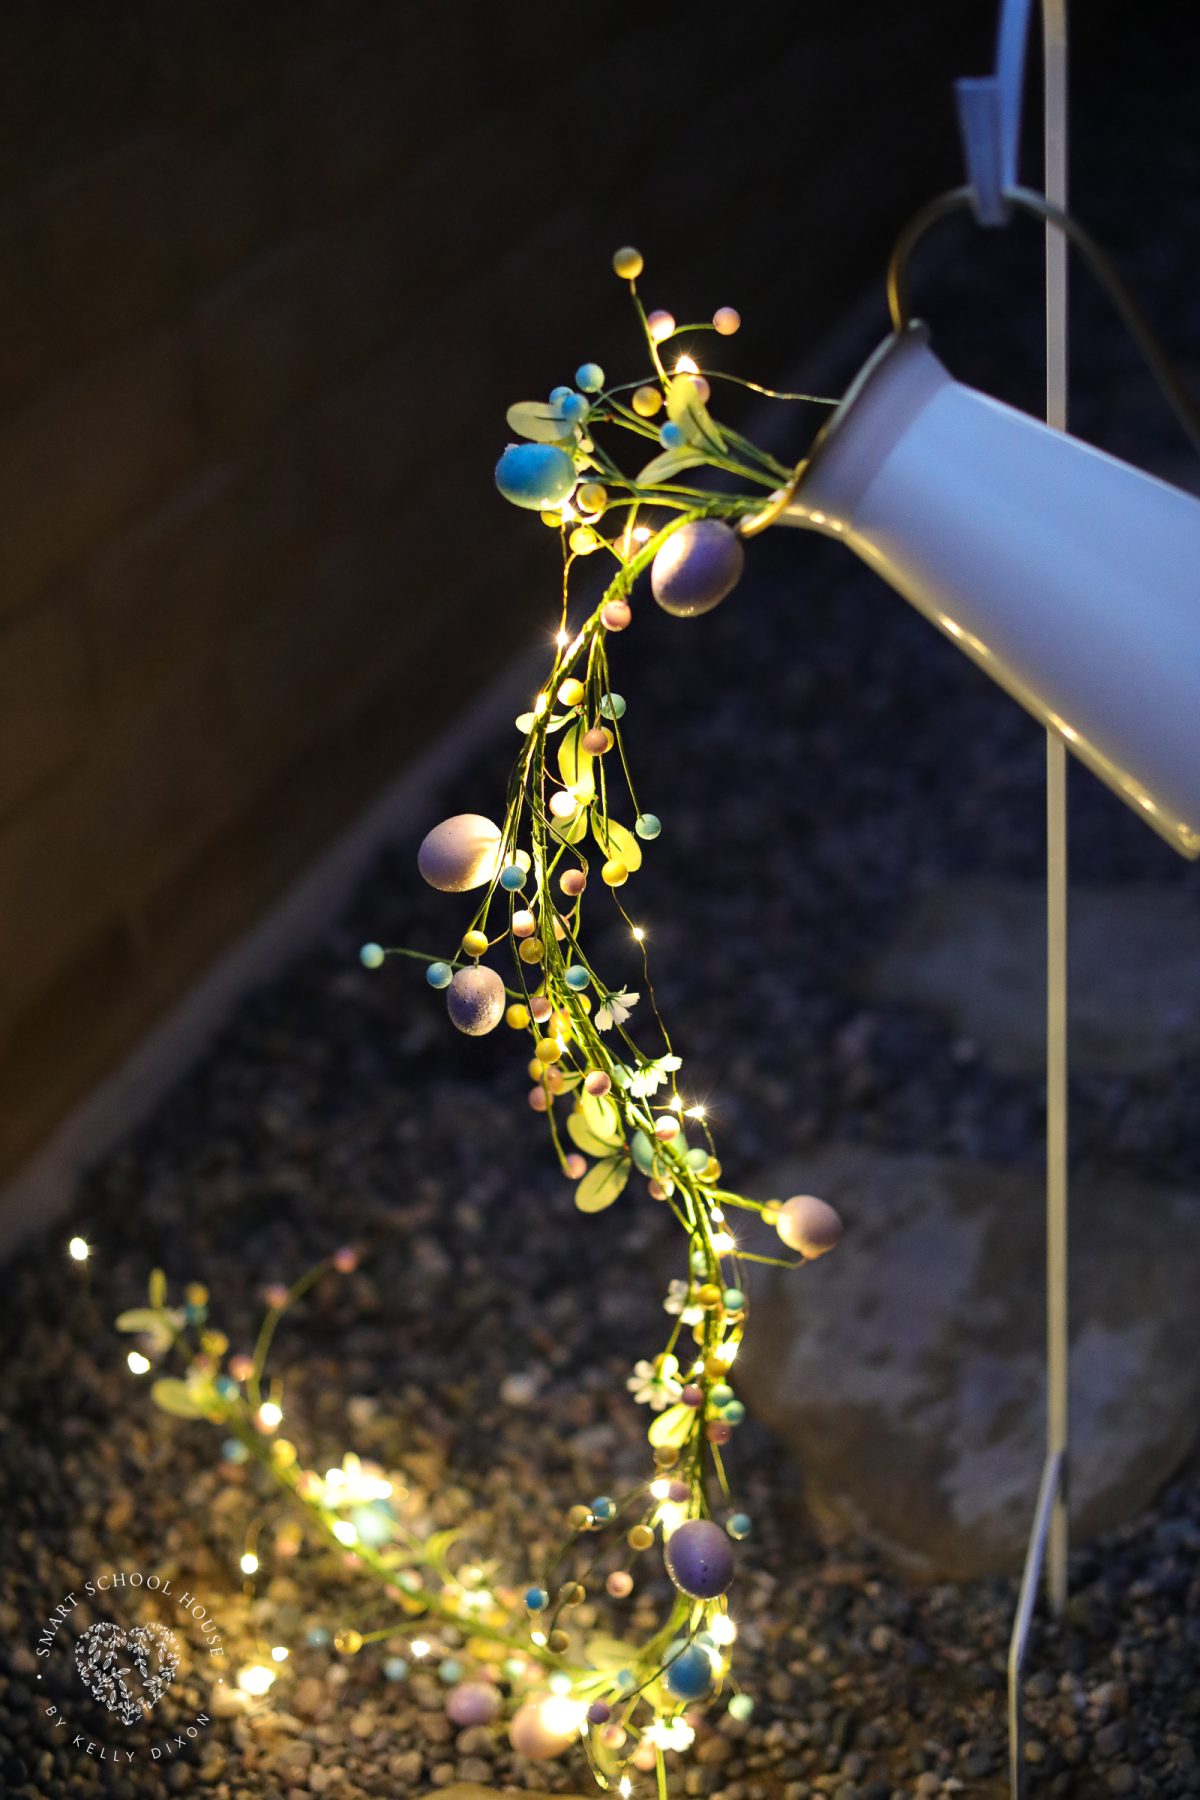
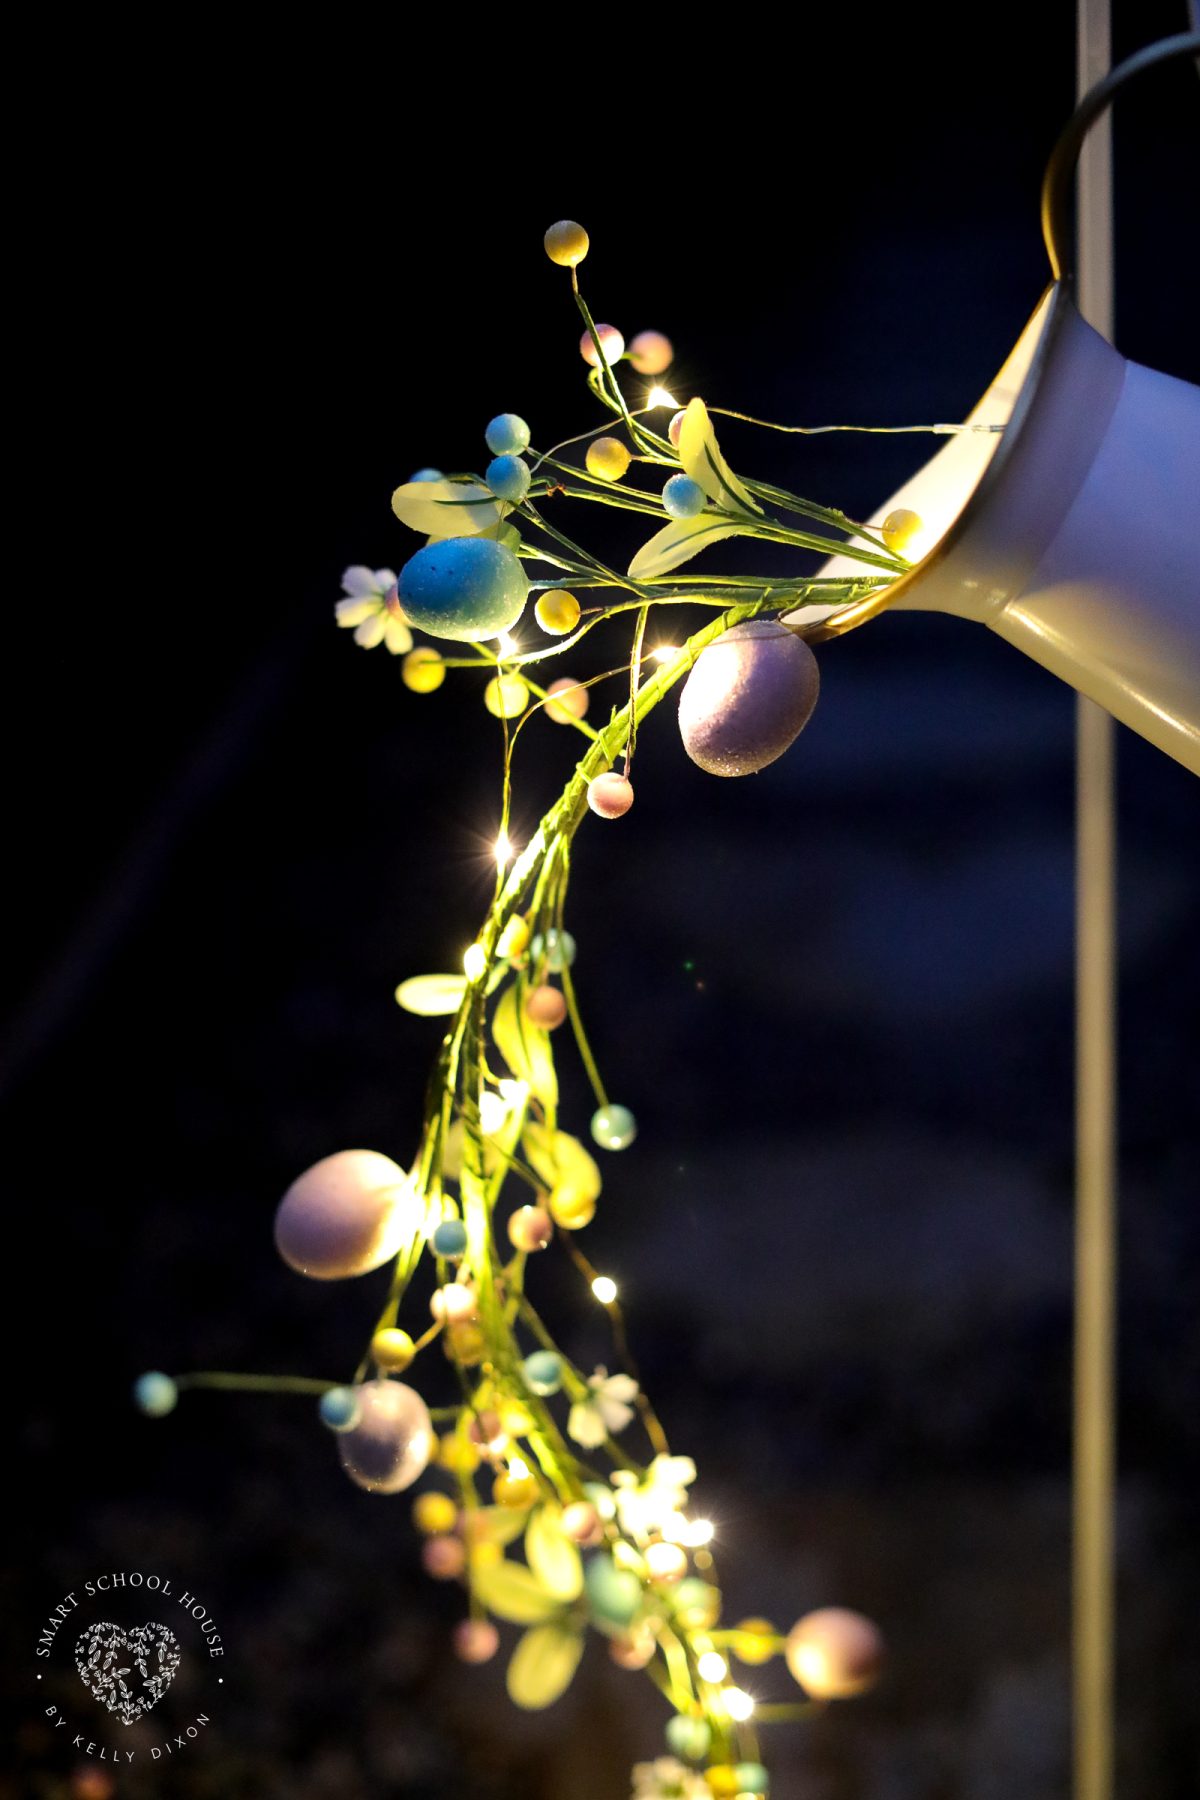
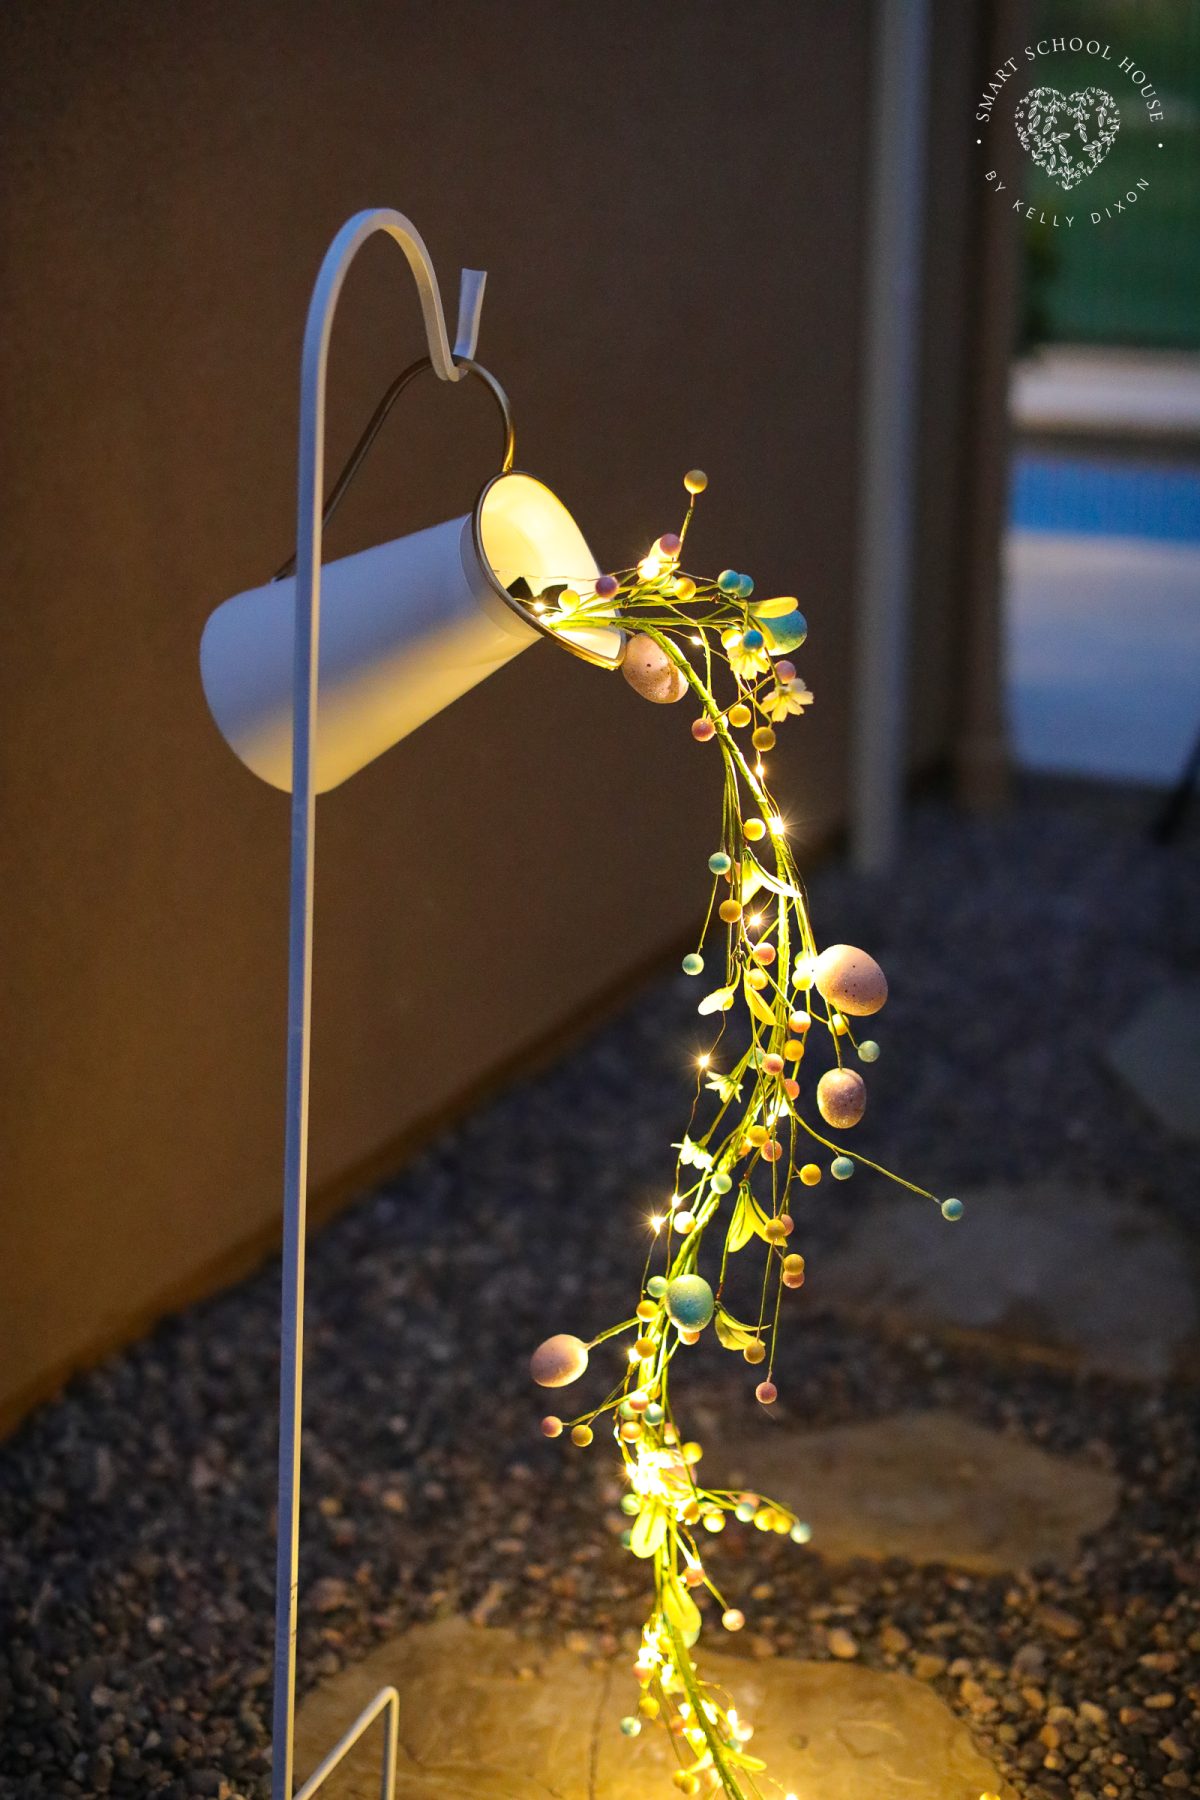
Tape the garland to the inside of a watering can or decorative pitcher. Shape the garland so it cascades naturally toward the ground. Next, put put a couple strands of fairy lights in the can.
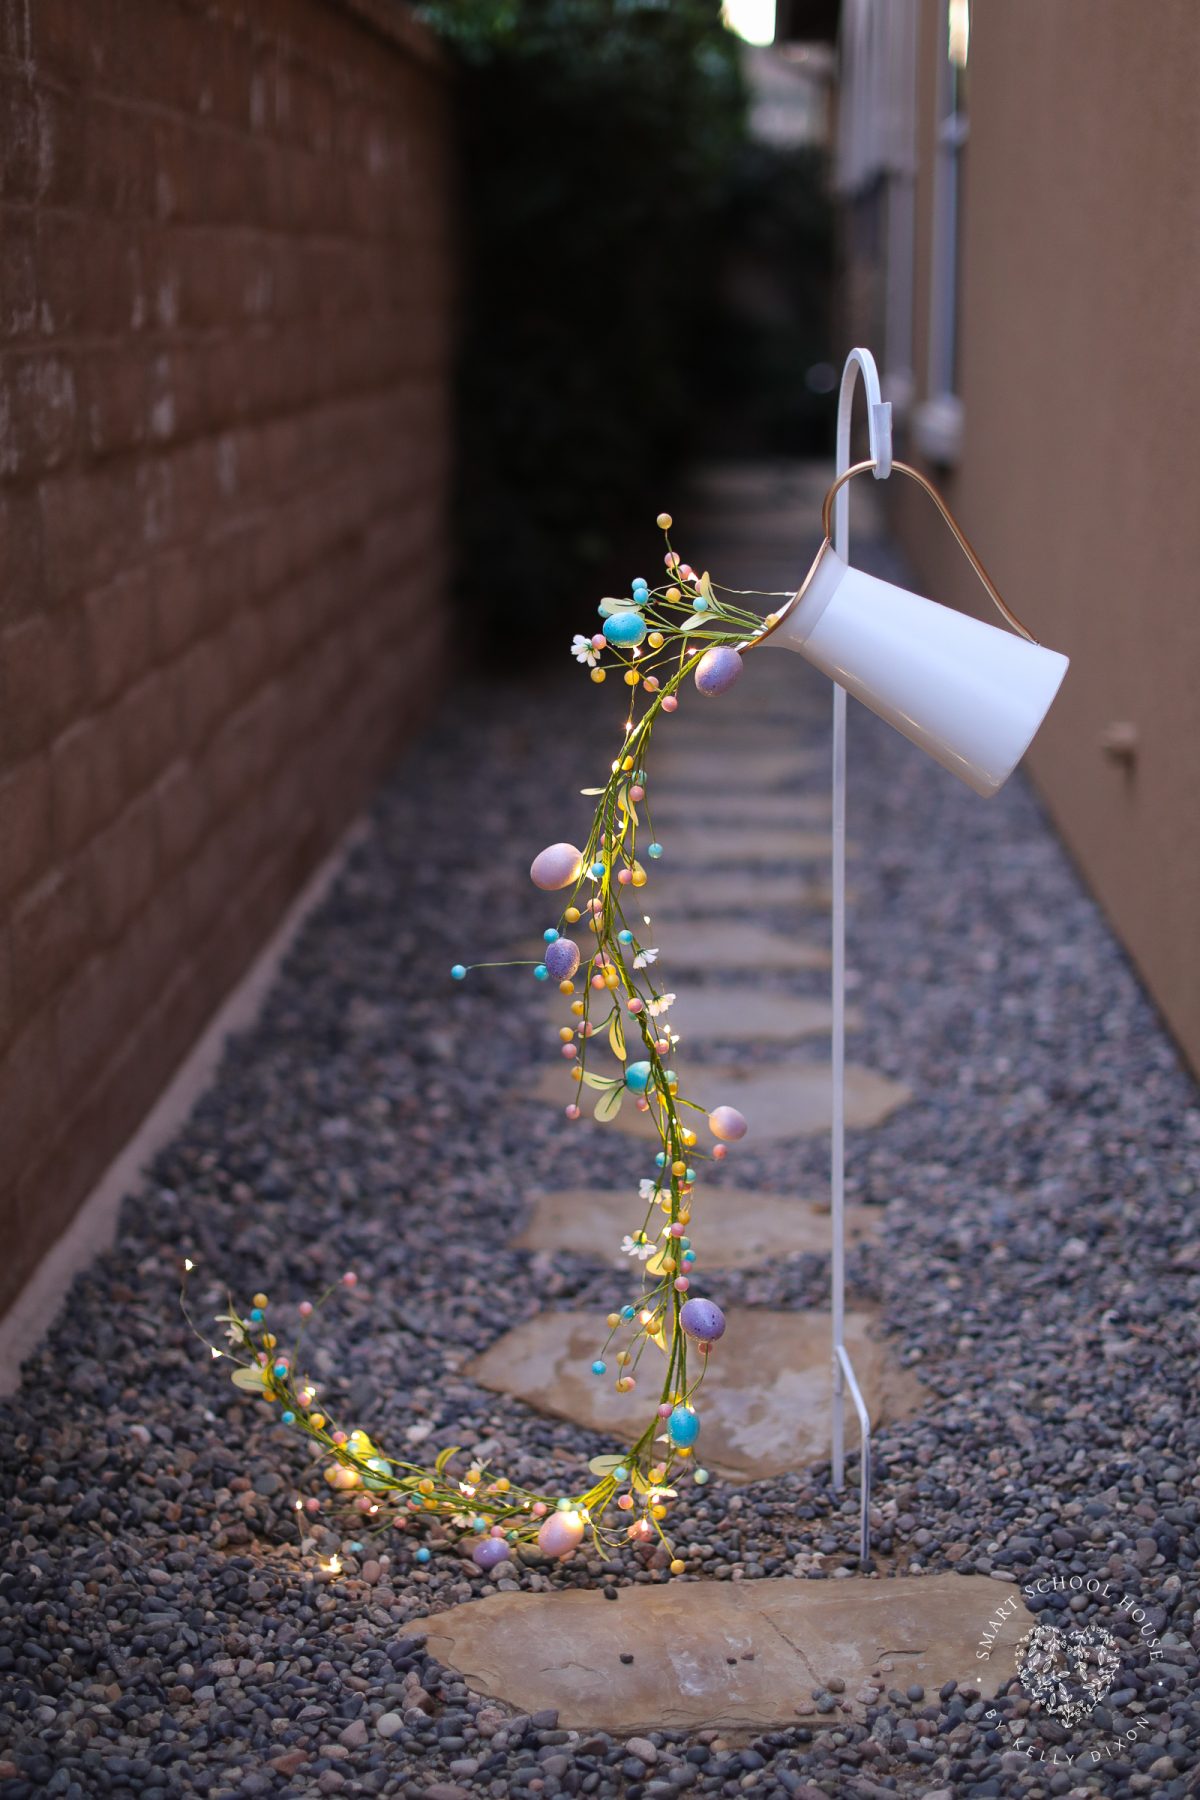
Step 4: Mount on the Shepherd’s Hook
Hang the pitcher from the shepherd’s hook. Adjust the bend and flow until it looks like the eggs are spilling out of the pitcher. Turn on the lights and adjust the garland until the glowing “pour” looks balanced and full.
This Pouring Easter Garland is one of those DIY Easter crafts that instantly becomes a conversation piece. It’s creative, elegant, and surprisingly easy to make, making it a standout choice for anyone searching for memorable Easter crafts for adults. This is proof that a little imagination can turn everyday decor into something magical.
More Easter Craft Ideas


Pouring Easter Garland
Supplies
- Duct tape
- Hot glue
- Shepherd’s hook
- White primer spray paint
Instructions
- Prepare the Pitcher – Start by spray painting your pitcher or watering can with white primer.

- Strengthen the Base – Strengthen the base of the Easter garland by wrapping it with craft felt and adhering it with hot glue.

- Add the garland and lights – Use duct tape as necessary inside of the pitcher or watering can to secure the decorations in place.

- Hang the pitcher from the shepherd’s hook – Adjust the bend and flow until it looks like the eggs are spilling out of the pitcher.