This post may contain affiliate links. Please read our disclosure policy.
Hey there everyone! It’s Sara popping in again from over at Bitz & Giggles! I’m always so happy to come over to Smart School House to share some fun and creativity! I’m super pumped because there is absolutely no more snow in our yard, and the kids’ boots and snow pants are taking a timeout (hopefully a long one) for the next several months. Spring just makes me happy – it’s the return of warmer weather, colorful flowers and ENERGY that you forgot you had inside of you. It’s certainly a time for renewal and a time to refresh. I love to add pops of color to the house in Spring, and this month I had the perfect project in mind. I remember seeing this Stained Glass Art at my son’s school years ago.
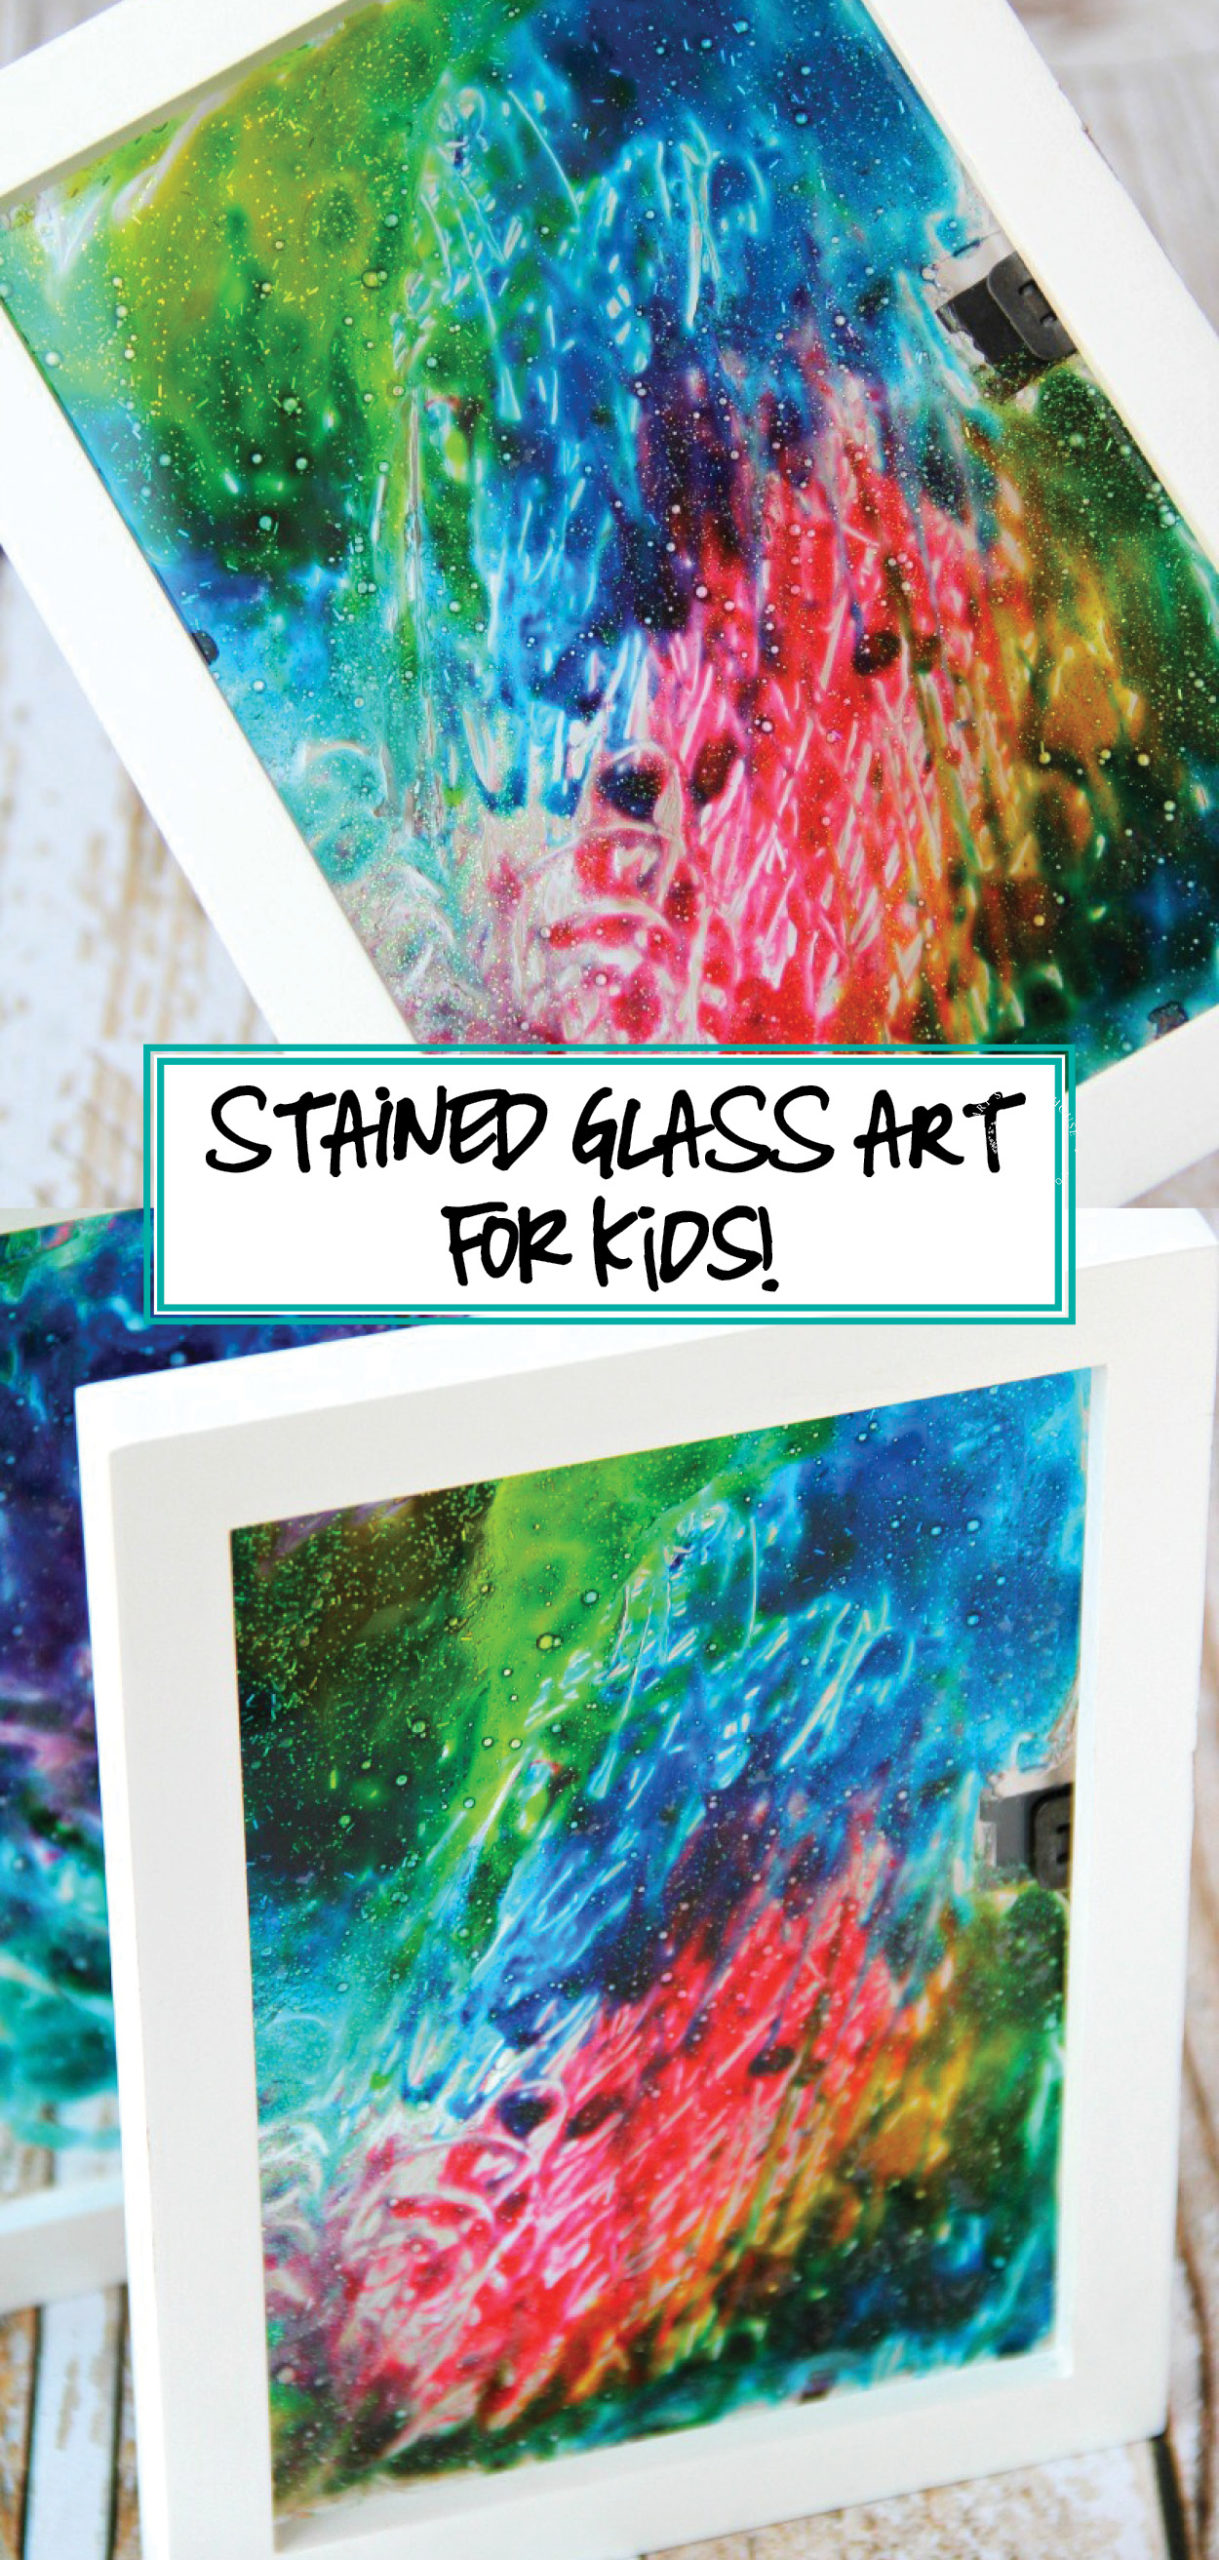
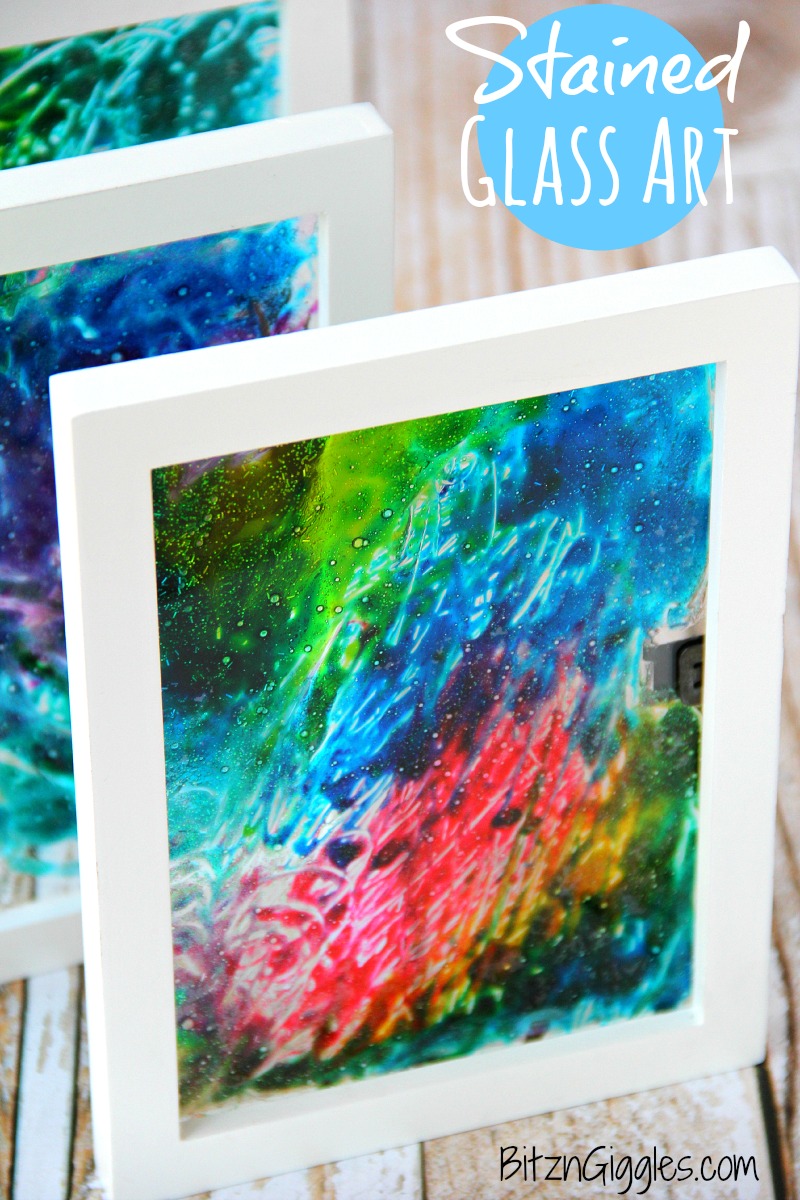
Stained Glass Art for Kids
To prepare for it, however, the teachers were adding food coloring to empty condiment squirt bottles filled with glue and shaking them like crazy for what seemed like hours to get everything mixed. It looked like quite the process. I loved how their art turned out, but between you and me, that’s just way too much work. I’m going to show you an easy way to achieve the same stained glass effect without all the muscle and prep.
You just add the glue and the food coloring separately. Glitter glue is translucent so when you hang your art, the sun will really make the colors shine. I also love the little specks of glitter sprinkled throughout! This project is so easy and affordable and the end result is quite breathtaking. This is so much fun for families to sit down and work on together!
So, first things first. Let’s talk about the frame. I found some white 5×7 frames at Walmart. They had three left on the shelf so I grabbed one for my son, one for my daughter and, of course, one for me. There’s no way I was missing out on the fun.
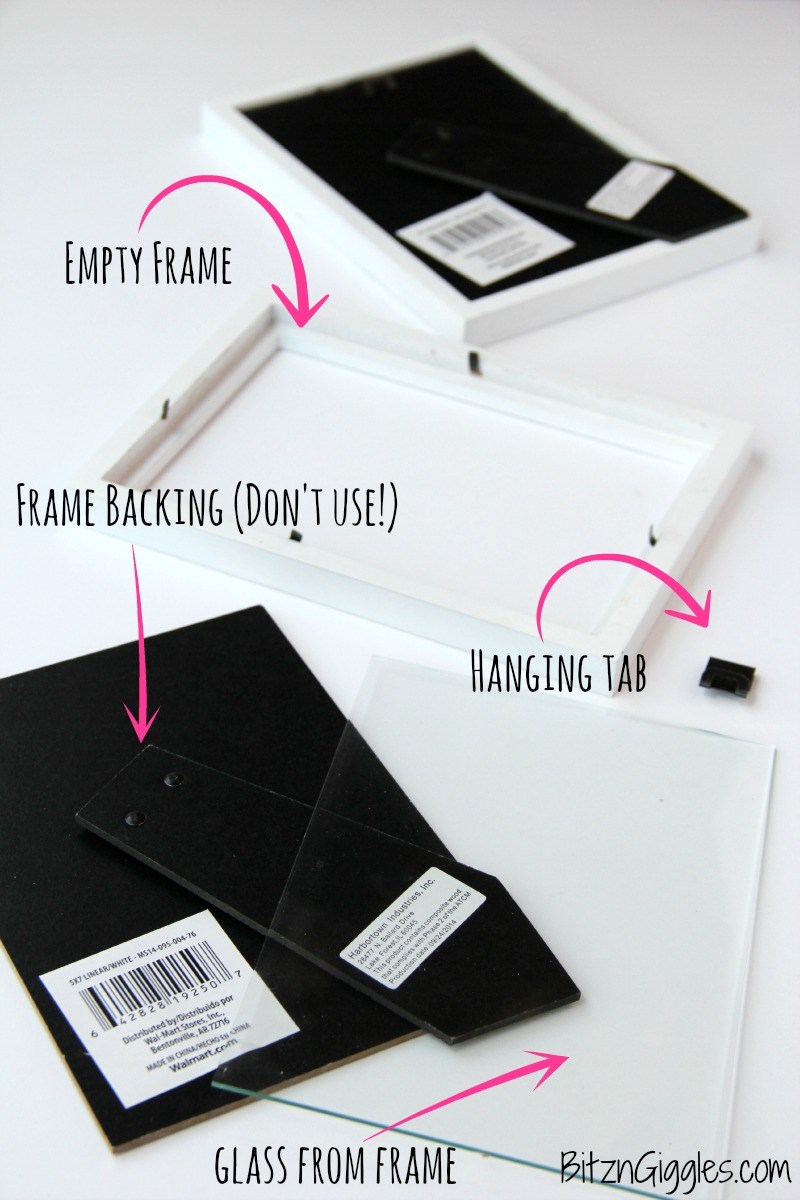
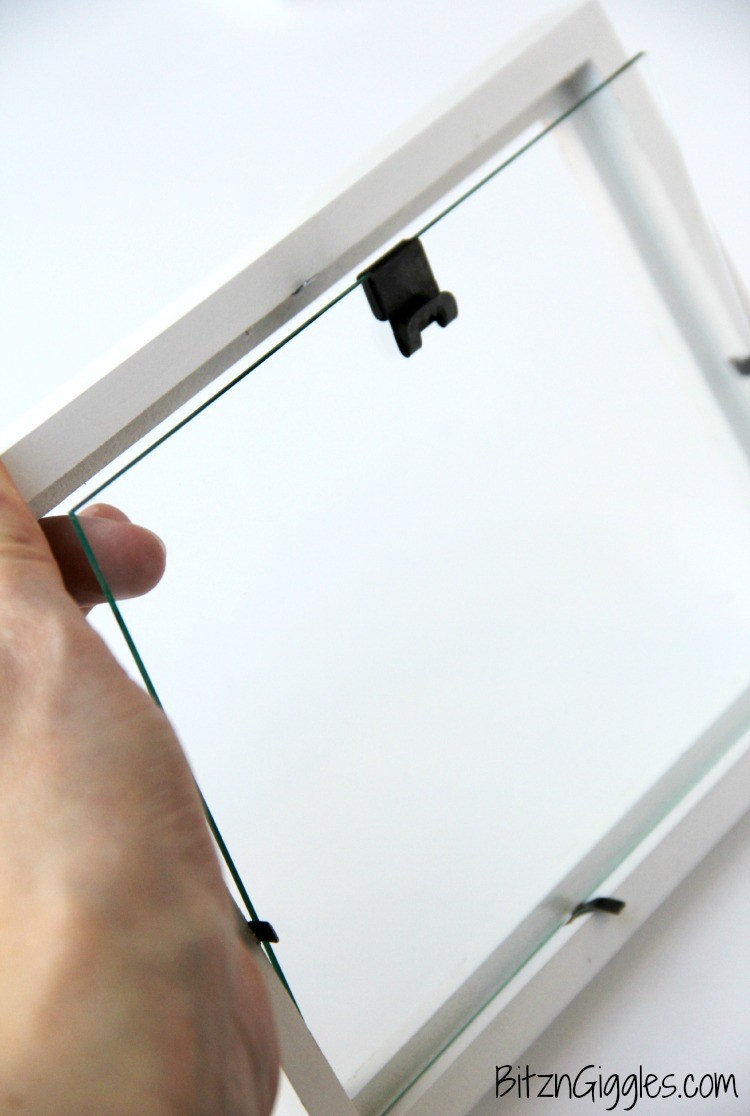
You want to begin by disassembling the frame. The cardboard back to the frame doesn’t get used for the project so you can set it aside. Clean the glass with some glass cleaner and then place it inside the white frame. Once the frames are ready to go, cover your work surface. I used wax paper and newspapers on top of that. Then, I set out the glitter glue, toothpicks and food coloring, and called in the troops.
The kids had so much fun with this project. If you want to ensure the kiddos walk away with clean hands, you could always have them wear some plastic gloves. We braved it, and, believe it or not, the color they did get on their fingers came off pretty easily.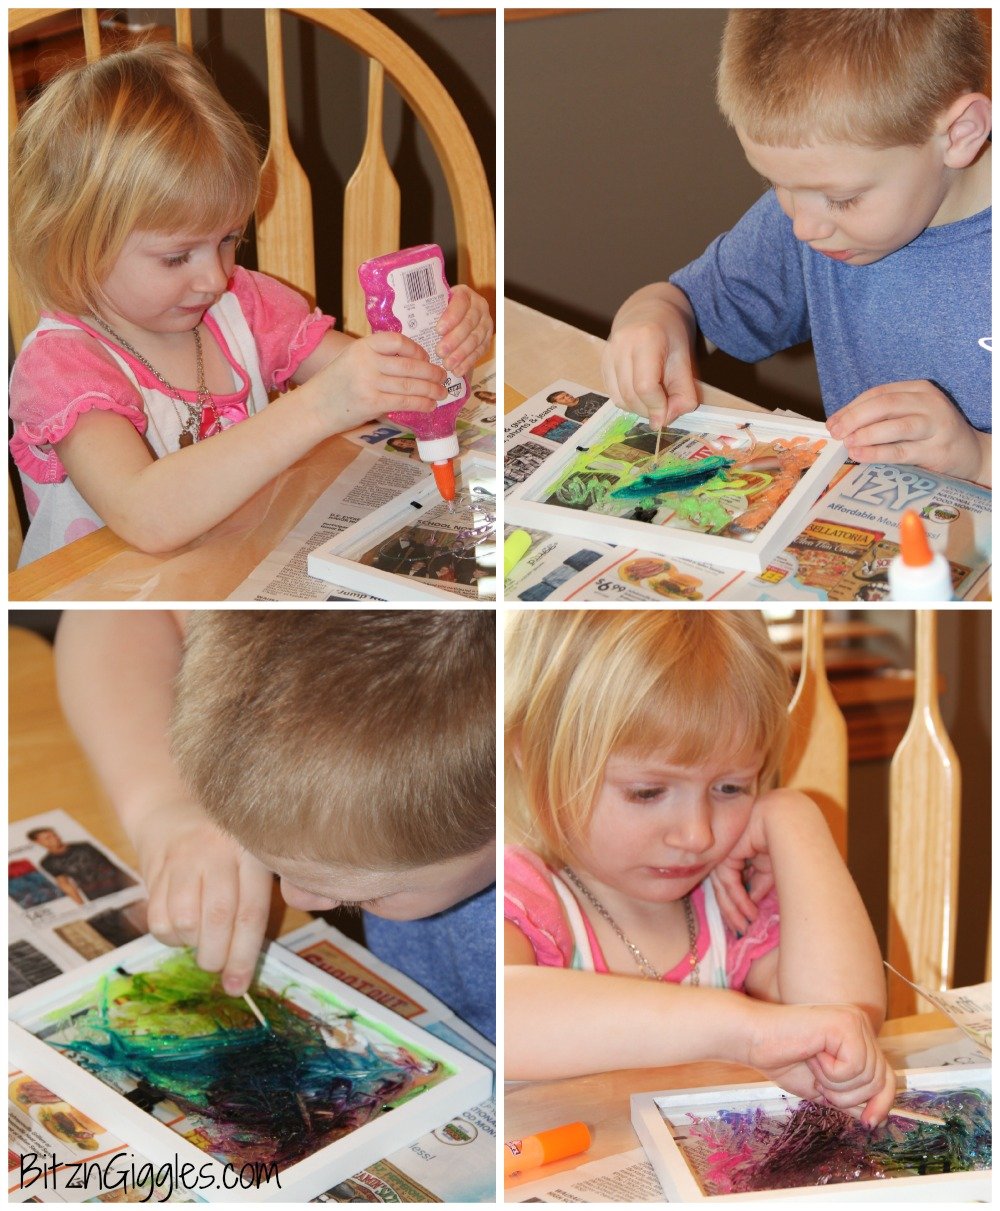
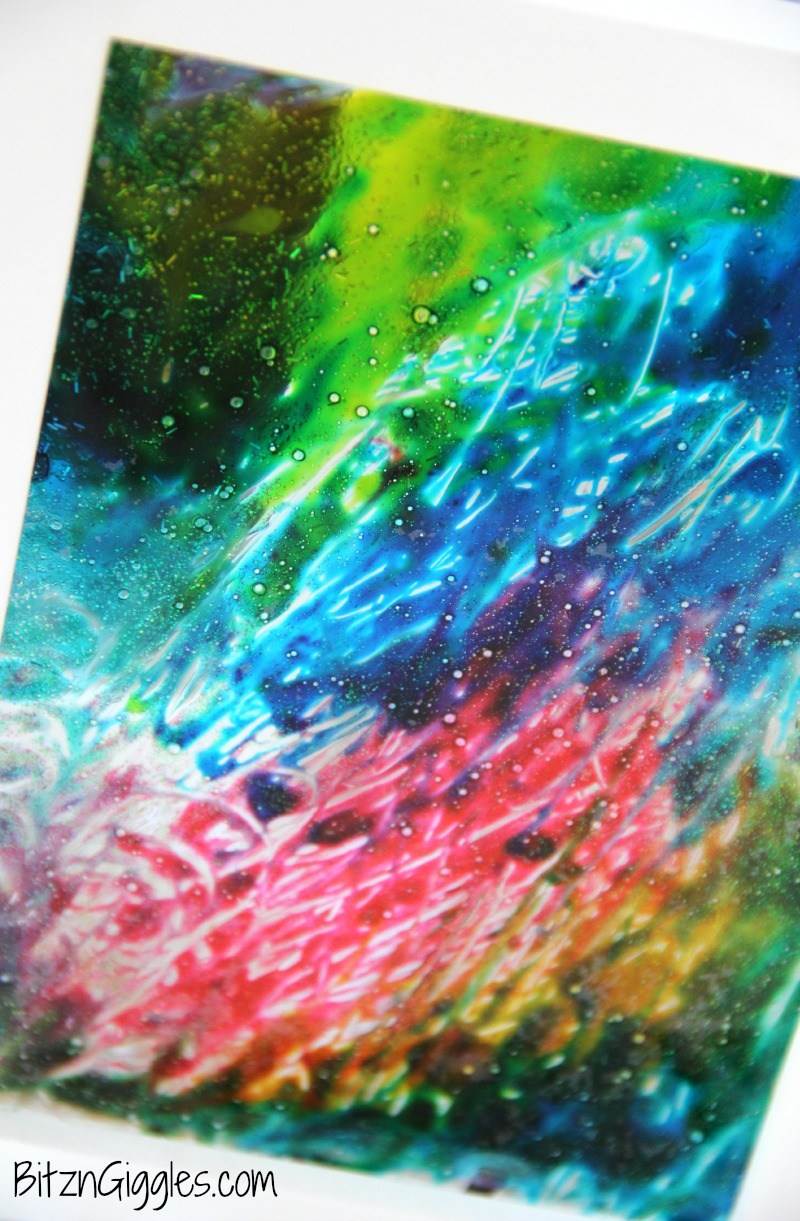
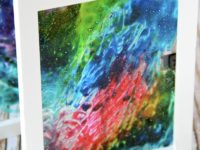
I love how these frames turned out. I adore all of the bright colors. They look beautiful hanging up on our patio door. If you look real close you can see bubbles, glitter and fine line designs. To give it a bit of a different look, you could use a paintbrush to create softer lines and blending.
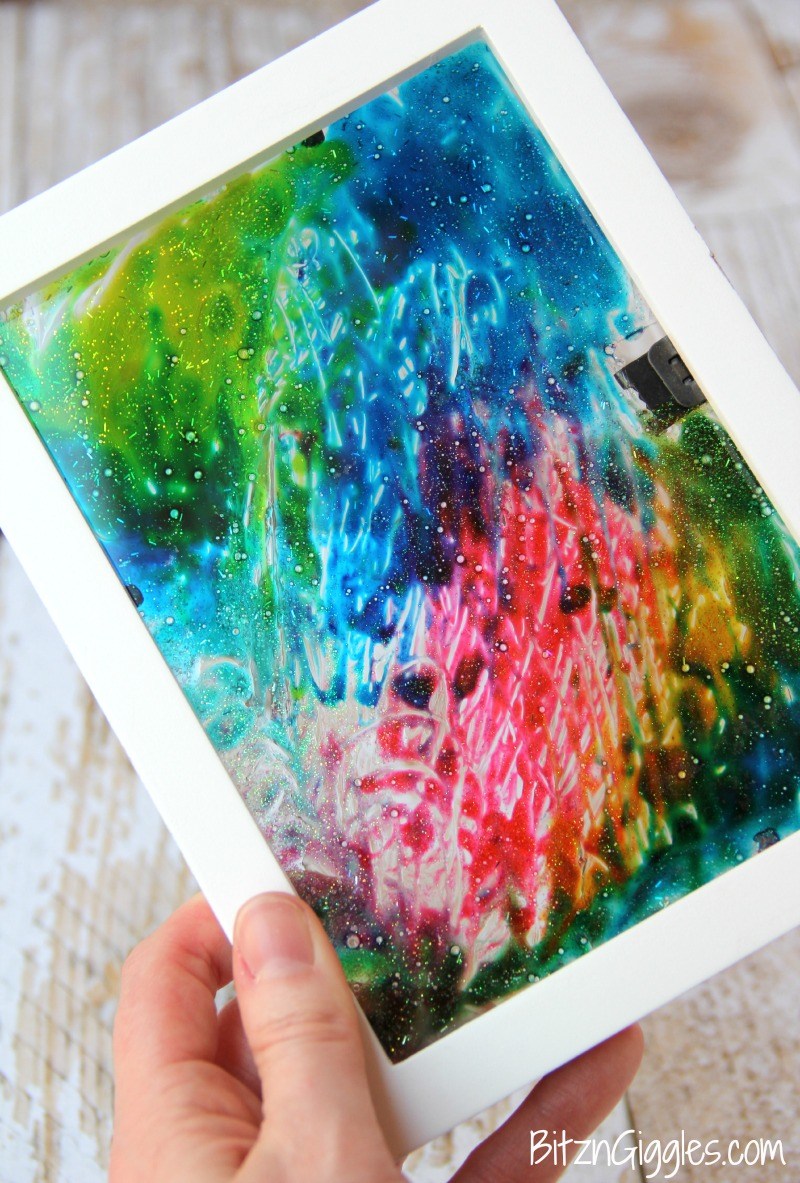
Each frame will have a little bit different look to it. I love that. It’s really a work of art. It becomes even more beautiful when you allow light to shine through. Isn’t this a perfect project for Spring? I think so! I can’t wait to hear how your frames turn out. Will you use two colors or five? Will you go with a black frame or a white one? I would love to hear about the little artists that helped you, too. As with anything glass, if you have little hands involved, just make sure the kids are supervised throughout the entire project.
More Arts and Crafts for Kids on Smart School House:
-
Toilet Paper Roll Crafts
-
Homemade Paint
-
18 Crafts for Kids
-
Ice Cream Play Dough
-
Dish Soap Silly Putty
You Will Need
- Glue (regular white glue or glitter glue)
- Toothpicks or paint brushes
- Food coloring (we used neon)
- Picture frames (we used 5×7 frames)
- Suction cup hangers (for hanging frames on your window later on – I found mine at Walmart)
Directions
- Position your frame so you’re painting on the back of it.
- Squirt glue all over the frame. There is no rhyme or reason here. Add a little, add some more.
- Add one drop of food coloring at a time to various parts of the frame. I wouldn’t suggest putting all of the colors in one place or you’ll just end up with a black puddle on your glass.
- You can use a toothpick to blend the colors into each other and create some swirl or line designs. Here’s where the kids can get real creative.
- Once you’re happy with your design, allow the glue to dry overnight.


This reminds me of something we used to do way back when I was in grade school… only our way was easier. Take a bunch of water soluble markers (like crayola) and color all over the glass… then just pour school glue over it all and let it dry.
When I did it, we did it on a baking pan and poured the glue in shapes that we then peeled off when they dried to make hanging ornaments, but I see no reason why you couldn’t do it in a frame and just leave it there.
Is there a way to make it with a design in it. I want to use for VBS but would like a cross in the middle and to allow the kids to paint however else they want.
Just a suggestion: could you draw the cross on with marker first?
You could place tape on the glass to make a cross. Painters tape would probably work best. 🙂
Where do you get the hanging tab? I haven’t been able to find them and it’s not on picture frame
Has anyone tried this with plastic instead of glass? I am wondering if plastic would work as well. Thank you!
hi there!!! I absolutely love this idea but need some help! I am doing it with my classroom at school and can not find the suction cup hangers for frames anywhere! Where did you find them? Which section of the store? Any help would be greatly appreciated!! Thanks!
Shawna
I’ve seen them at the hardware store (like the Home Depot). Good luck!
Help!! I absolutely love this idea but can’t find the suction cup frame holders anywhere! I know you had said you found them at Walmart, what section were they in? Has anyone else had any success? Thanks in advance!!!
I got them from a craft store.
when using elmers glue you should always be able to change it up because it will wash off or with windex. Just made a sample for my sons class. He’s in an autistic class and this would be great for Mother’s Day.
Love it! However there is a one question… does it matter what type of food coloring i have. I mean gel or liquid? Thank you.
We just made these in the church nursery with a group of 2-4 year olds. It worked beautifully.
I have a 5 yr. old grandson this is perfect for. Tks.
I am wondering if this could be removed at some point? I am thinking about doing this on a french door. Just not sure if i want something permanent or not? Would love to try it, if the glue could be peeled off someday.
To April, this can be removed with a razor blade scraper. Try a smaller project if you’re concern about its removal, Protect wood work with painters tape.
My four year old made two of these. We liked the second one a lot better so washed off the first and are starting over. Sooooo beautiful and so easy. Thank you so much for posting!!!
This will look amazing in my house!! I have such boring big windows!! Thank you for sharing! 🙂
Love it!!!
Thanks for sharing such a wonderful way to teach abstract art.
I am trying this even with hubby…he might get a blast getting fingers dirty with glitter glue.
Hi! I would looove to make a windowframe like this with my daughter, but she is 2,5 years old and i wondered… How did you keep the frame that white!! Or is it easy to remove it? I cant imagine the frame to stay white here
Just a suggestion, you could cover the frame parts with masking or painters tape.