This post may contain affiliate links. Please read our disclosure policy.
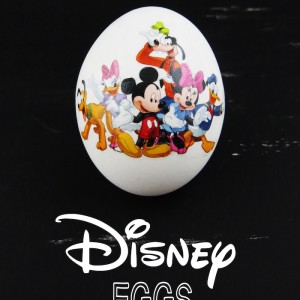
Create custom Disney Eggs for Easter using temporary tattoos! We are SUCH a Disney loving family and we hope every child will love a Disney inspired Easter! This project is easier that using the traditional egg coloring kids. Plus, the possibilities are endless! I can’t wait to teach you this Easter craft.
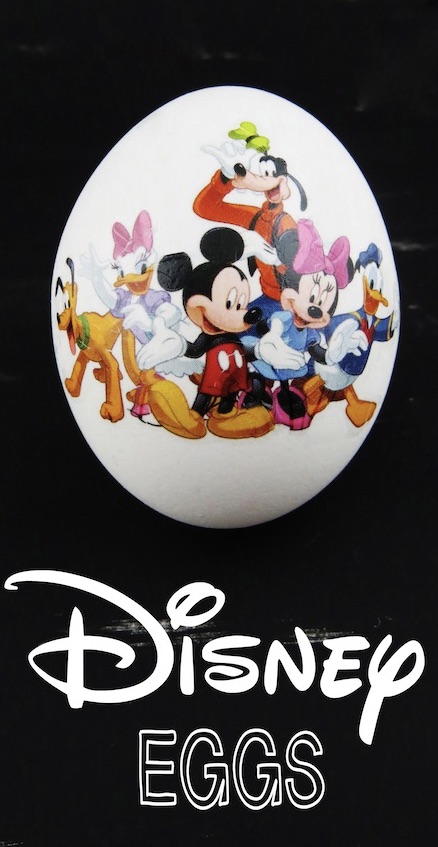
DIY Disney Decorated Easter Eggs

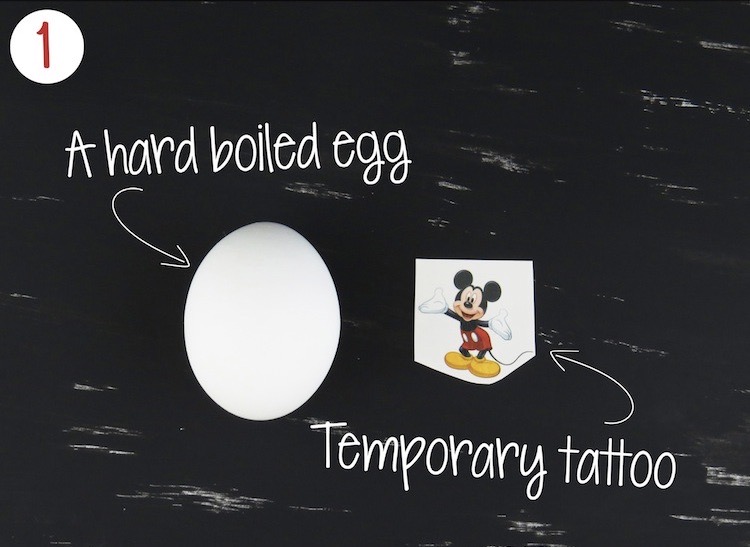
- Hardboiled eggs
- Disney temporary tattoos (you can find them here)
- A sponge and water

First, cut out the tattoos that you would like to use and make sure they fit on the eggs.
Next, remove the protective plastic seal from the temporary tattoo. Gently place the “sticky” part of the tattoo face down on your hardboiled egg. Place a wet sponge on top of the tattoo and hold it there for a good 30 seconds.
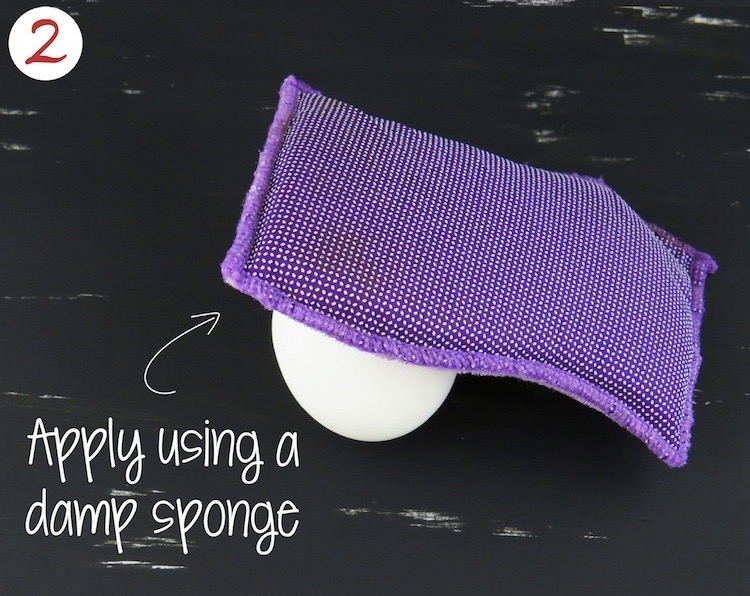
I do recommend using a pretty wet sponge. Just place some extra paper towels below your hands to catch any excess water drips.


More Easter Crafts
Disney Eggs for Easter
Ingredients
- Hardboiled eggs
- Disney temporary tattoos (you can find them here)
- A sponge and water
Instructions
- Prepare hardboiled eggs
- Cut out the tattoos that you would like to use and make sure they fit on the eggs
- Remove the protective plastic seal from the temporary tattoo
- Gently place the “sticky” part of the tattoo face down on your hardboiled egg
- Put a wet sponge on top of the tattoo and hold it there for a good 30 seconds
- Remove the sponge and the backing of the tattoo away from the egg
- Allow tattoo to dry on egg


You can also use the temporary tattoos to decorate plastic disposable cups for a birthday party. A lot cheaper than buying the themed ones.
That’s an awesome idea!!
I neve thought of using temporary tattoos – what a great idea. And I bet you can use them onthings other than eggs for other decor ideas. Thanks!
That is a really good idea!
Very clever to use temp tatoos for eggs! Nice job! You have made many mommys very happy with this post.
Craft On & dance like no one else is watching 🙂
Visiting from Your Weekend WrapUp Party@Tatertot & Jello linky party
Smiles,
Suz @MaytagNMom
NW Illinois
My Party Project This Week
Oh my goodness…These are really cute! I never thought to use a temporary tattoo for decorating! Brilliant:) Thanks so much for sharing this great idea!
I love this idea, thanks for sharing! Cheers!
Lori in Atlanta
Visting from Shabby Creek Cottage – What a cute cute cute cute idea – LOVE THIS! – Off to Pin!
How clever to use temporary tattoos to decorate eggs. I never would have thought of that. Oh the possibilities! Thank you so much for sharing on We Made That!
Sharing on FB tomorrow ! Love these!
So stinkin smart! Girl – those are adorable!!
That’s a great idea … I would never think to use regular tattoos to decorate eggs!
Spectacular! I’m pinning on my Disney for Cub & Boy Scout Board…what a terrific idea!
scoutingwdw.com
BRILLIANT!!!! I need to try this! Thanks for posting this, I would never have thought of it! 🙂
Oh these are so cute! I used to have a Donald Duck watch as a little girl! Disney rocks Easter! 😀
Great eggs! I love Disney {who doesn’t right?} I bet any kid would love these, I know I would have as a child. I never thought of putting temporary tattoos on a eggs before. Way to think outside the box! I’m having a link party on my blog and I’d love for you to join!
https://www.simplydreamandcreate.com/2013/03/simply-create-thursdays-1_7.html
As a huge Disney fan, your eggs caught my eye immediately at the Pin Me Link Party – pinning! 😉 Such a terrific idea!! Thanks for sharing! :*)
What a cute idea! We have loads of Superman & Batman tattoos. My son would love this!
So cute! I love that you used the tattoos! My little girl would go nuts!
Those are so cute! My 2-year-old granddaughter would love them. Thanks for the tutorial.
Sandy
Cherished Handmade Treasures
That is just brilliant, love it!
-Meg, http://www.willwork4cupcakes.blogspot.com
Those are so cute Kelly!
<3 Christina at I Gotta Create!
That is so clever and so awesome! Fantastic idea!
Such an awesome idea! Getting some temporary tattoos and doing this for sure!
Oh my goodness my daughter will freak out! I have to make these for her!! Where did you find the Disney character tattoos?
Anna
askannamoseley.com
The Dollar Tree!