This post may contain affiliate links. Please read our disclosure policy.
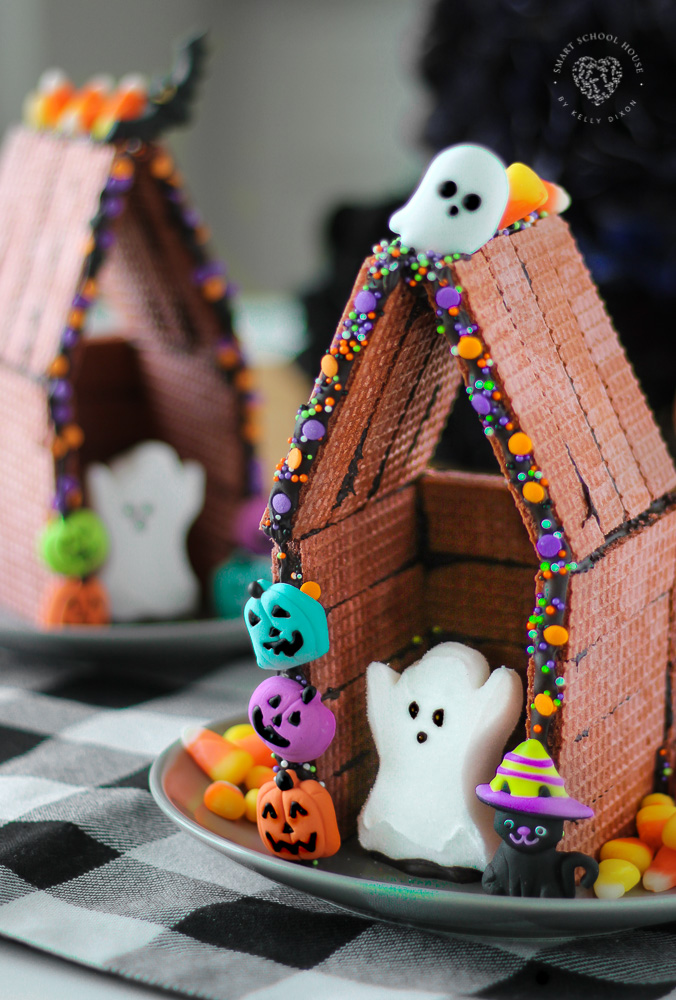
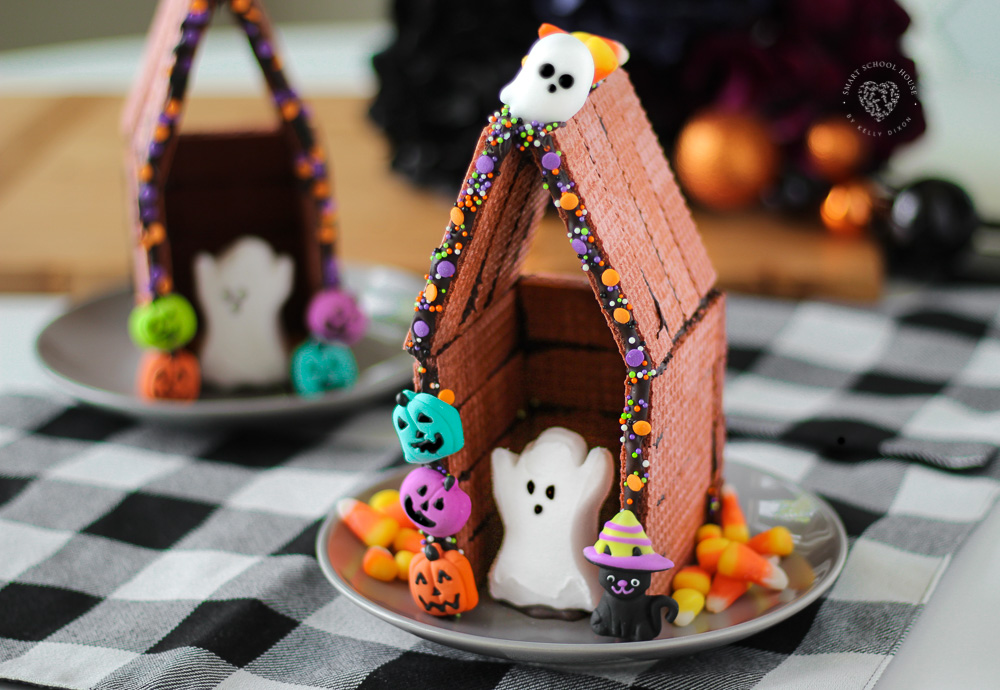
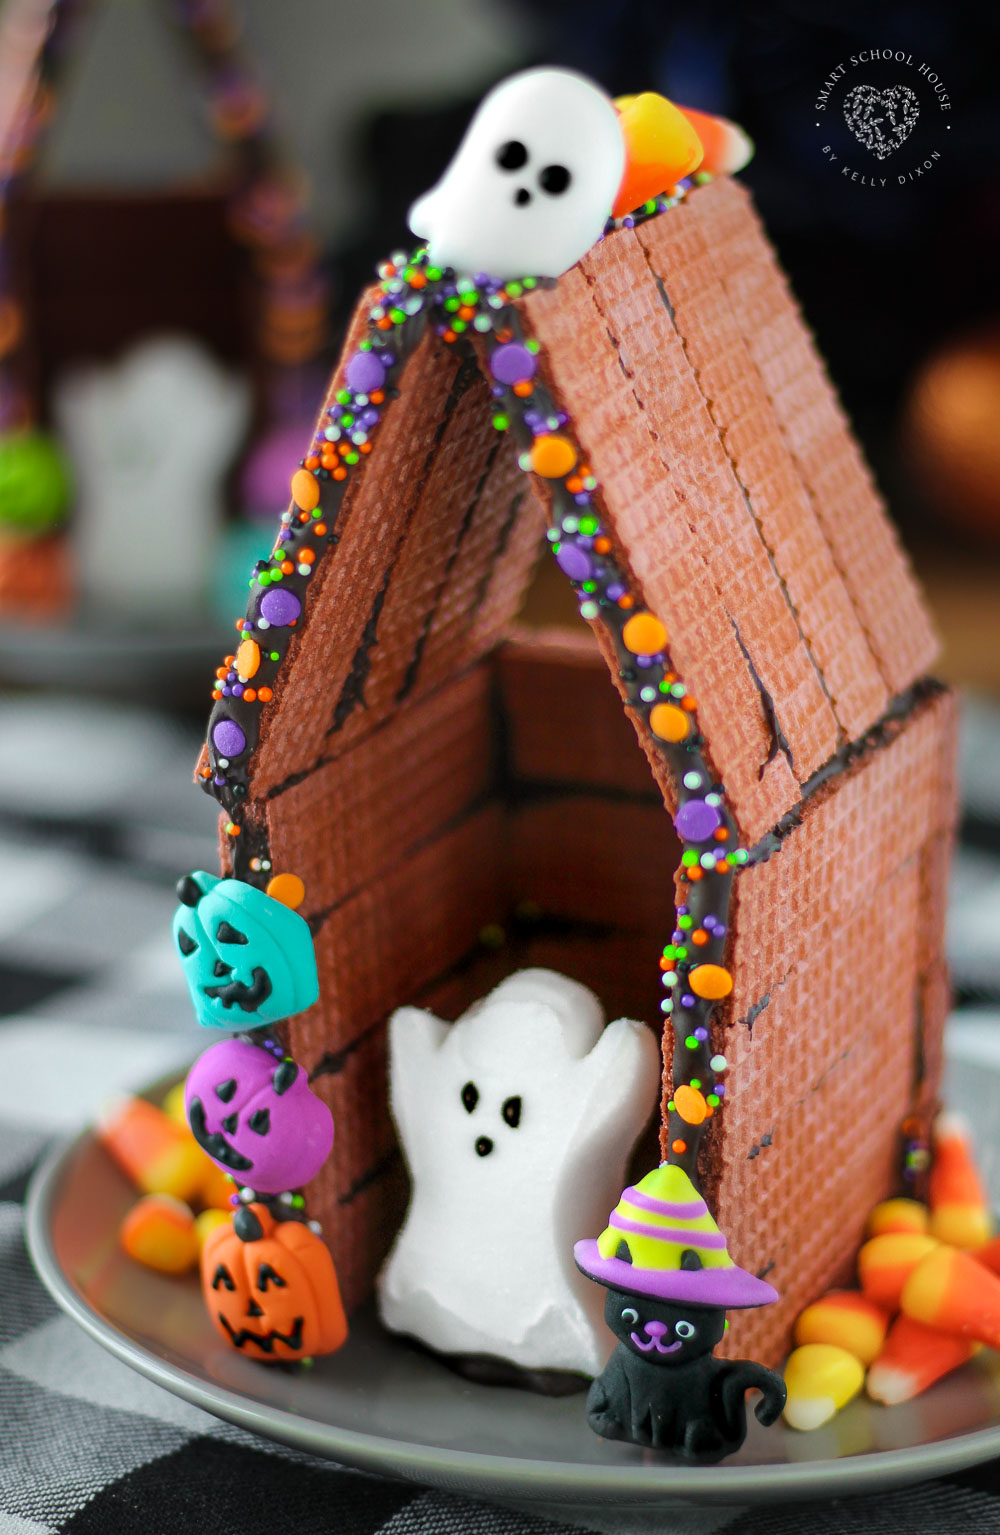
Halloween Peeps Houses are adorably spooky and creative. Do your kids enjoy making gingerbread houses? If they do, you HAVE to show them this idea! They are fun to make and fun to eat:) Unlike traditional gingerbread houses we make at Christmas, the Halloween Peeps Houses are made with yummy wafers. Be sure to pin and save this for October!
Halloween Peeps Houses
I can’t believe Halloween is just around the corner. This year has flown by! Once the 4th of July ends, we immediately start looking forward to Halloween and the rest of the Holidays that follow. Halloween is SUCH a fun time of year for crafting. Let’s get started with building and decorating haunted Peeps houses.
Pin this now to save it for later
Pin It NowIf you’ve been following us for a while, you might have seen our original Peeps Houses for Easter. They were such a huge hit that when I saw the ghosts Peeps in the grocery store, this idea instantly popped into my head.
Supplies:
- Chocolate wafer cookies (18-20 wafers for 1 house)
- Chocolate CandiQuick or brown candy melts
- Halloween icing decorations or fondant decorations
- Halloween Sprinkles
- Ghost Peeps
- Microwave safe bowl
- Spoon
- Plastic sandwich baggie
- Scissors
You can find the icing candies (cats, ghosts, bats, and pumpkins), as well as the Halloween, sprinkles in the Halloween aisles at Walmart. You’ll also need a sealable plastic bag and a microwavable safe container for working with the candy melts.

Tip
To get the wafers to stick together, I used dark chocolate CandiQuik. It is SO much easier than regular candy melts to work with. Trust me on this one… You’ll thank me later! It doesn’t burn and it tastes better. Best of all, it can be reheated multiple times which makes it so much better than regular candy melts that can’t be reheated and burn easily.
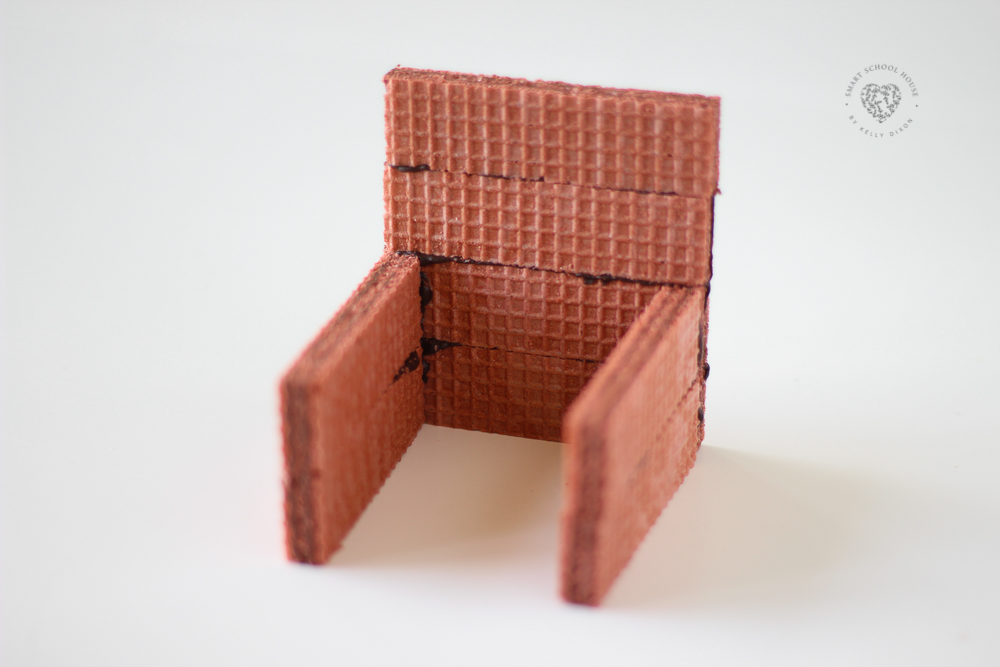
Creating the haunted Peeps houses starts by stacking chocolate wafers and gluing them together with the melted chocolate. Bigger kids are capable of this, but younger kids will need your help because the houses are delicate at this point.
The wafer sticks are so easy to stack and stick together, that this easy Halloween project was a no-brainer (why hadn’t I thought of this before?). Grocery stores and even craft stores will have Halloween dessert accessories this time of year.
Here at Smart School House, we are known for our fun and easy Halloween crafts! Each year we’re adding more, so we hope you are following along with us on Facebook, Pinterest, Instagram, and email so you never miss a beat.
More Halloween Crafts

Halloween Peeps Houses
Supplies
- Microwave safe bowl
- Spoon
- Plastic sandwich baggie
- Scissors
Ingredients
- Chocolate wafer cookies (18-20 wafers for 1 house)
- Chocolate CandiQuick or brown candy melts
- Halloween icing decorations or fondant decorations
- Halloween Sprinkles
- Ghost Peeps
Instructions
- Break apart the chocolate wafers. We used a total of 20 wafers for the Peeps House shown. 4 on each side, 4 in the back, and 8 on top for the roof.
- Melt the CandiQuick or candy melts according to the instructions on the package (usually using a microwave safe bowl in 30 second intervals). We used CandiQuick (found in the baking aisle) but any kind of candy melts will do.
- Put the melted candy into the corner of a sandwich baggie. This creates a homemade frosting bag for piping!
- Cut a tiny piece of the corner off of the plastic baggie.
- Pipe a little melted chocolate along the edges of the wafers to build up the sides and back of the Peeps House.
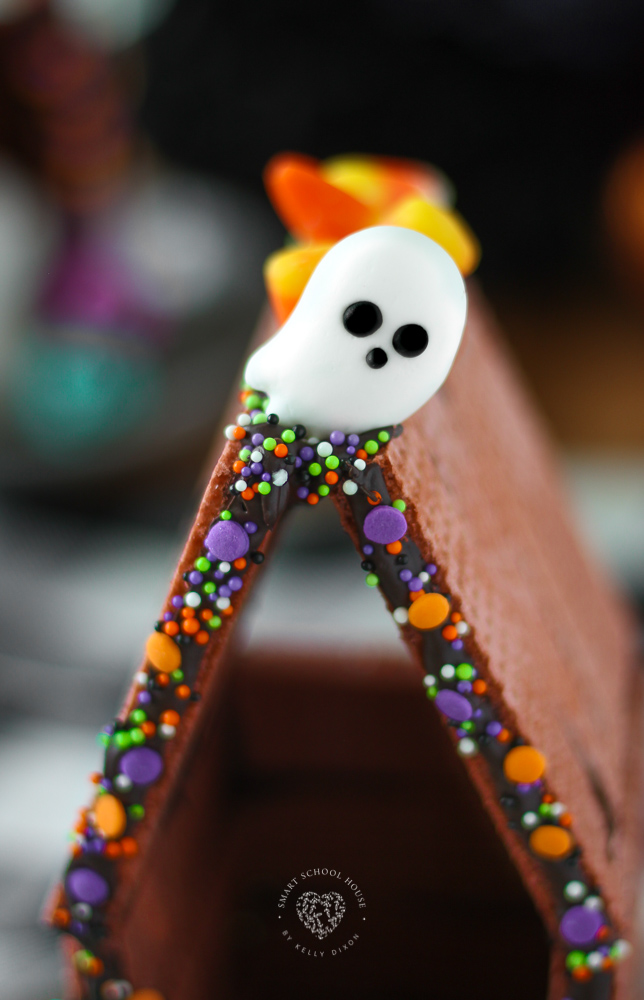
- Assemble the roof by adding melted candy to the top of the house, then leaning wafers together, and finally adding more melted candies on top.
- Add edible Halloween decorations on the top of the Peeps House
- Decorate the front of the house with sprinkles and more decor.
- Place a ghost Peep on inside


