How to Make Christmas Soap Bottles
1
Published: Oct 25, 2019
Updated: Nov 15, 2024
This post may contain affiliate links. Please read our disclosure policy.
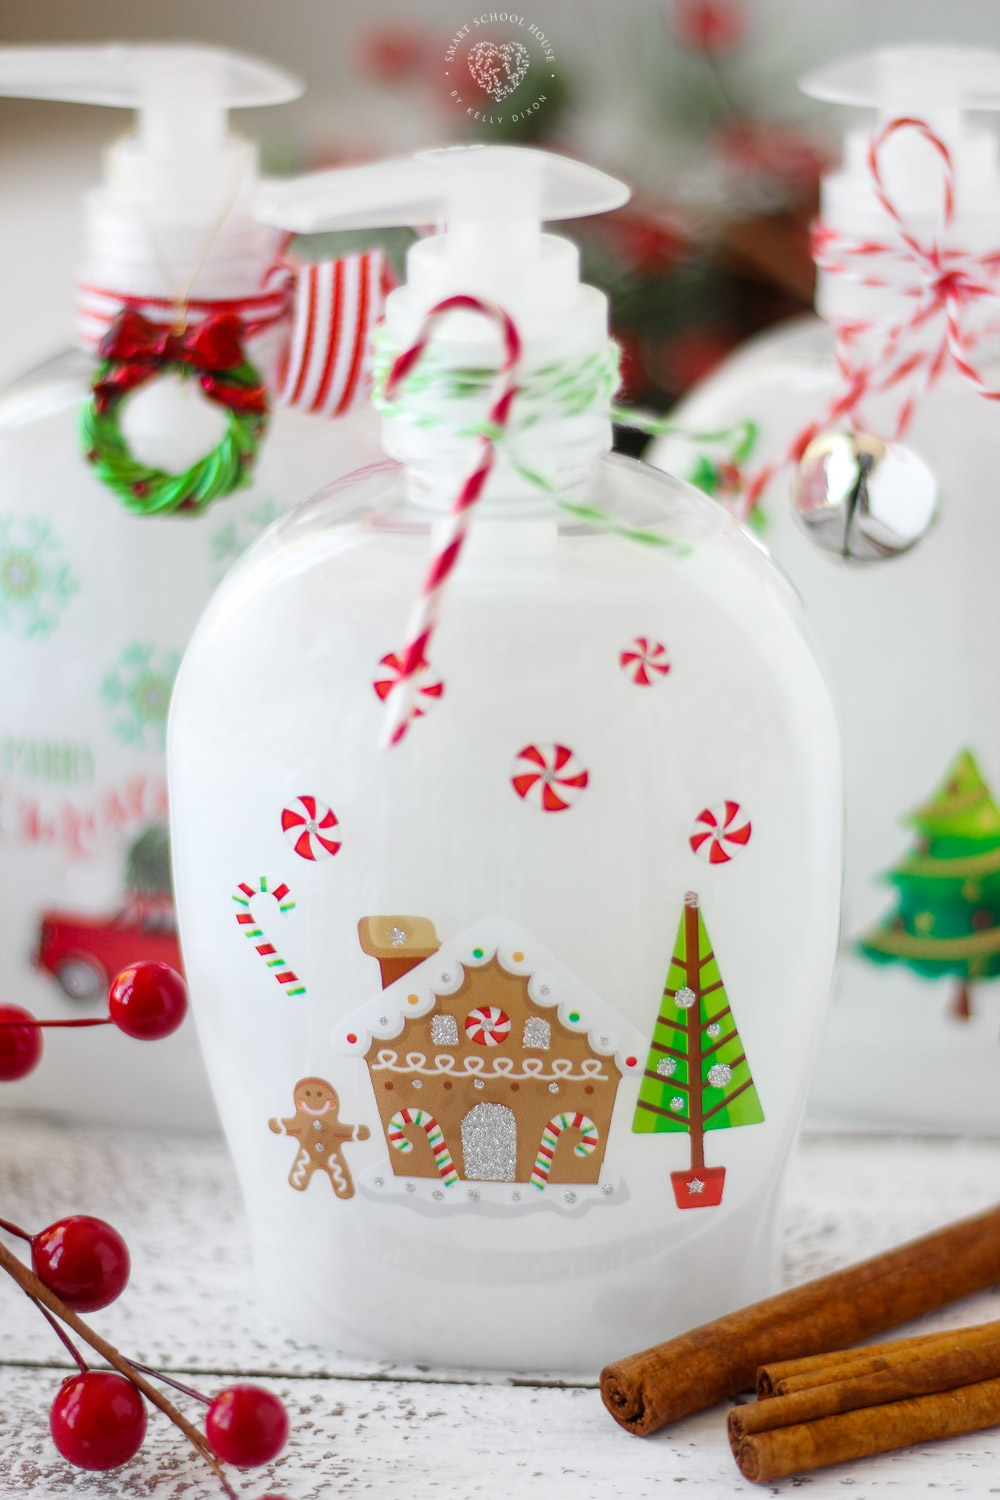
When it comes to the holidays, I love easy, quick, and inexpensive DIY gift ideas. Today we made these adorable DIY Christmas Soap Bottles. They look unbelievably amazing, will make everyone smile, and they cost less than $3 each. There are sooooo many ways to make these soap bottles and I bet you already have most of the materials! I’ve even made a quick DIY video to show you how I made them. Once they are finished, they are a perfect homemade gift. Kids will love making these too!
Christmas Soap Bottles
Christmas is my favorite time for crafting. Therefore, I got started early this year! Even if you don’t decorate much or you don’t consider yourself crafty, these DIY Christmas soap dispensers are simple to make. Plus, they encourage little ones to wash their hands because they are so cute. Kids of all ages can make these Christmas soap bottles! Adults will have to help with removing the labels and applying the Mod Podge. However, all the decorating can be done by the kids! After all, kids love Christmas crafts too.
Pin this now to save it for later
Pin It Now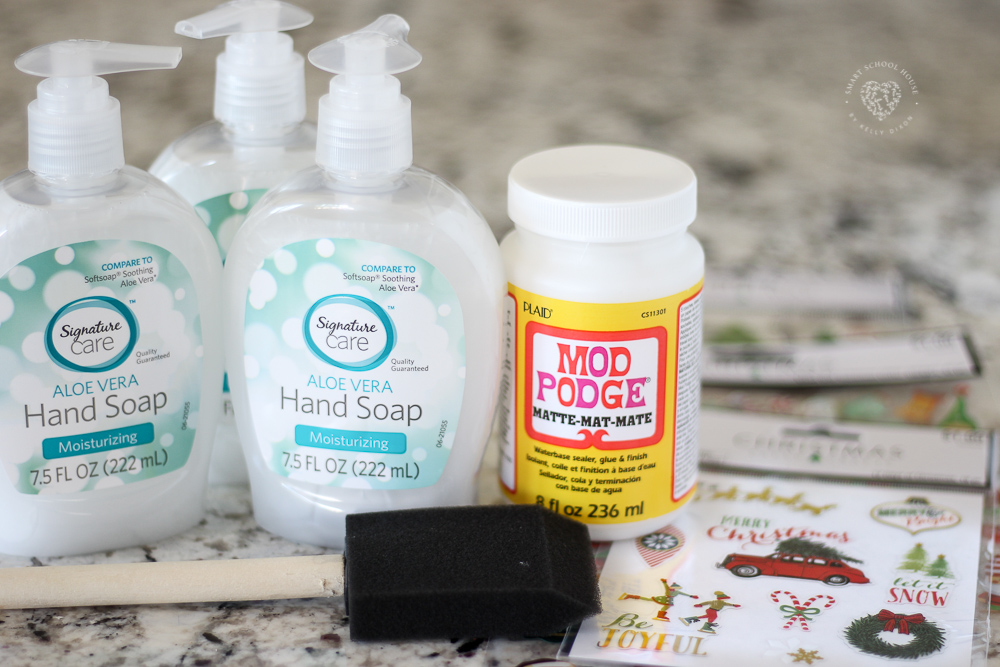
Supplies:
- Bottle of white soap – inexpensive for $1 or $2
- Mod Podge – is used to decoupage
- Goo Gone spray gel – to remove sticky soap label
- Sponge paintbrush – to apply Mod Podge
- Christmas stickers, fabric, or paper
- Ribbons, miniature Christmas ornaments, and other embellishments
Instructions:
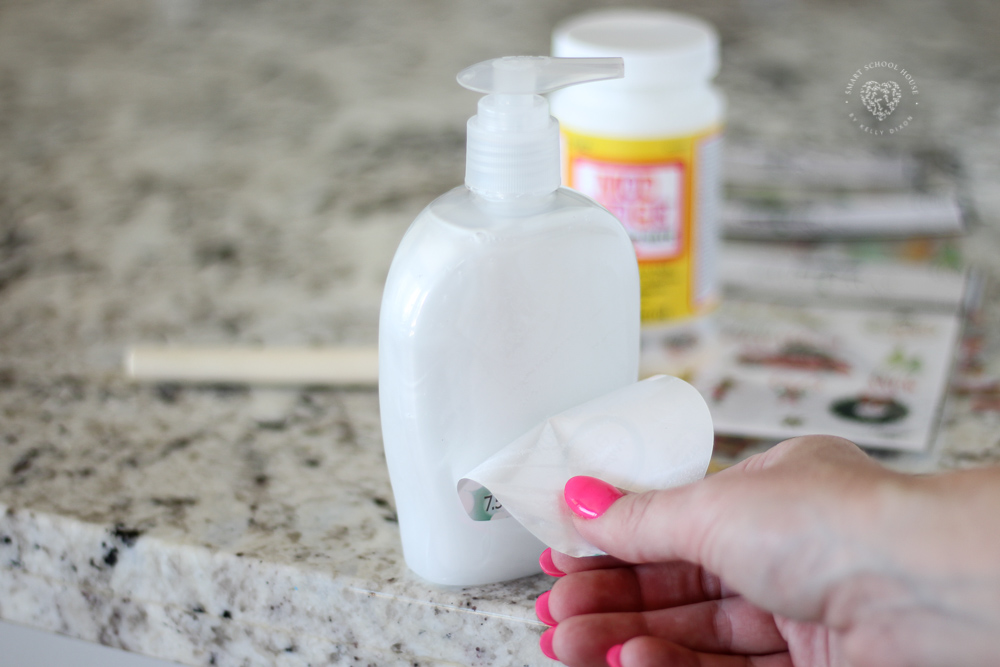
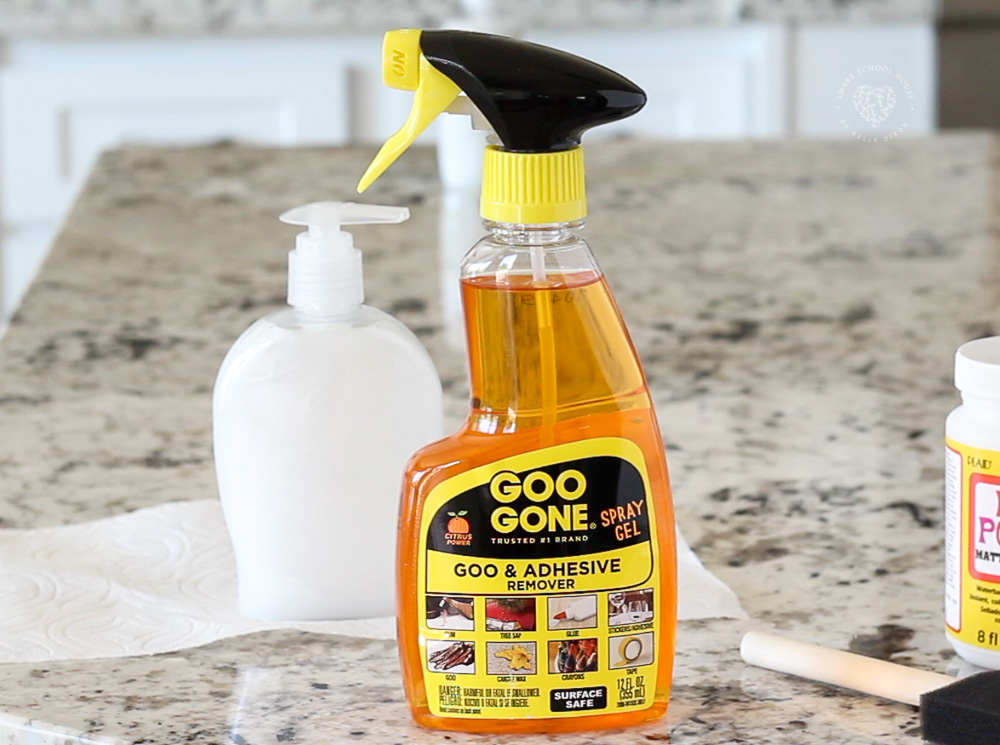
First things first, remove the label on the front of the soap bottle. The soap bottle will have some sticky residue on it from the label. Goo Gone spray gel is the greatest! It will remove that sticky stuff so easily! You can find this Goo Gone spray at your grocery store. Simply spray it on, let it sit for a minute, then wipe off the sticky residue. After that, use some dish soap and water to get the Goo Gone off the soap dispenser. Now, it’s time to get creative!
If you are using fabric or paper, do a coat of Mod Podge on the bottle first. Then, place the fabric or paper where you want it on the bottle. If you’re using stickers like I did, you can skip that step. Finally, add another coat of Mod Podge on top. Like magic, it will seal the material onto the bottle perfectly!

The Mod Podge will add a protective coat over the stickers (or fabric/paper/etc.). This gives the bottles a more polished look and will prevent the decorations from coming off. I love decoupage crafts:) Last week, we decoupaged fabric onto a painted rock for a project my daughter is doing in school. It turned out so cute!
A full list of supplies and step-by-step instructions can be found at the end of this post.
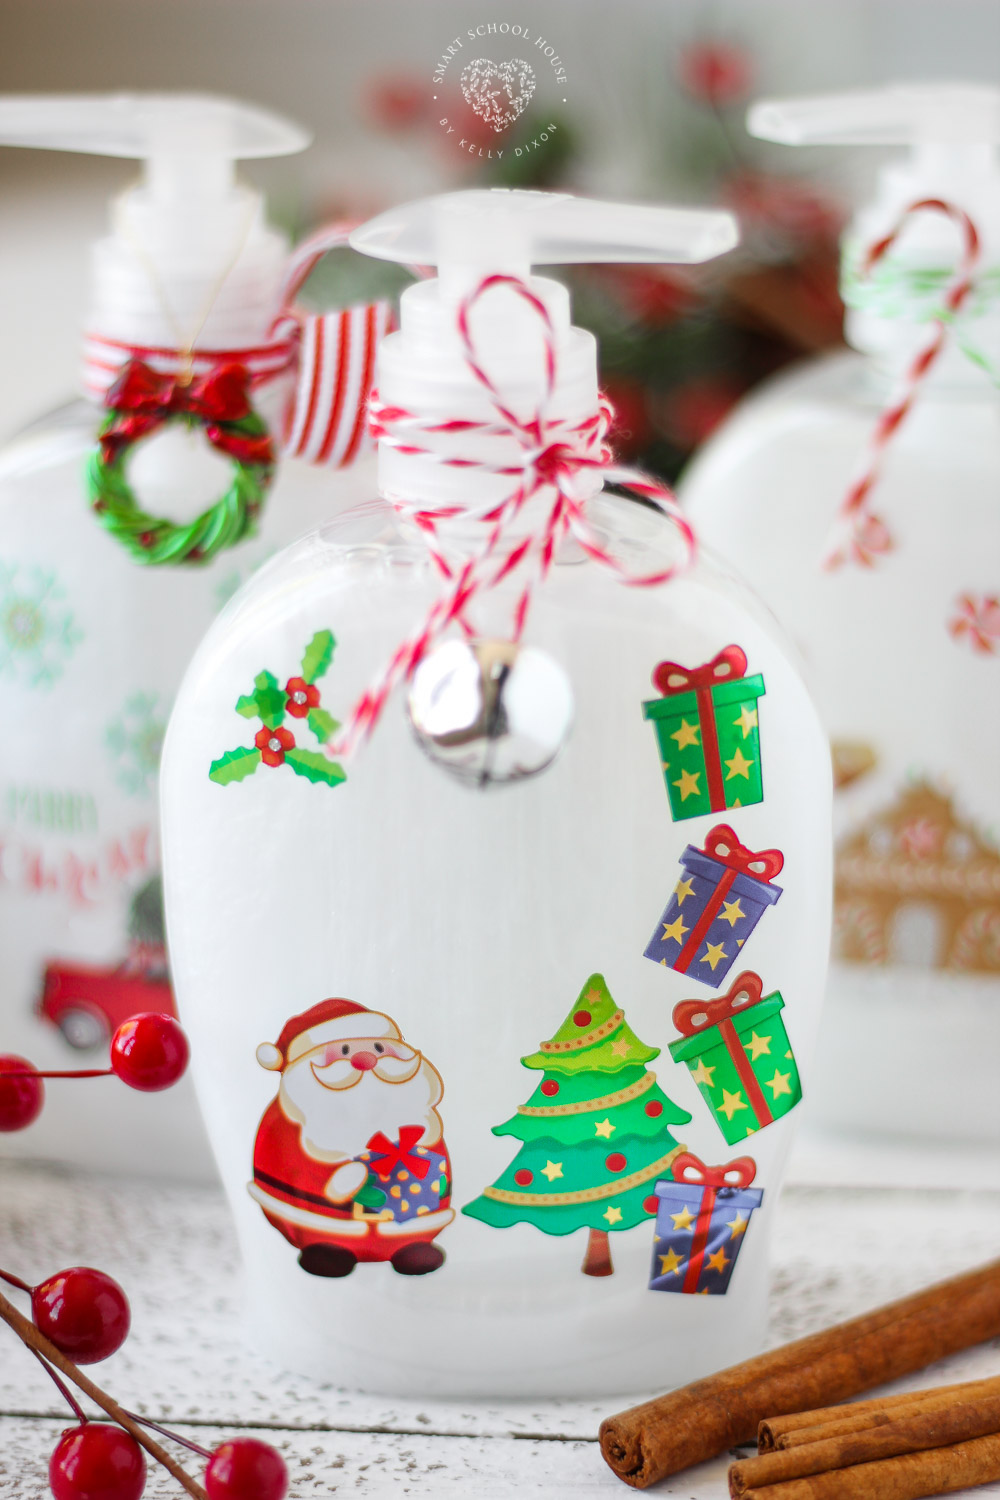
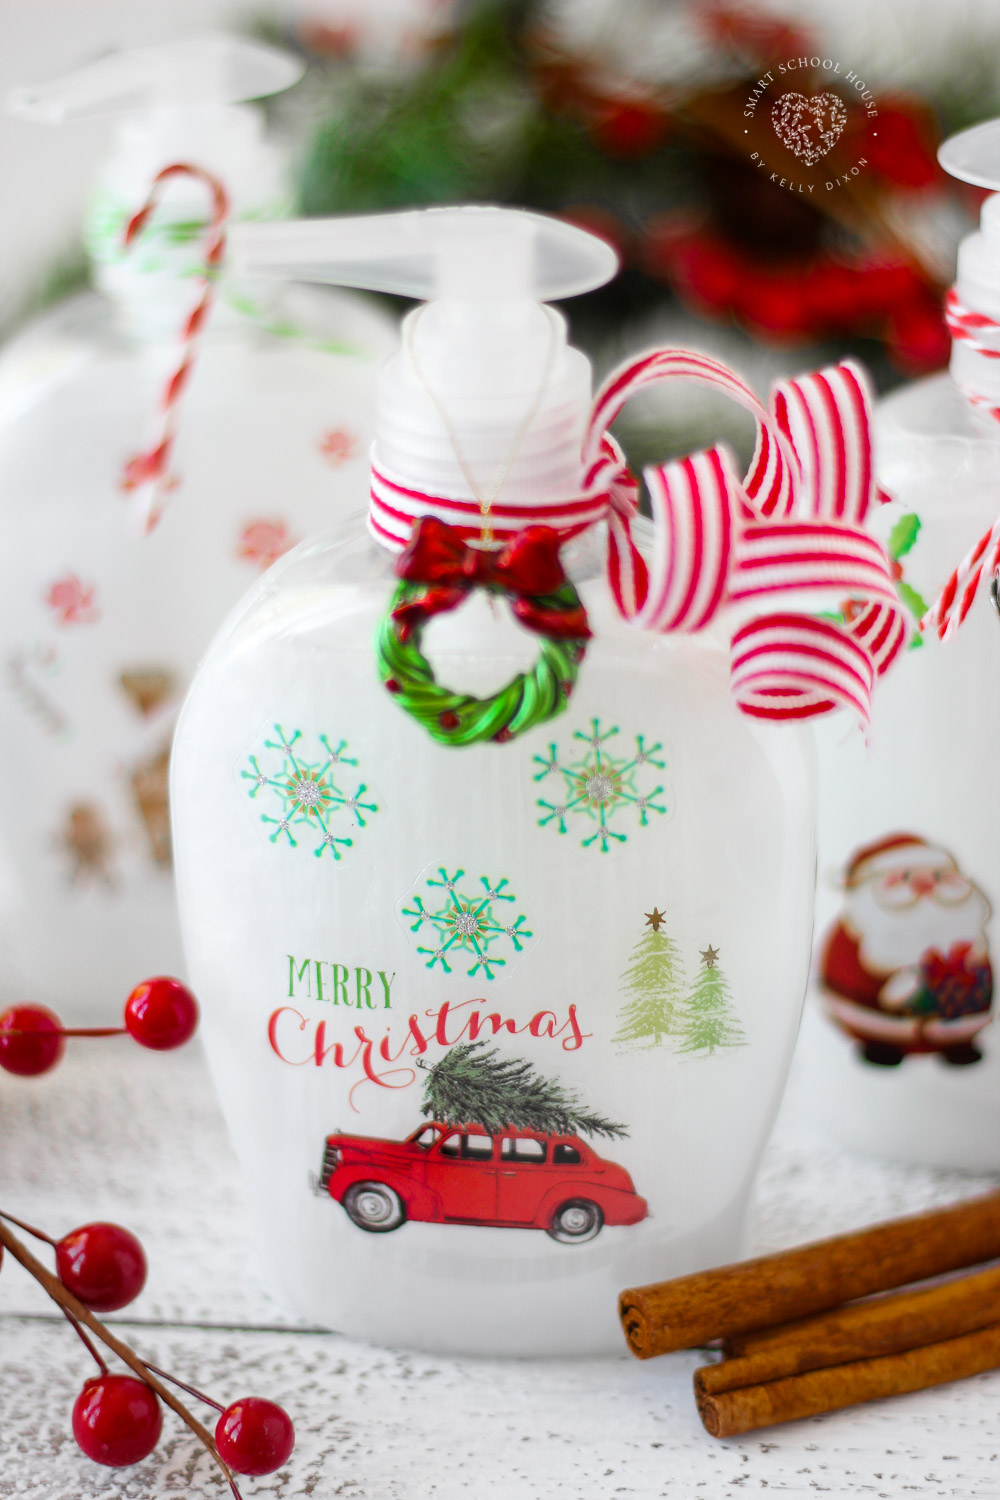
The glue will dry in just about 20 minutes, which makes this a great Christmas craft idea for kids. Once the glue is dried, add some embellishments! We used curly ribbon, twine, jingle bells, and the little wreath is a Christmas ornament for miniature trees! Any craft store will have a great variety of miniature Christmas ornaments. They are perfect for hanging on the soap pump! You could also use this technique on lotion bottles.
If you’re giving a DIY Christmas Soap bottle as a gift, you could place it in a clear gift bag and tie it with some pretty Christmas ribbon. In addition to being adorable, they are very useful too!

More Christmas Crafts
Christmas Soap Bottles

Christmas Soap Bottles
Ingredients
- Bottle of white soap
- Mod Podge
- Goo Gone spray gel
- Sponge paint brush
- Christmas stickers, fabric, or paper
- Ribbon, miniature Christmas ornaments, and other embellishments
Instructions
- Peel the label off of the front of the soap dispenser
- Use Goo Gone to remove the residue left behind from the label
- Wash the bottle with soap and water
- If you are using fabric or paper, cut out the parts you want to use on the soap bottle. Brush on a layer of Mod Podge on the front of the bottle. Place the fabric or paper where you want it to go. Let dry (about 20 minutes). If you’re using stickers you can skip this part! Simply place the stickers where you want them on the bottle.
- Add a layer of Mod Podge on top and let it dry (about 20 minutes). It will dry completely clear and it will seal everything in place giving it a nice polished look.
- Add ribbon, twine, jingle bells, miniature Christmas ornaments etc. to the pump.


Love love love this idea perfect instructions can’t wait to get started with all the bottles I saved from cleaning seasonal rentals but I’m gonna do spring and Easter 🐇🐣