This post may contain affiliate links. Please read our disclosure policy.
The BEST easy DIY Halloween Decorations! BOO! Are you as excited about Halloween as we are? So many of the supplies for all of these crafts can be found at the dollar store, the hardware store, or Walmart. Pin and keep these ideas in mind when it’s time to decorate for Halloween!
Easy DIY Halloween Decorations
1. Glowing Pumpkin Sconce
Make a glowing pumpkin sconce by putting $1.00 plastic pumpkin over outdoor lights. Don’t place the plastic pumpkin directly over a lightbulb (for obvious fire hazard reasons). Be sure to place it over the existing wall light cover. Source unknown.
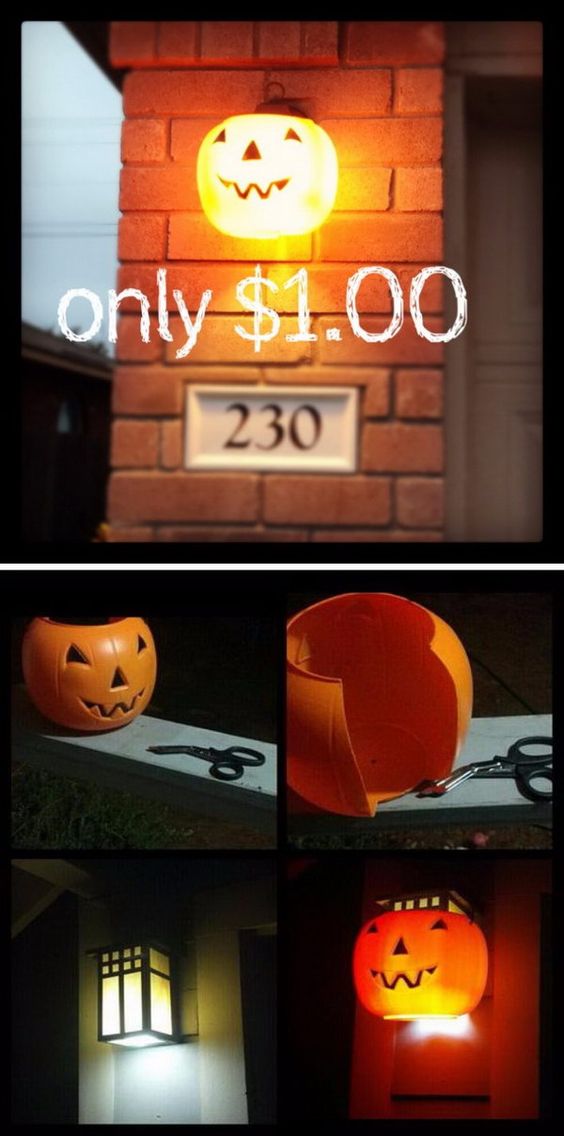
I love how this one turned out by Alicia Hamel

2. Doll Heads in a Jar
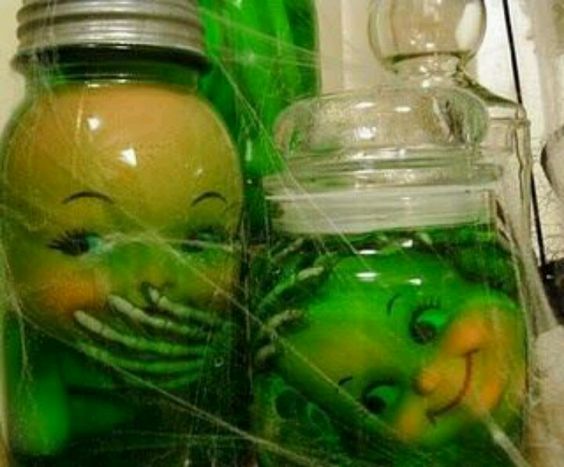
Take old doll parts, add some skeleton parts, fill jar with water, and add green food coloring. Awesome! Source unknown.
3. How to make Brewing Witches
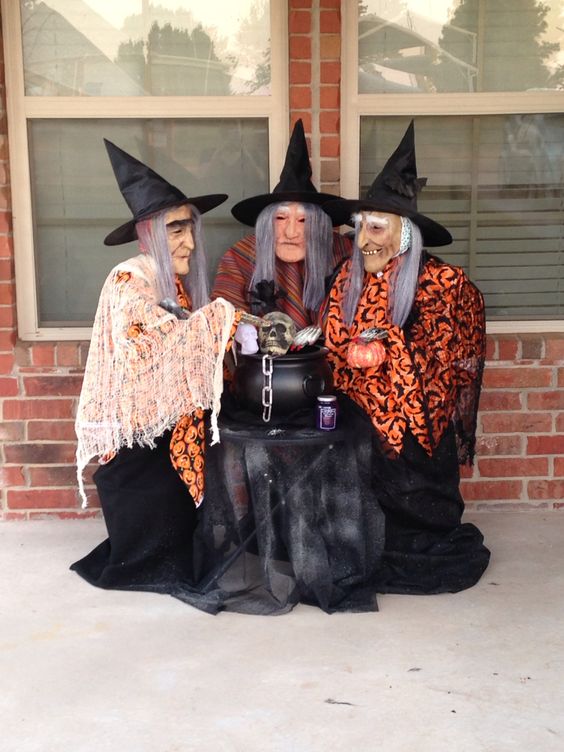
Use tomato cages turned upside down and 6 inch styrofoam balls for the heads. The shoulders are made of 2 inch pvc pipe and run a coat hanger for the arms. Place pillows on the backside of the witches to give them a hump back look. Cover with fabric. Add hats, masks, and hands (all from the dollar store!). By Kim Griffith
4. Toilet Paper Pumpkins
New sewing, gluing, or hard crafting involved with this adorable Halloween craft idea. Directions HERE.

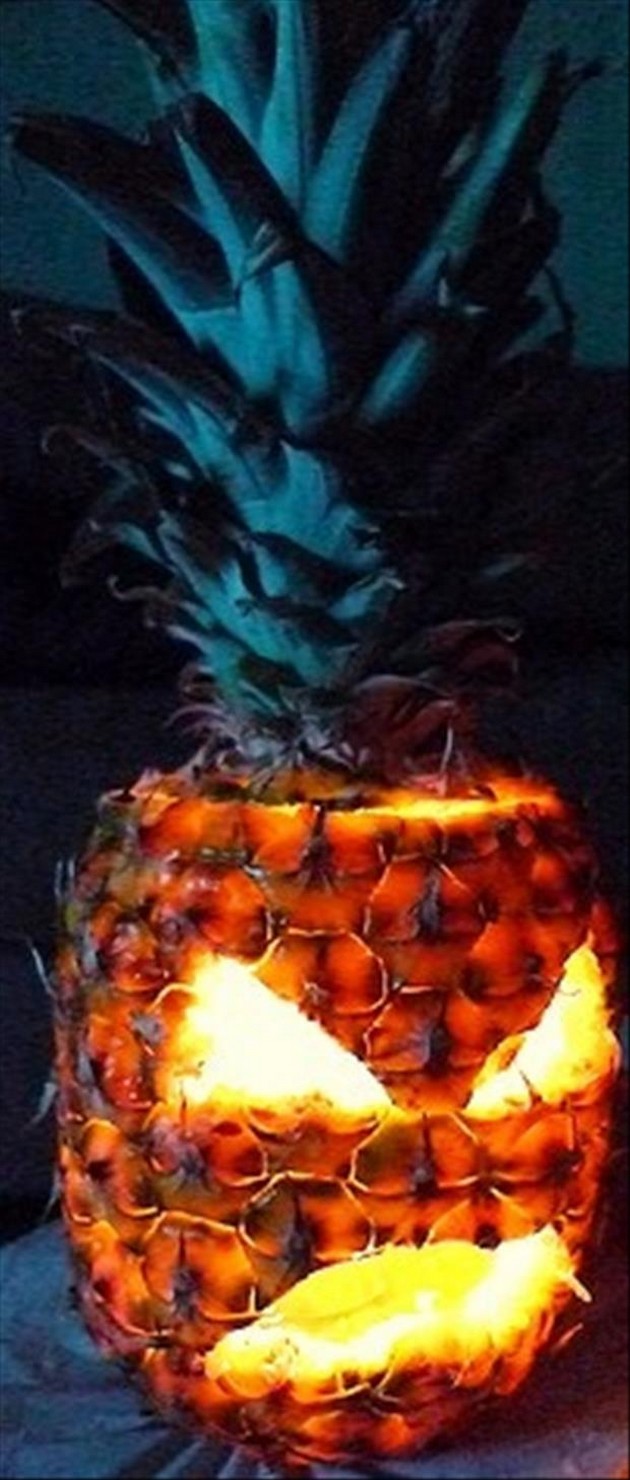
5. Pineapple Pumpkin
Live anywhere near a beach? Consider making a Pineapple Pumpkin! Despite their prickly facade and somewhat oblong shape, the fruit can serve as the perfect tropical twist on the old standby.
6. Milk Jug Witches
Make milk jug witch heads using the following supplies:
- an empty gallon jug
- green craft paint
- a witch hat (I found mine at the Dollar Tree)
- a flexible but strong wire (comes in a roll at Home Depot)
- a washer the size of the opening of the milk jug
- a black trash bag
- scissors
- wire pliers
- a black sharpie
- hot glue or a quick dry glue suitable for outside
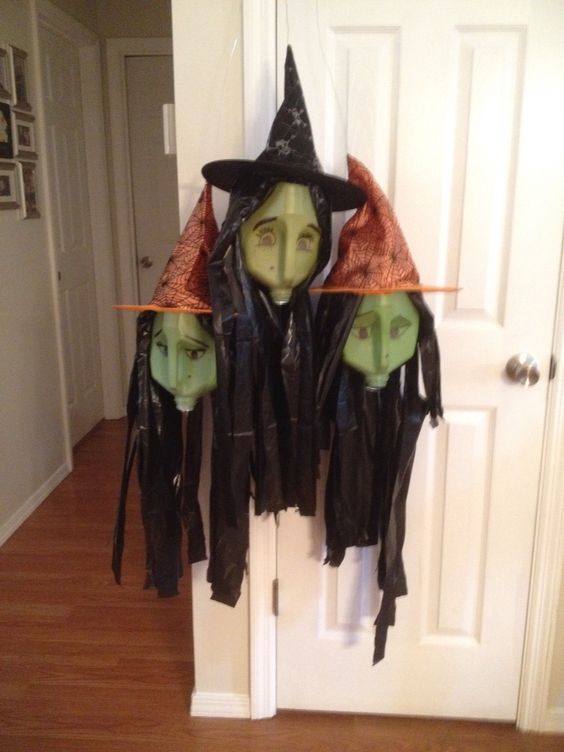
Vicki Drake, the creator of these milk jug witches saw this post on my Facebook page and gave us the instructions! Thank you Vicki! Here’s what she said:
Directions:
- If you’re using a water jug let it dry throughly. If a milk jug rinse well and let it dry.
- Squeeze craft paint inside and shake. Of course with the lid on. I started with a medium amount and added what was needed to coat the whole jug so that only the green showed.
- Let the paint dry completely with the lid off the jug. I turned mine every so often to make sure it didn’t puddle inside. This might take a few days.
- Once it dries poke a hole in the middle of the bottom of the jug. This hole should be just the size to run the wire through.
- Cut a hole in the top tip of the witches hat just large enough for the wire.
- Slit the trash bag up one side. Fold what would be the bottom of the bag in half.
- Place the folded part of the bag on the bottom of the jug (which is now the top of the witches head).
- Adjust to make a wig. Glue into place.
- When this dries run the wire through the top of the hat then through the hole in the top of the head all the way through the opening on the bottom of the jug.
- Use the washer to close the opening by placing it over the hole and twist the wire to hold in place.
- Back to the top of the hat, leave a long enough piece of wire to hang your witch. I measured the distance from the top of the porch to where I wanted them to hang.
- Now cut the bag into strips to make the strands of hair. I found it easier to hang her and do the cutting. I didn’t want them to tear in the wind so I only went part way up the side of the head and made them thick. You can cut the length of the strips to suit your witch’s style.
- After this take the sharpie and create the face. Now she is ready to hang.
Oh if you want to put a flashlight or glow sticks inside just gently slide the jug up from the washer and you can slide them in the opening.
Hope you have fun making her.
I love how this milk jug witch is made on top of a tomato cage covered with a black trash bag. Directions here.

Halloween Decorations
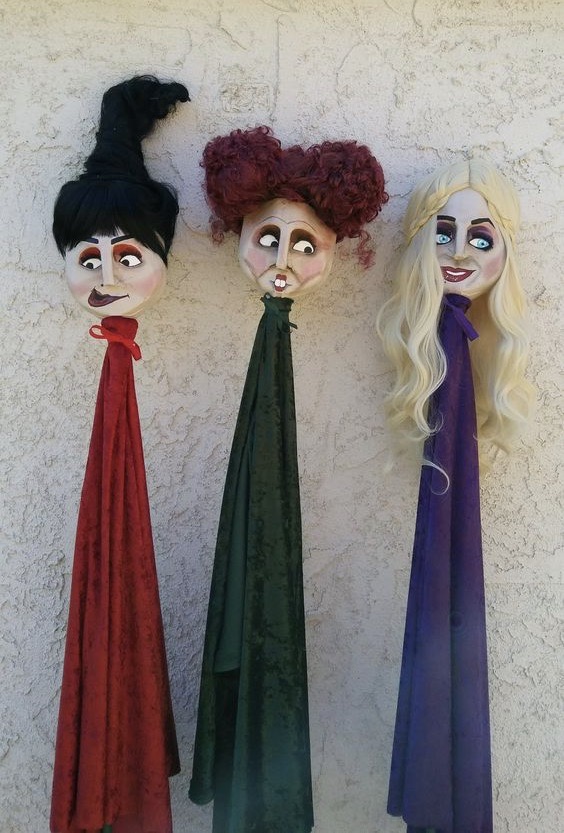
Sanderson Sisters Made out of Milk Cartons!
By Allison Hopwood
7. Flamingo Vultures
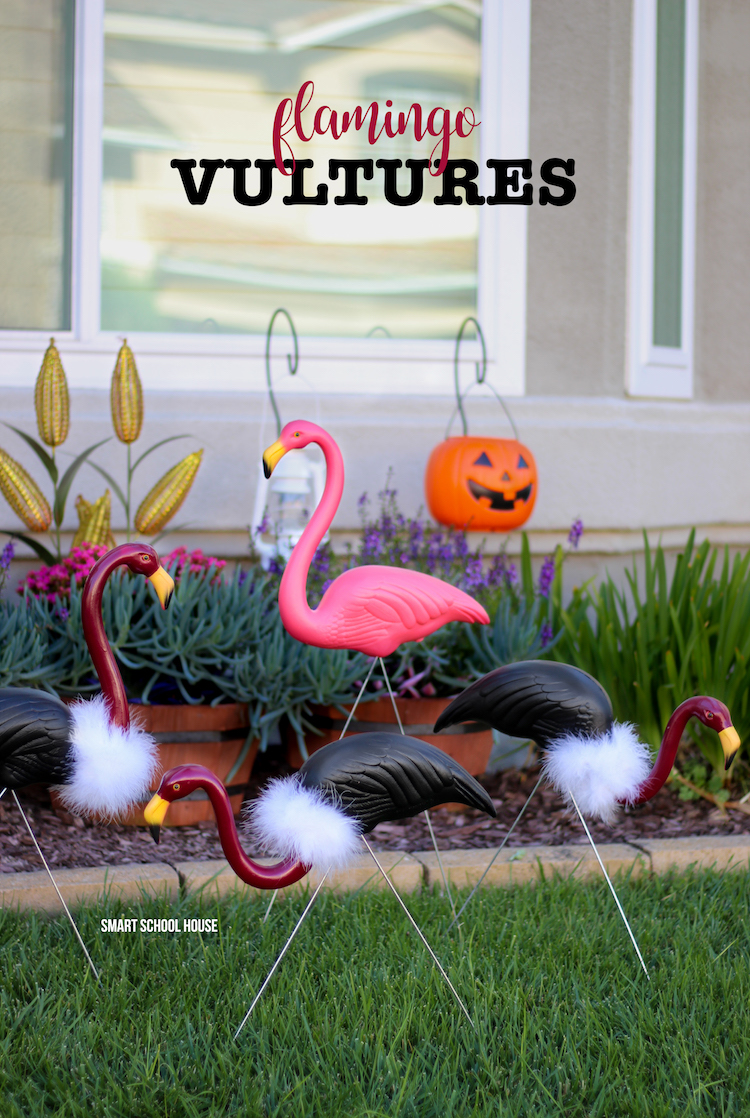
Turn pink lawn flamingos into vultures using some spray paint and a white boa around the neck. The buzzards are an unexpected surprise to any of your outdoor decorations for Halloween! Directions HERE. We love making Halloween Decorations here at Smart School House!
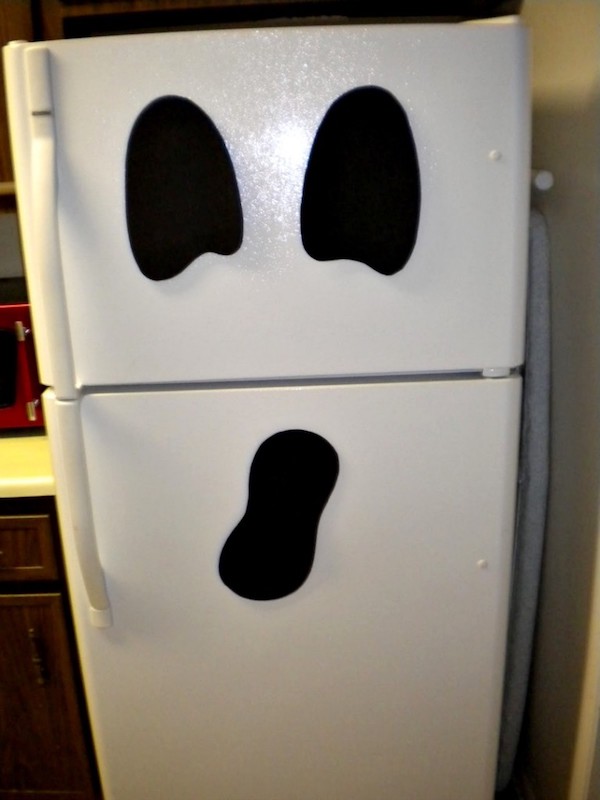
8. Ghost Face on a Refrigerator
Use foam or felt to make a ghost face and add magnets on the back. Know anyone with a white refrigerator? Show them this simple idea! Source unknown.
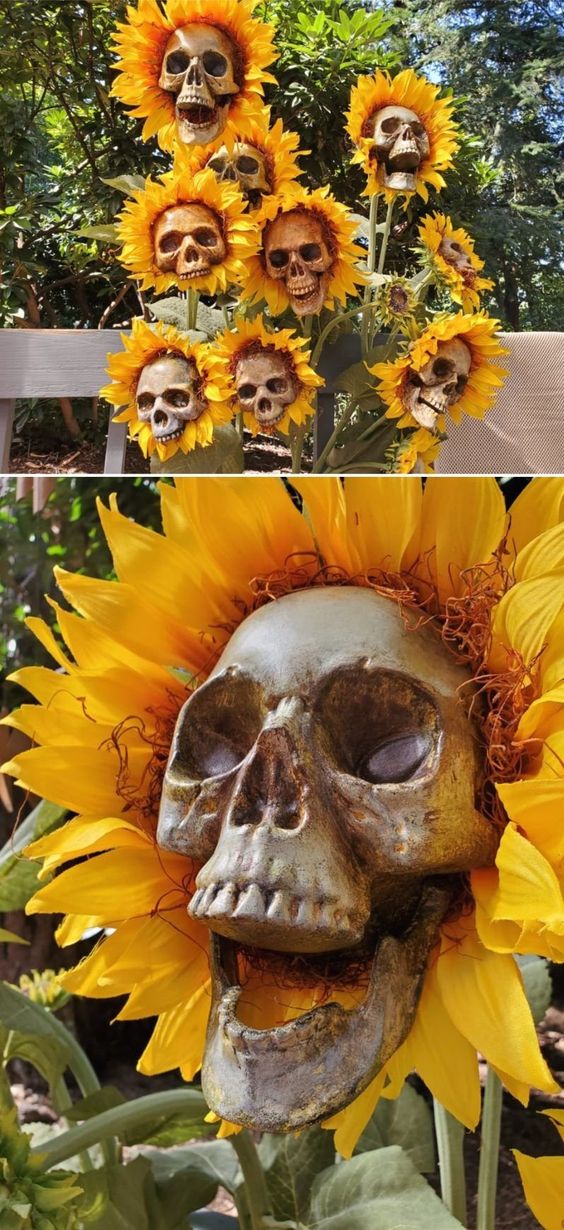
9. Sunflower Ghosts
These DIY Sunflower Skeletons Scream Halloween – and I want a whole garden full of them! The spooky flowers are simply made of “cheap plastic skulls,” hot glue, paint, fake moss material, and artificial sunflowers. Who knew Halloween Decorations could actually look pretty and scary at the same time!
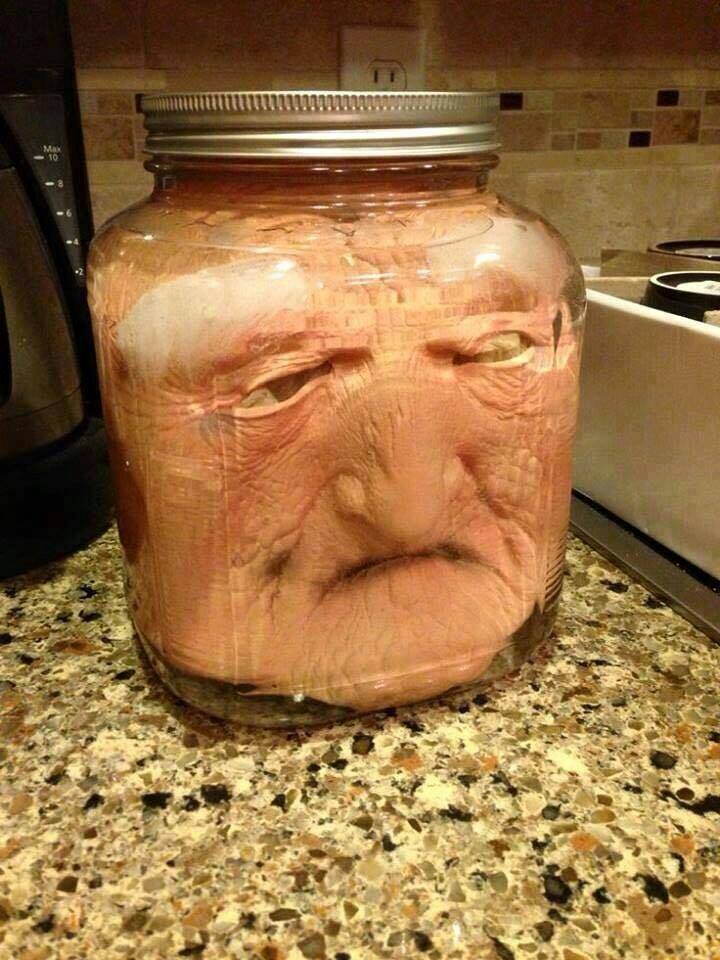
10. Halloween Mask in a Glass Jar
Put a rubber mask in a glass jar, add water, and place in a glow stick inside at night. CREEPY! Source unknown.
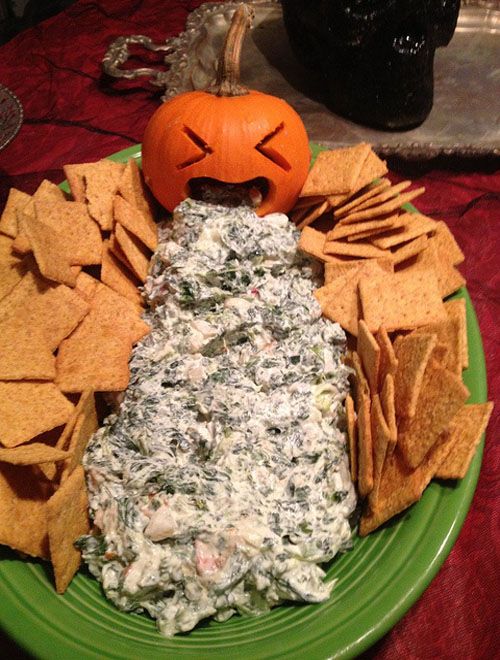
11. Halloween Spinach Dip Appetizer
Okay, this is totally gross, which is what makes it perfect for your ‘tween’s Halloween party. Carve a small pumpkin and make some spinach dip. Eww!
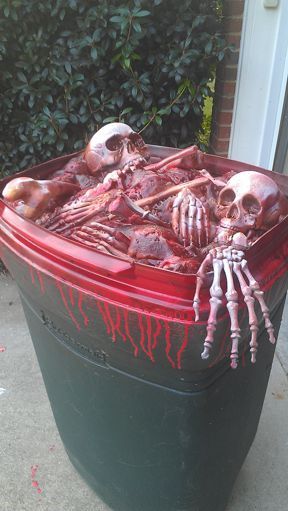
12. DIY Skeletons in a Trash Can
Make a trash can look like it is filled with bones and blood. Use a trash can, skeleton bone parts, Great Stuff Foam (found here) and spray paint in red and mahogany lacquer.
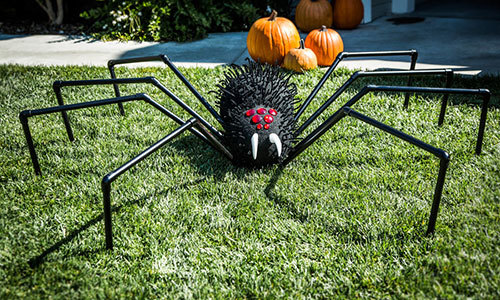
13. Halloween Decoration Lawn Spider
Make a GIANT yard spider using styrofoam balls, PVC pipes, pipe cleaners, crystal jewels, and glue!
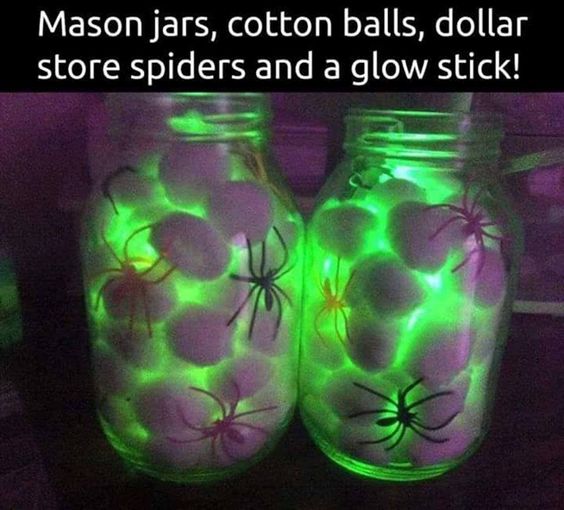
14. Spiders in a Jar
Have any mason jars hanging around? Don’t we all! Grab some glow sticks, plastic spiders, and cotton balls from the dollar store for this creepy spider nest display!
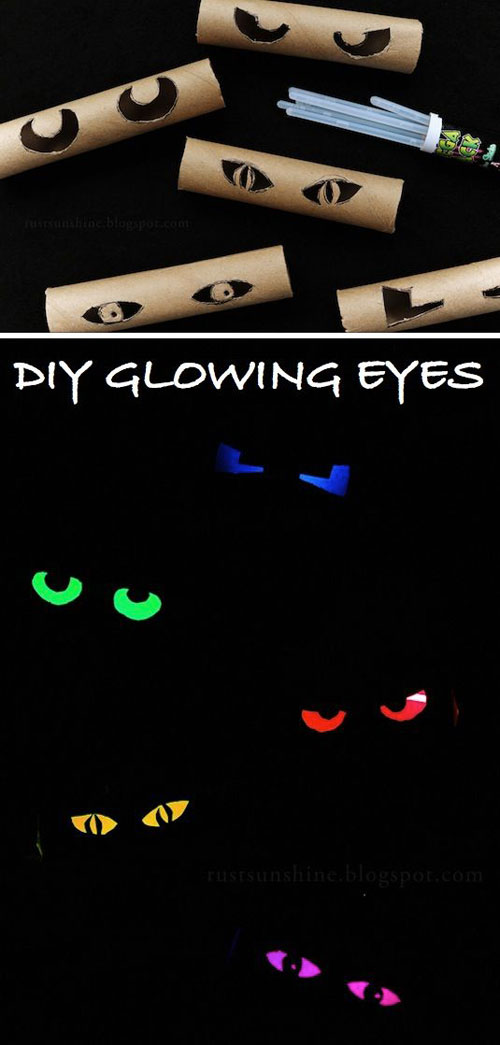
15. Glowing Eyes Halloween Decorations
You might want to start saving those toilet paper rolls and paper towel rolls for this glowing Halloween craft! Head to the Dollar Store for some glow sticks and check out what you can make! Which one is your favorite?
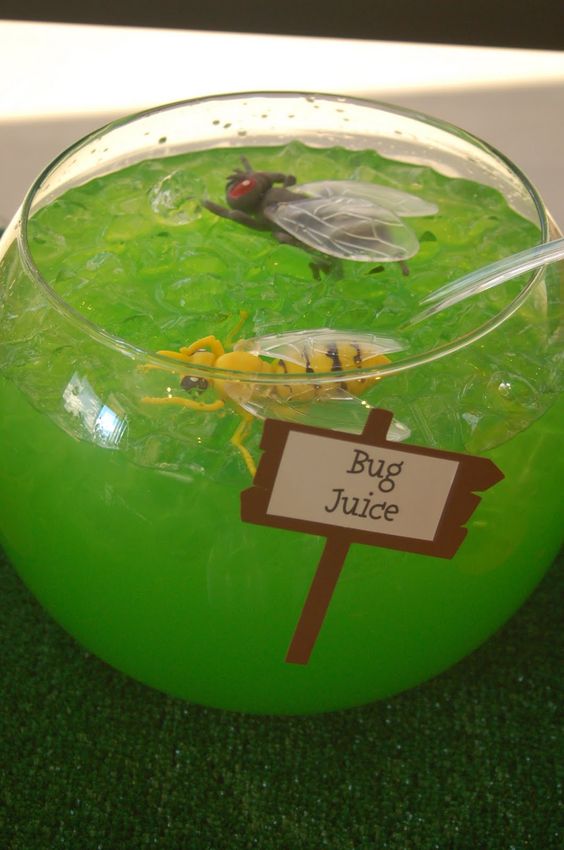
16. Bug Juice Halloween Punch
Fill a large punch bowl (or fish bowl) with any green juice. Add some big plastic spiders and it suddenly becomes bug juice! I can think of a few kids who would love this:)
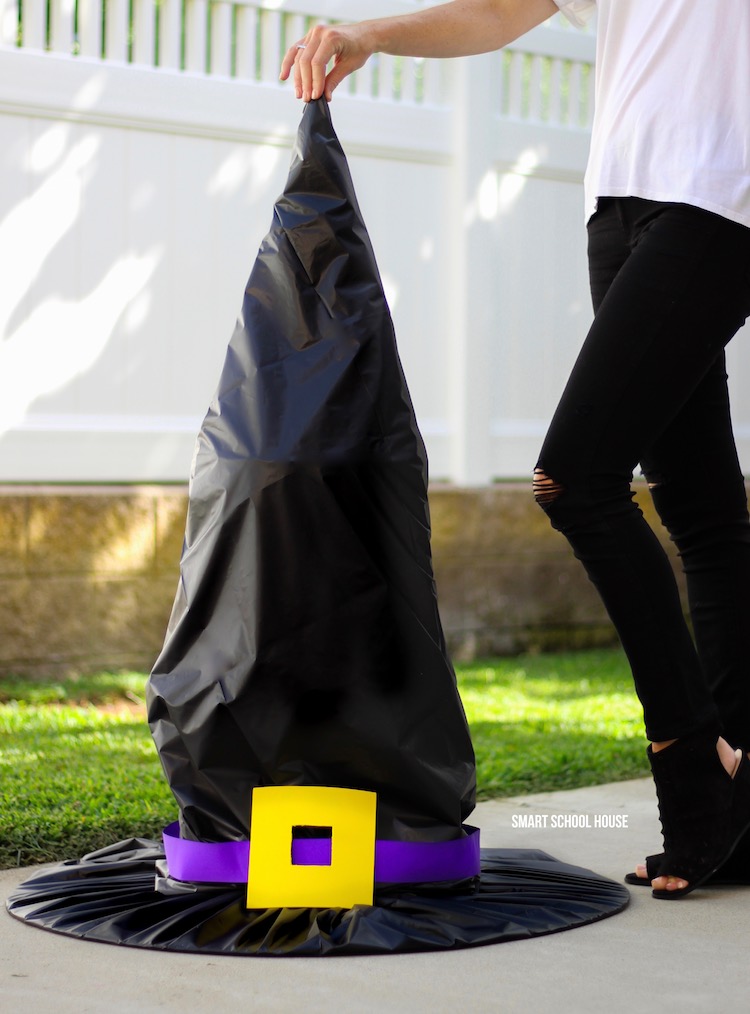
17. Tomato Cage Witch Hat
This HUGE tomato cage witch hat for Halloween is sure to be a show stopper!! Directions HERE
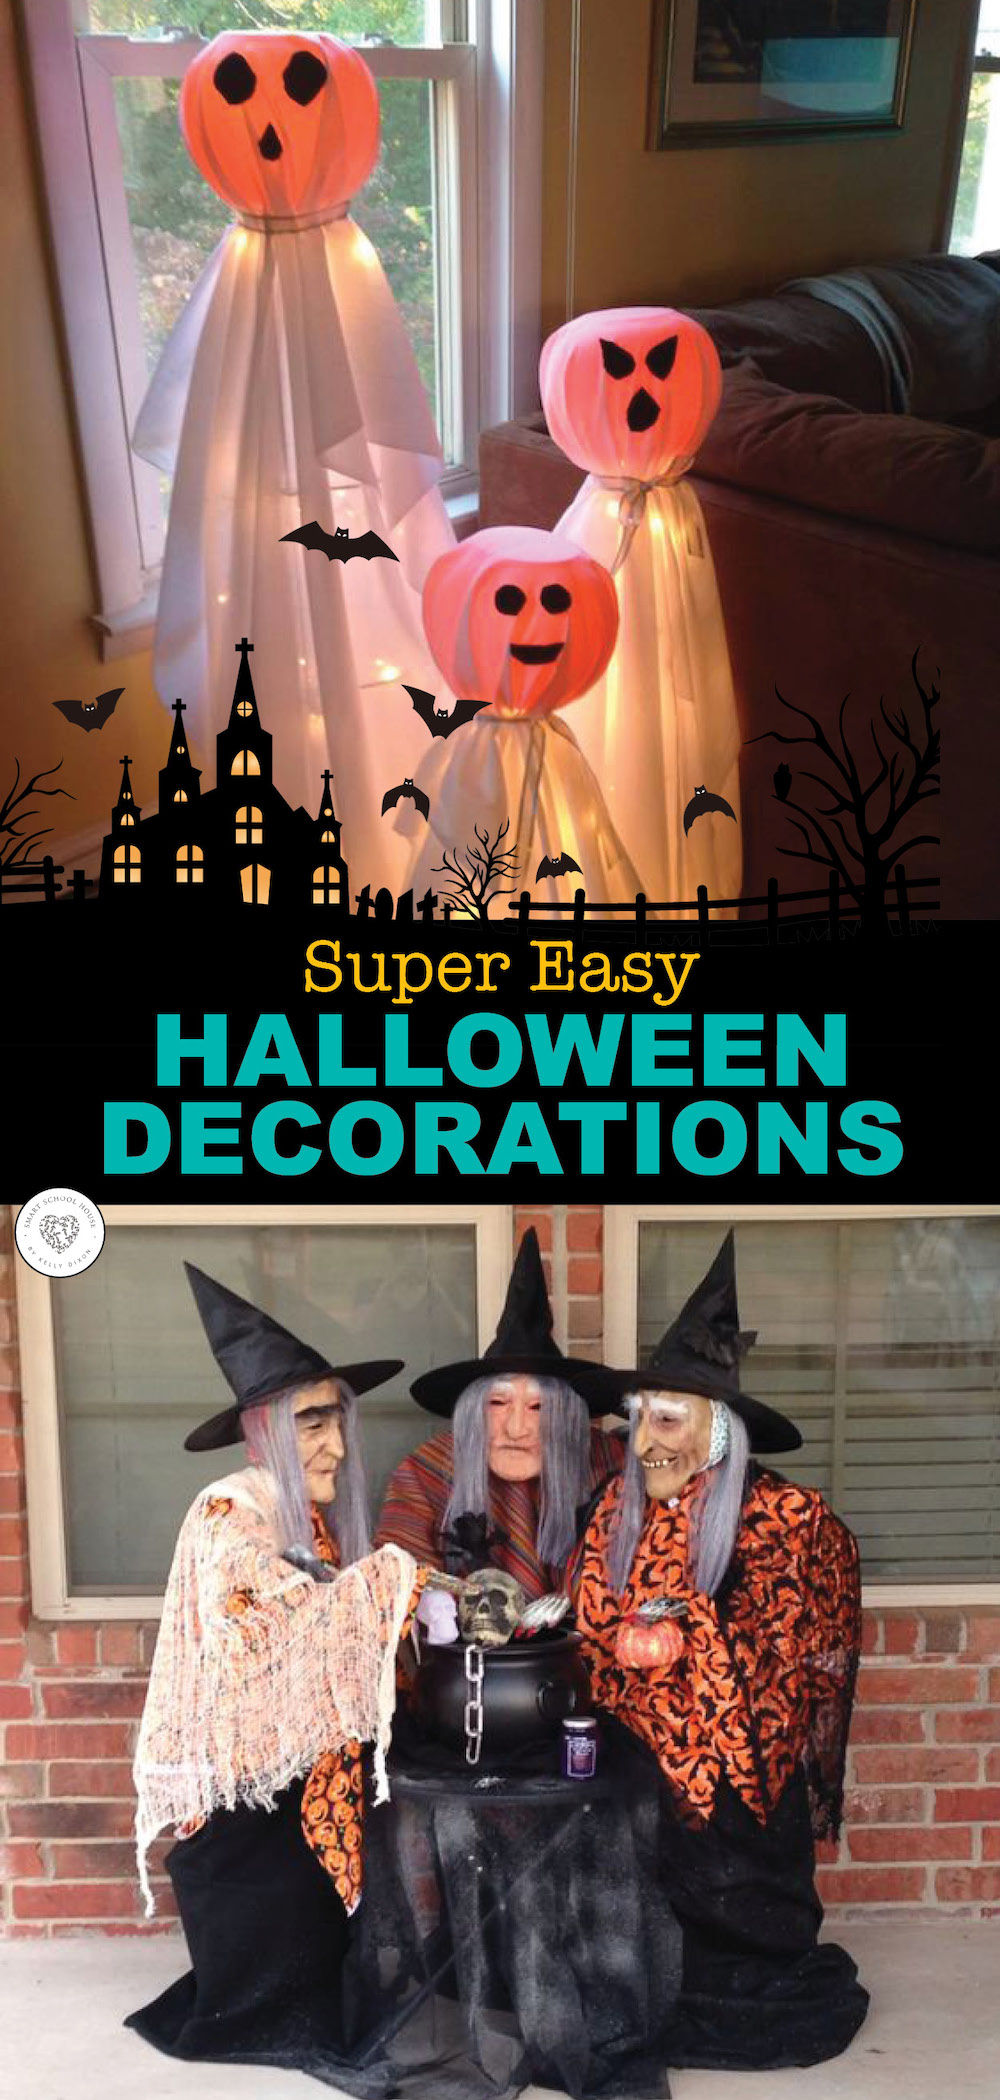
18. Glowing Tomato Cage Ghosts
I LOVE DIY Halloween decorations and am so excited to share the directions for this Tomato Cage Ghost craft idea with you. This is the cutest and friendliest Tomato Cage Ghost ever!
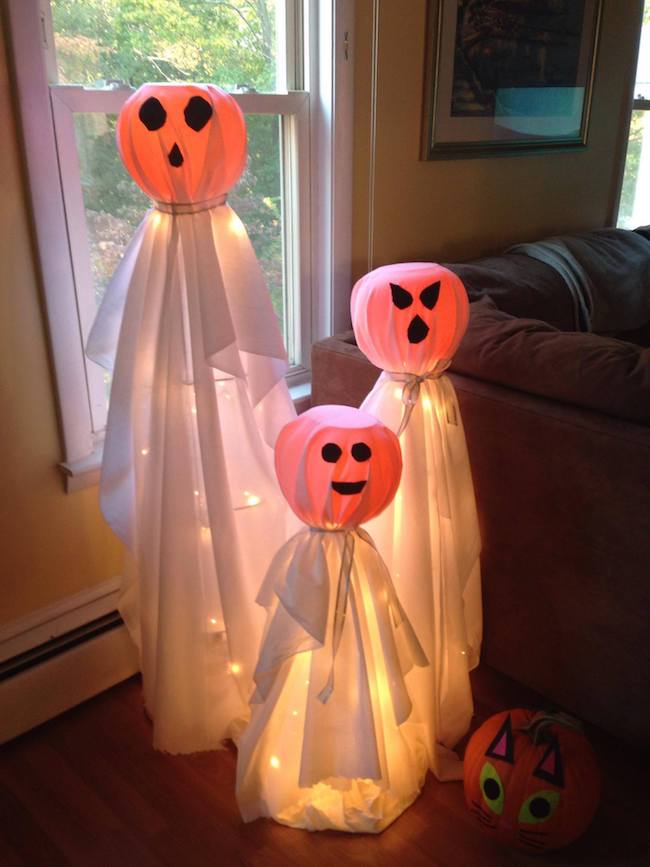
- Turn the tomato cage upside down.
- Place a pumpkin pail over the top pointed area of the tomato cage.
- Wrap lights around the cage and secure them in place with zip ties. Make sure to leave the cord out for easy on/off option.
- Place a white sheet over the cage and pumpkin pail.
- Create the ghost’s neck by using white ribbon (as pictured).
- Cut face shapes out of black felt or draw on face shapes with a black sharpie. Glue faces onto ghosts.
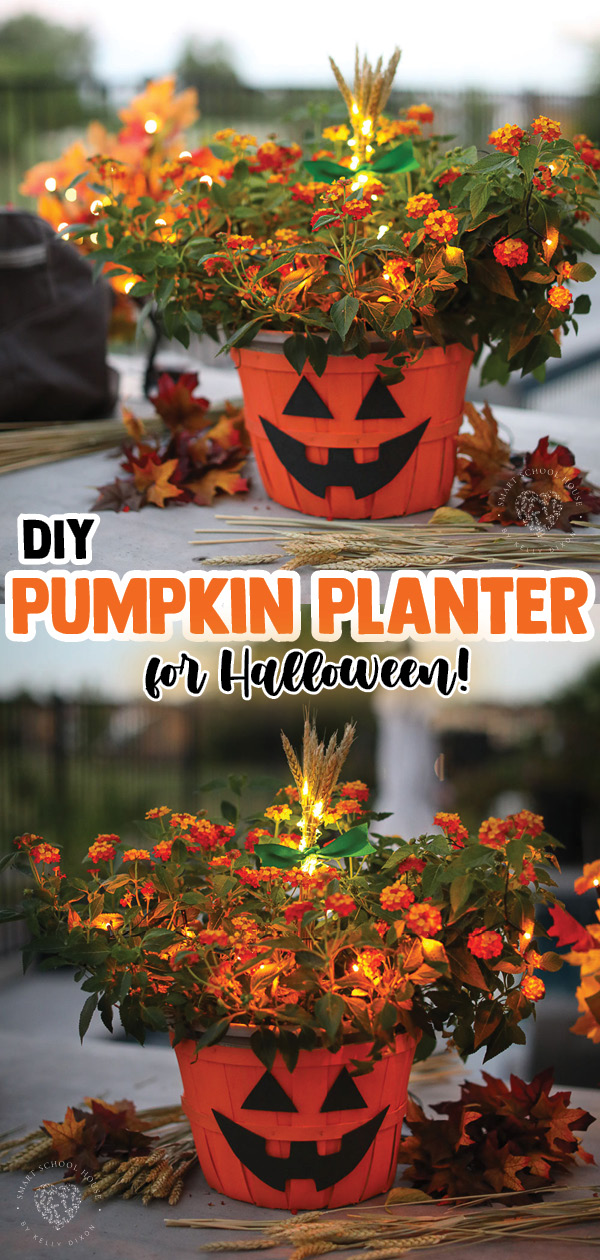
19. Halloween Pumpkin Planter
How to make a Jack-O-Lantern planter basket with this fall craft idea!



How do you make the witches out of milk jugs? They’re wonderful!
I am trying the witches out of milk jugs. Was wondering if the milk jugs are painted on the outside or inside and face on outside? Just the paint on outside wants to peel off when I try doing the face. Just starring at the pic I cant tell?????
The green paint goes on the inside
love these
love these. cheap dectortions. i would like more
Cool
Lo ve these craft ideas
I love everything for Halloween. I am still trying to find a watering can that the sprayer comes off for the fairy lights. Any ideas?
Try Amazon! I’ve heard people have had luck getting them on there:)