This post may contain affiliate links. Please read our disclosure policy.
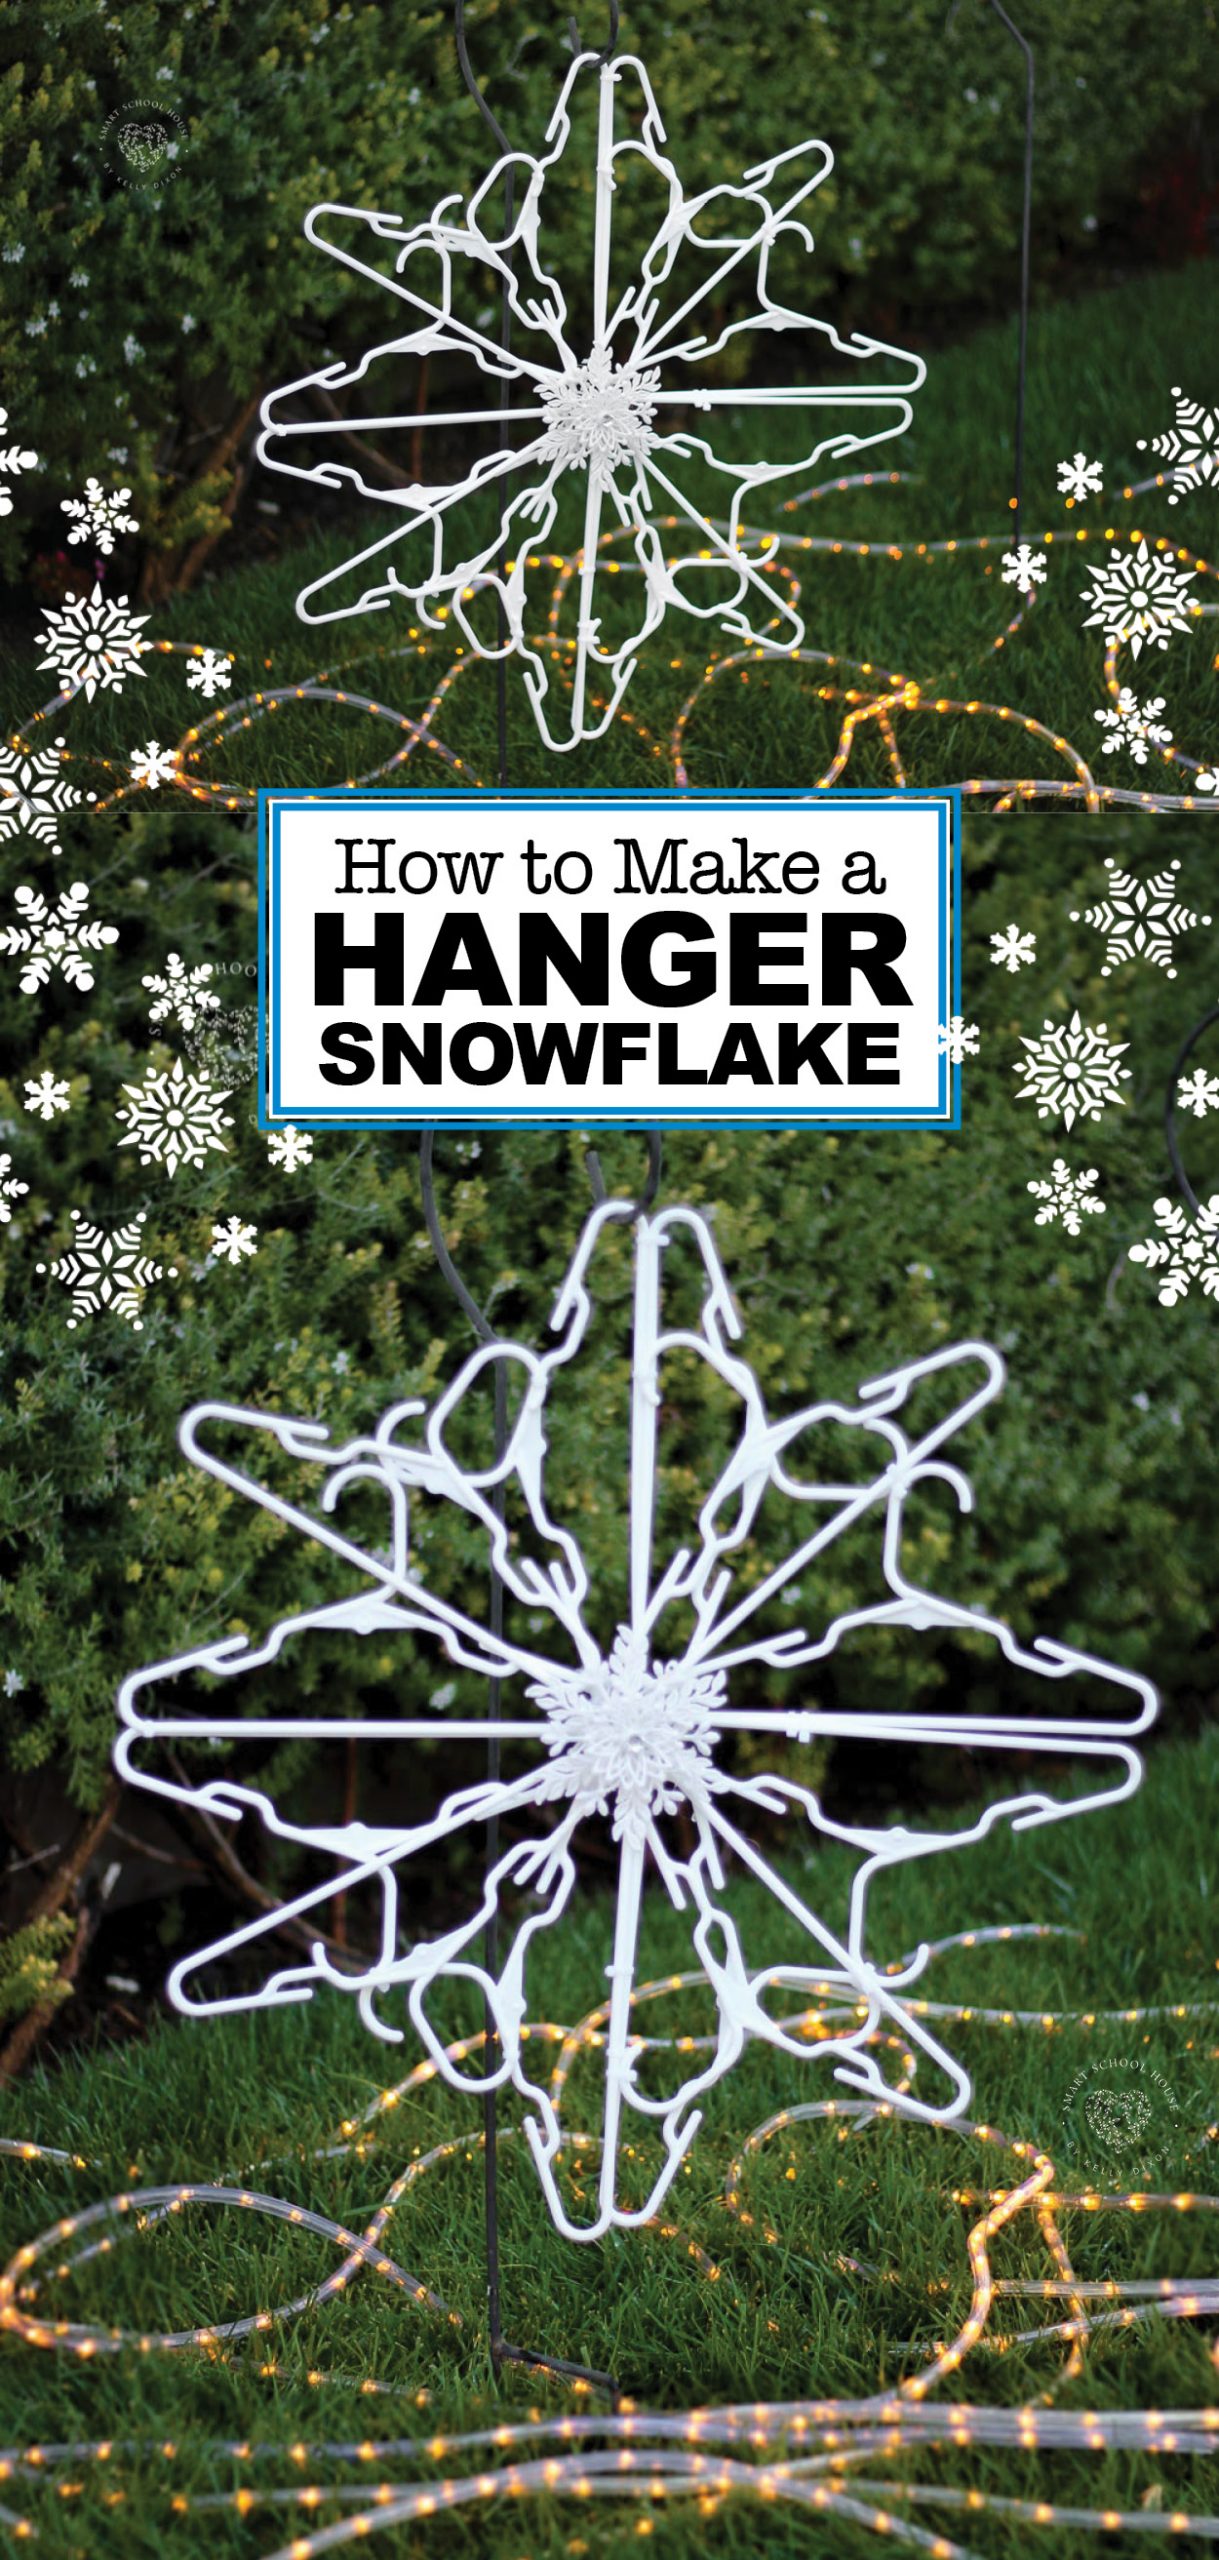
Turn on some Christmas music, pour a cup of hot chocolate, and let your creativity take over with this amazing DIY snowflake craft! With just a few simple supplies that are from the dollar store, decorate for the holidays with these beautiful snowflakes made out of hangers. Today I’m going to teach you how to make a Hanger Snowflake using plastic hangers and zip ties!
Hanger Snowflake
What I love most about making snowflakes out of hangers is that you really can’t go wrong. You know how every real snowflake that falls from the sky is different? Keep that in mind when assembling your own hanger snowflake! They are all beautiful and unique. This craft is wonderful for kids and adults alike. You can embellish the hanger snowflakes in hundreds of different ways. Today I’ll show you how to create a hanger snowflake and then you can decide how to decorate your own!
We live in sunny Orange County, California where we don’t see any real snow. In fact, our grass stays green, flowers bloom all winter, and the skies are usually blue and clear. While the temperatures might get a little brisk, we’re nowhere near cold enough to see real snowflakes. That’s why, when it comes to decorating for Christmas, we love winter wonderland decorations!
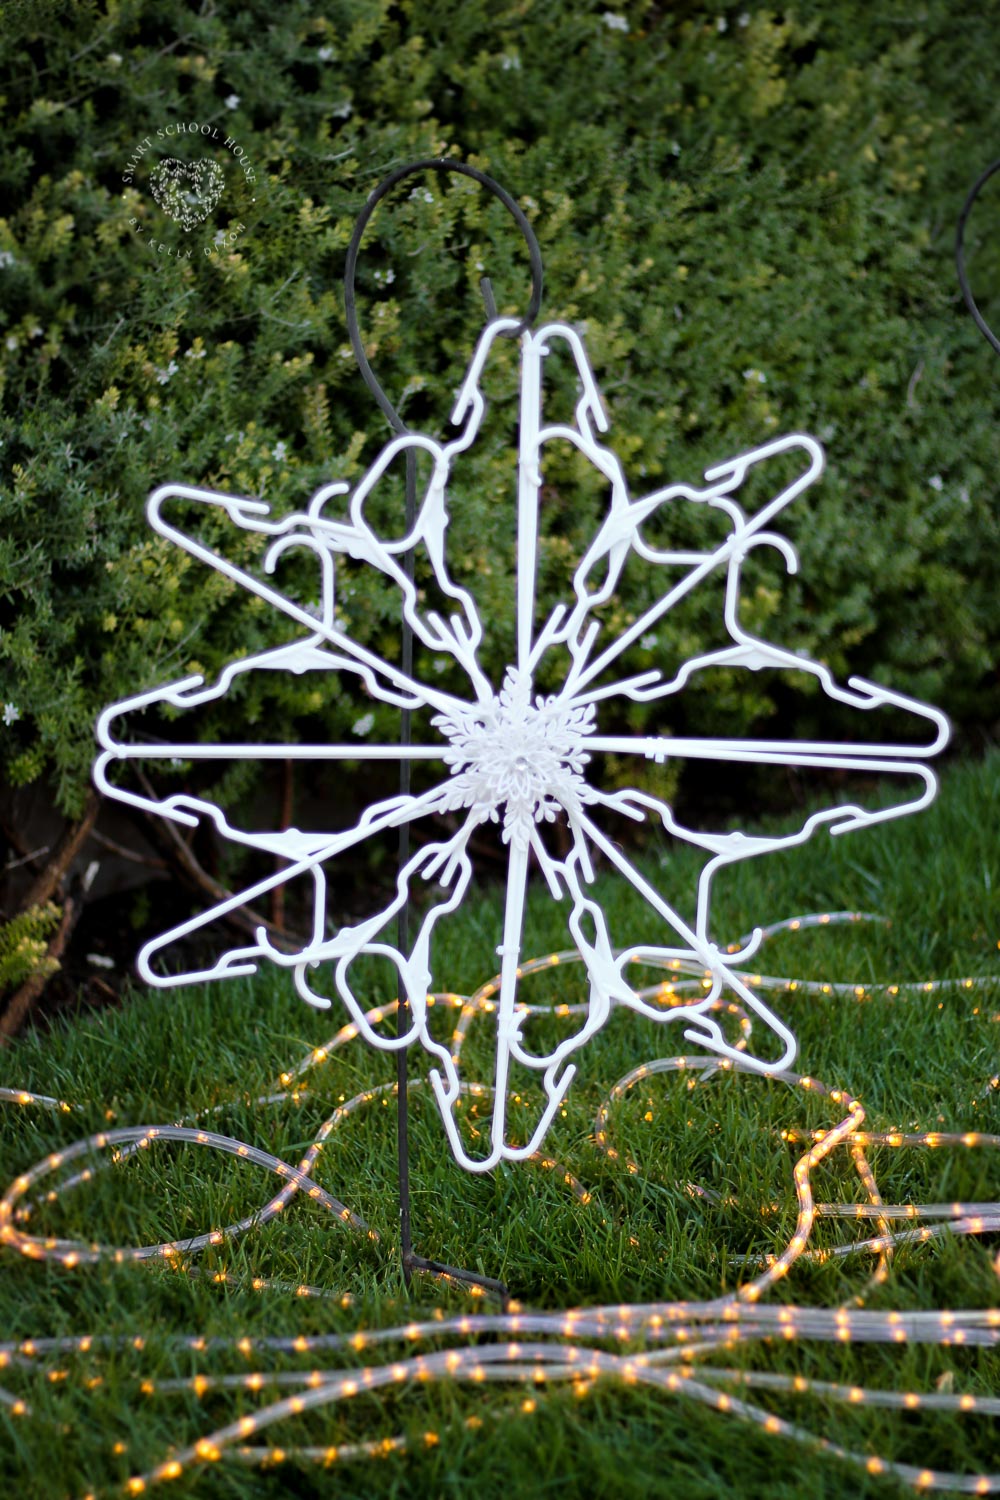
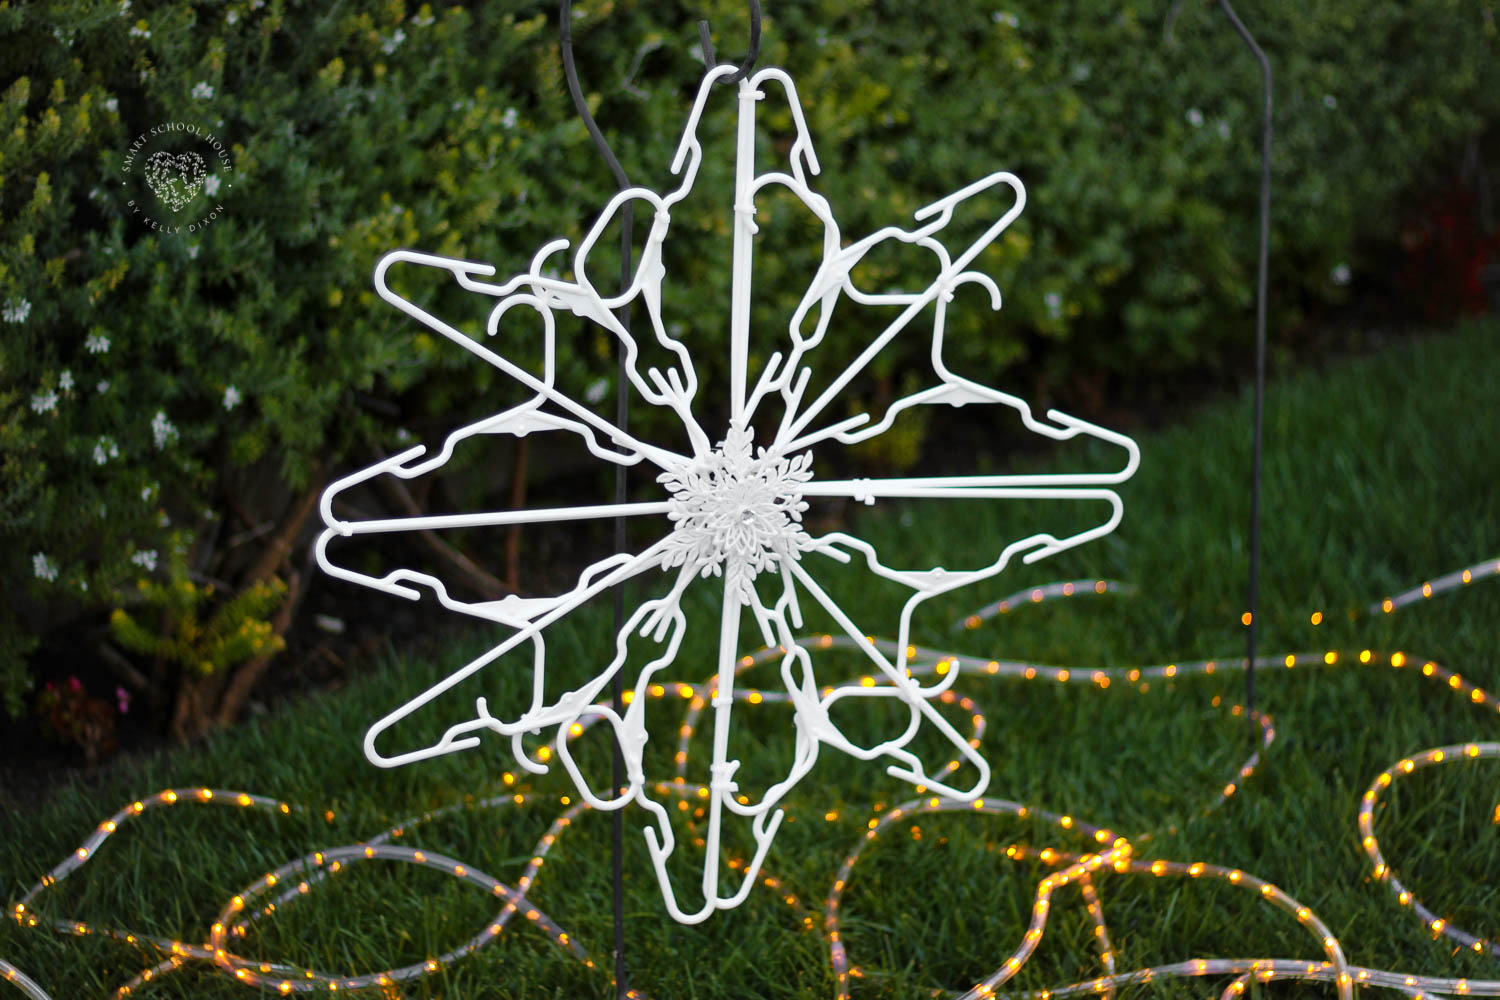
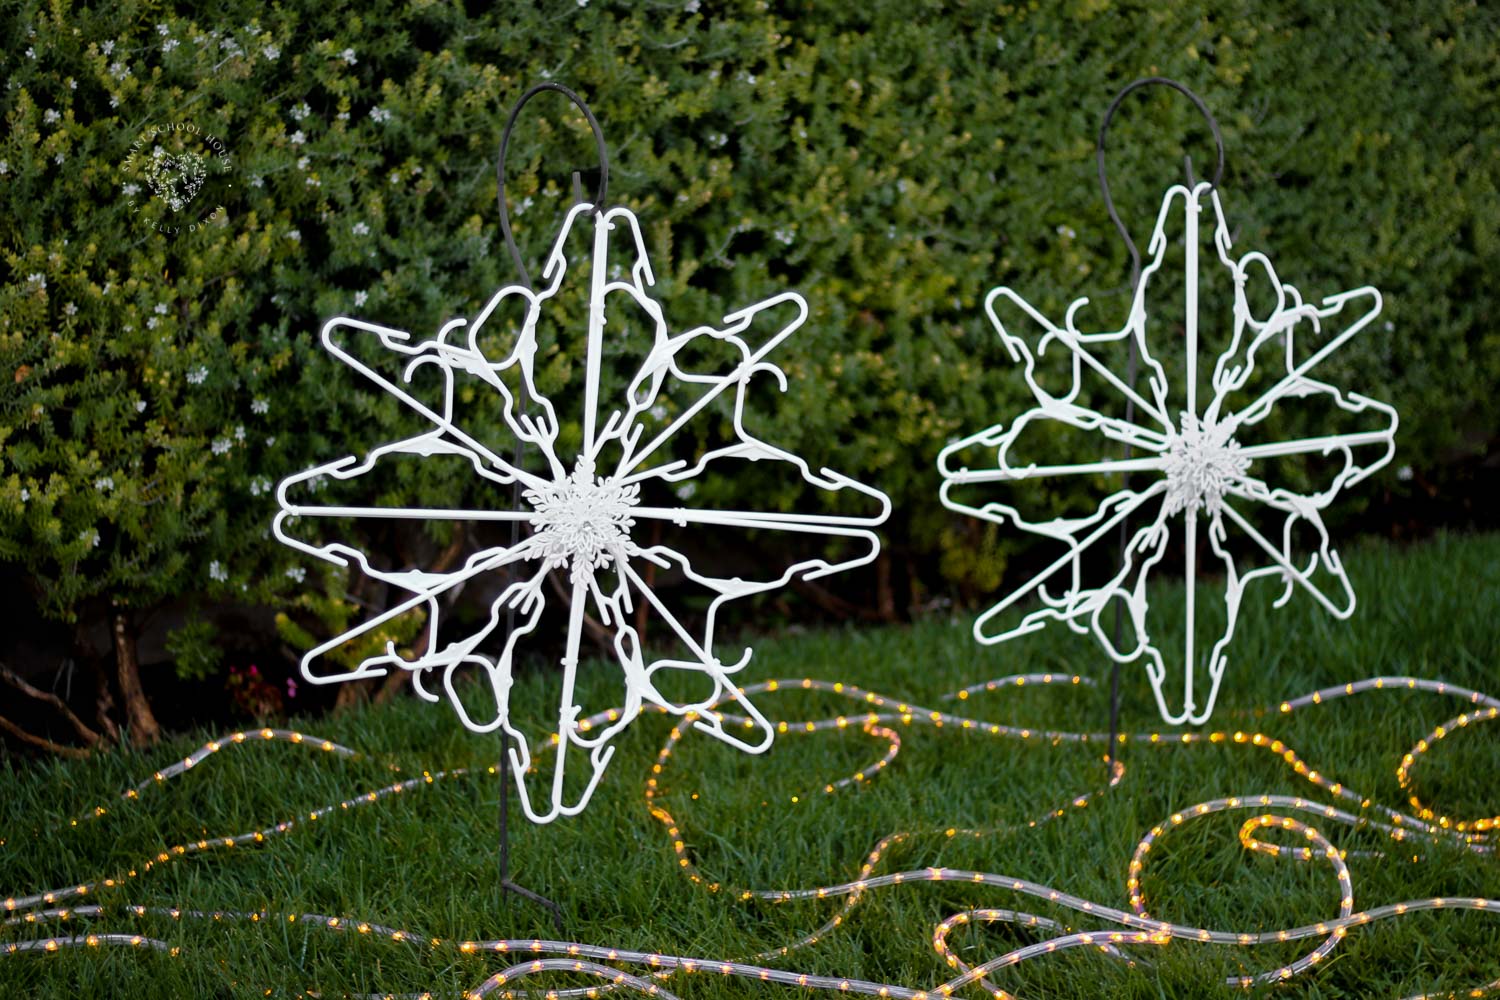
You will only need to make one trip to your local dollar store for this incredibly cool craft! You’ll need child size plastic hangers and zip ties. While you’re there, check out their Christmas decorations and see if you love any extra embellishments they have for you to add to your snowflake. The possibilities are endless! I found gorgeous white snowflake ornaments to place in the center of my hanger snowflake.
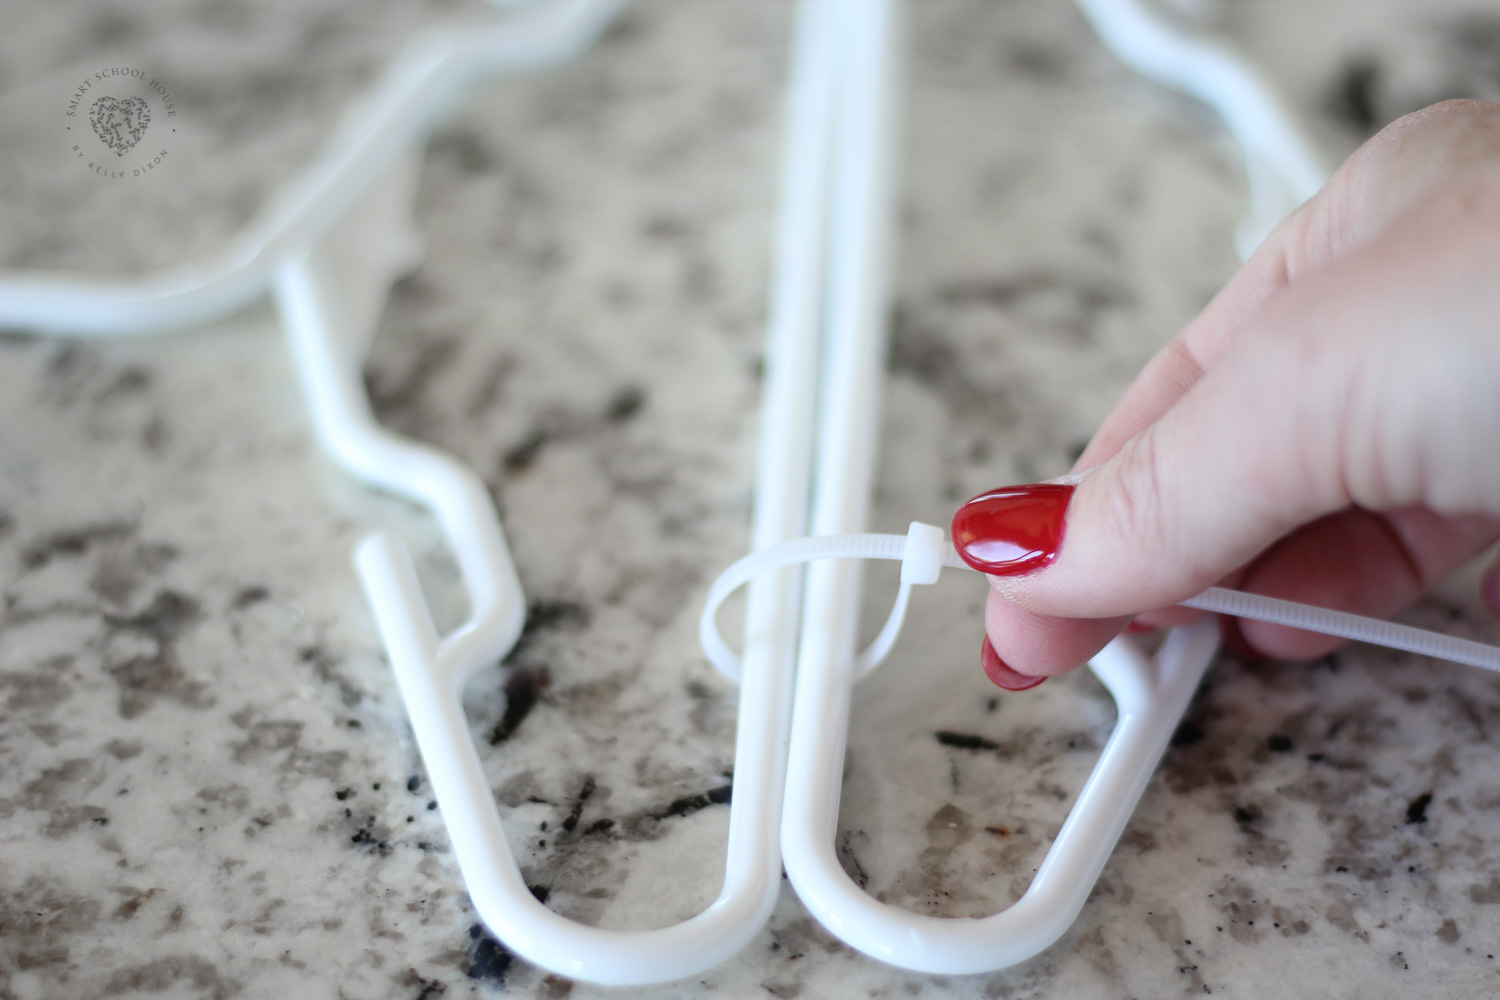
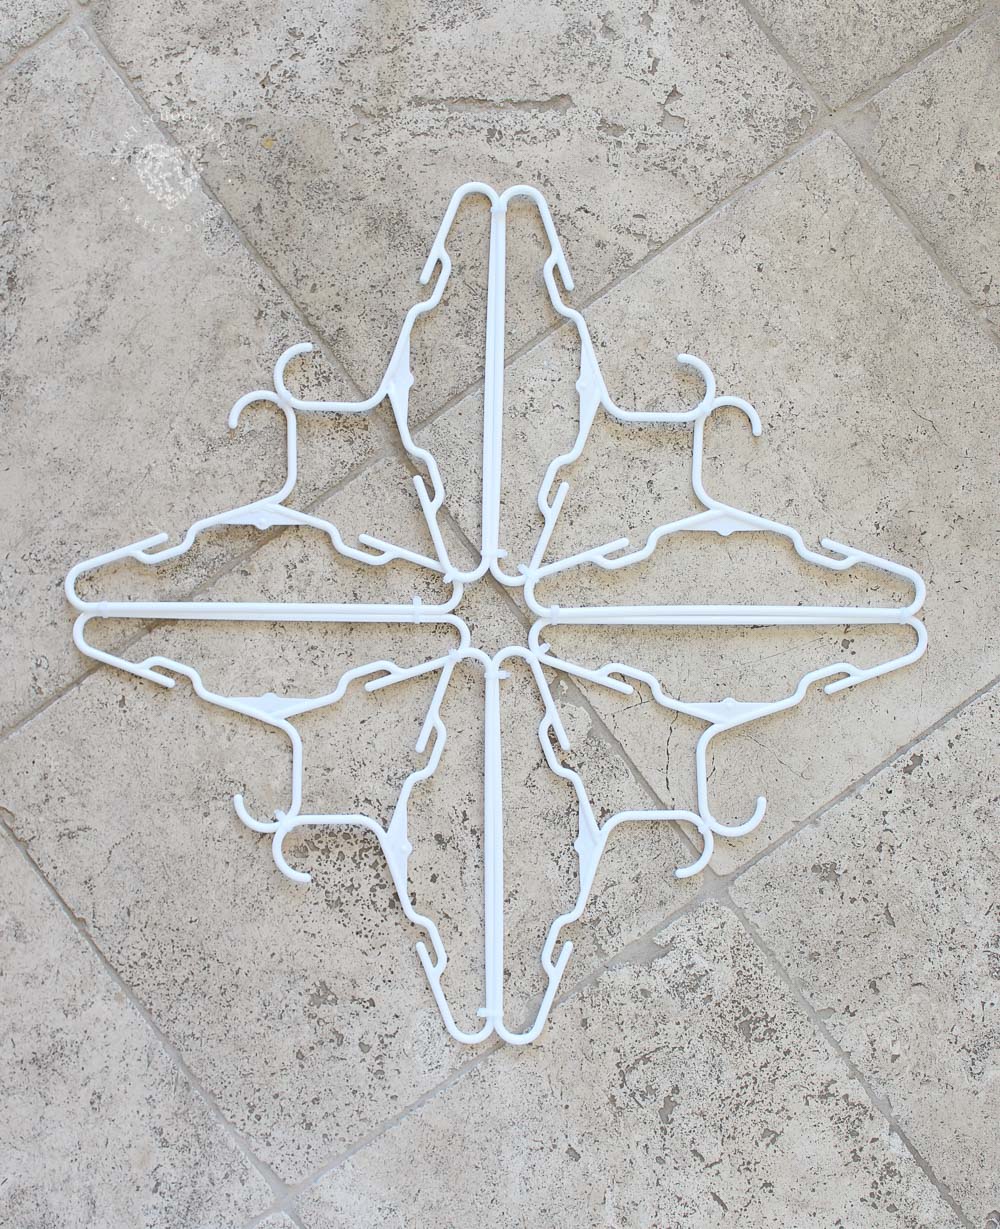
Each snowflake needs 12 child size plastic hangers (you could use more if you prefer!). If you want to use standard size plastic hangers it will work too! The snowflakes will be larger but just as beautiful! Connect two hangers with zip ties at their long edge with their hooks facing the same direction. Repeat that 3 more times, for a total of 8 hangers.
How to make a Hanger Snowflake
Now, arrange all 8 hangers in the beginning of a snowflake pattern, with 4 snowflake “points”, as seen above. I have all the hooks facing outwards. However, you can absolutely face hooks inward too! Once you have the arranged in a way you like, zip tie the 8 hangers together.
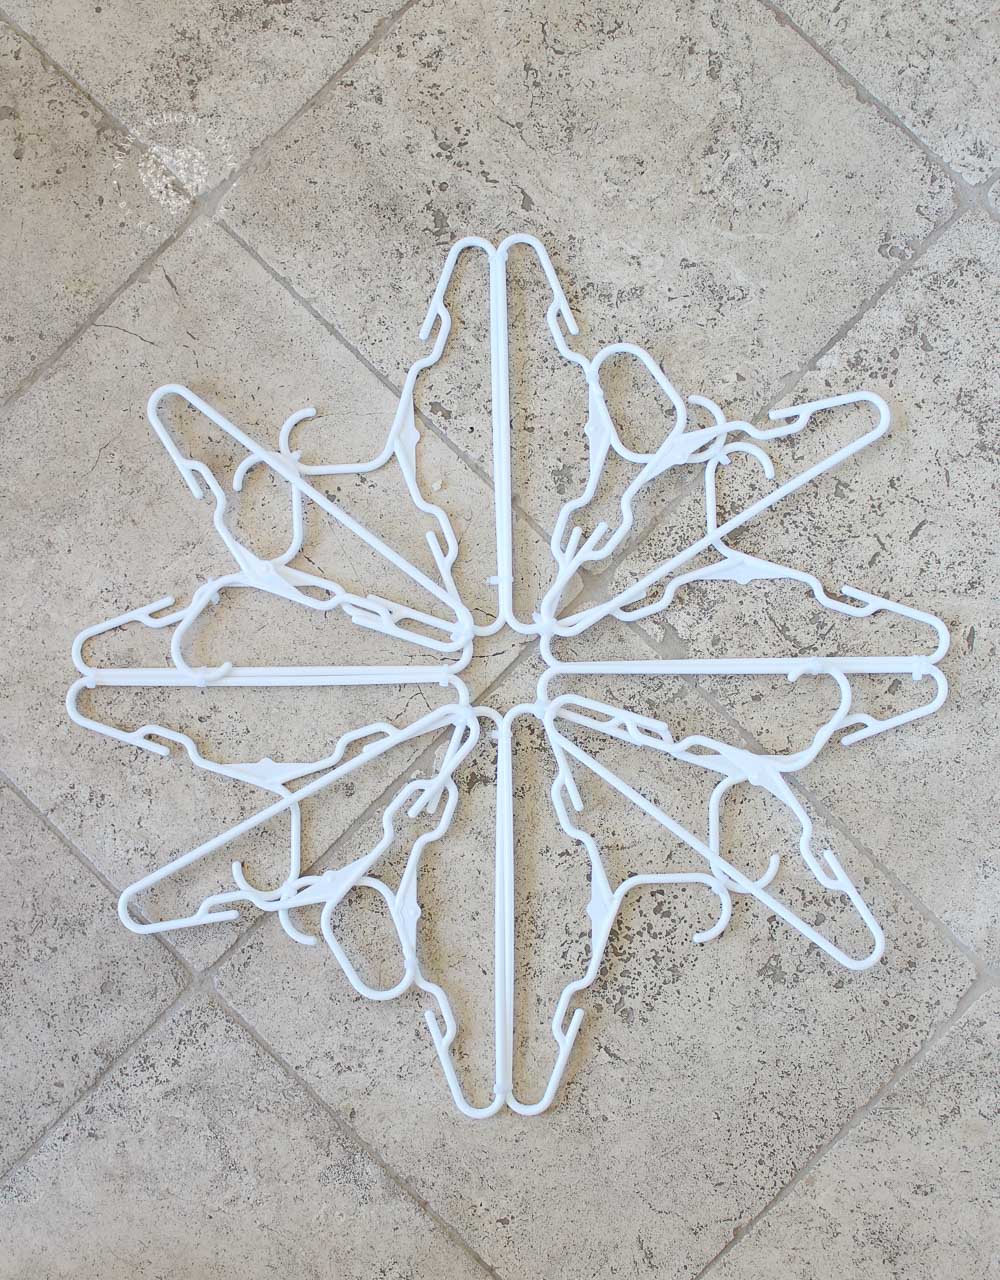
For this snowflake, I used 4 additional hangers to create a total of 8 “points” on my snowflake. Zip tie each hanger down in a pattern you like. I have all 4 hangers facing the same direction, but again, there is no wrong way to do this! Play around with your hangers and create a snowflake you love. Again, no two snowflakes are ever the same:)
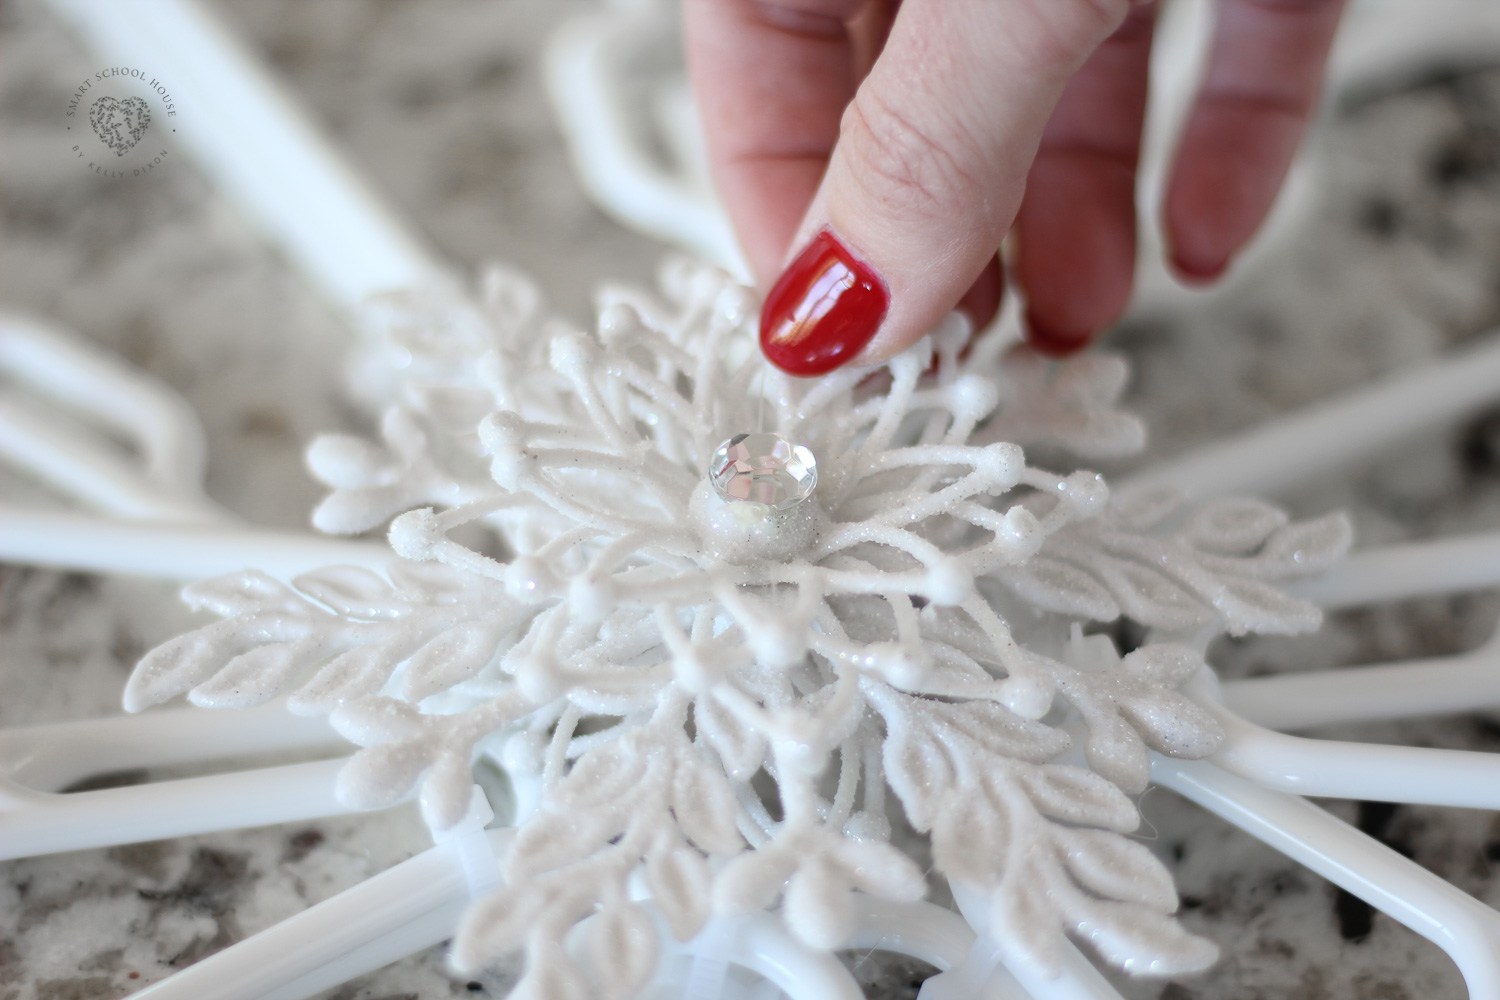
Here is where the creativity really kicks in… Once you have zip tied the hangers together to create a sturdy snowflake form, begin to decorate it! Embellish each hanger snowflake as much or as little as you prefer. I opted for a simple, clean, white design. I found the gorgeous snowflake ornaments that I placed in the center at the dollar store. Simply cut off the string used to hang the ornament and hot glue the piece to the hangers.
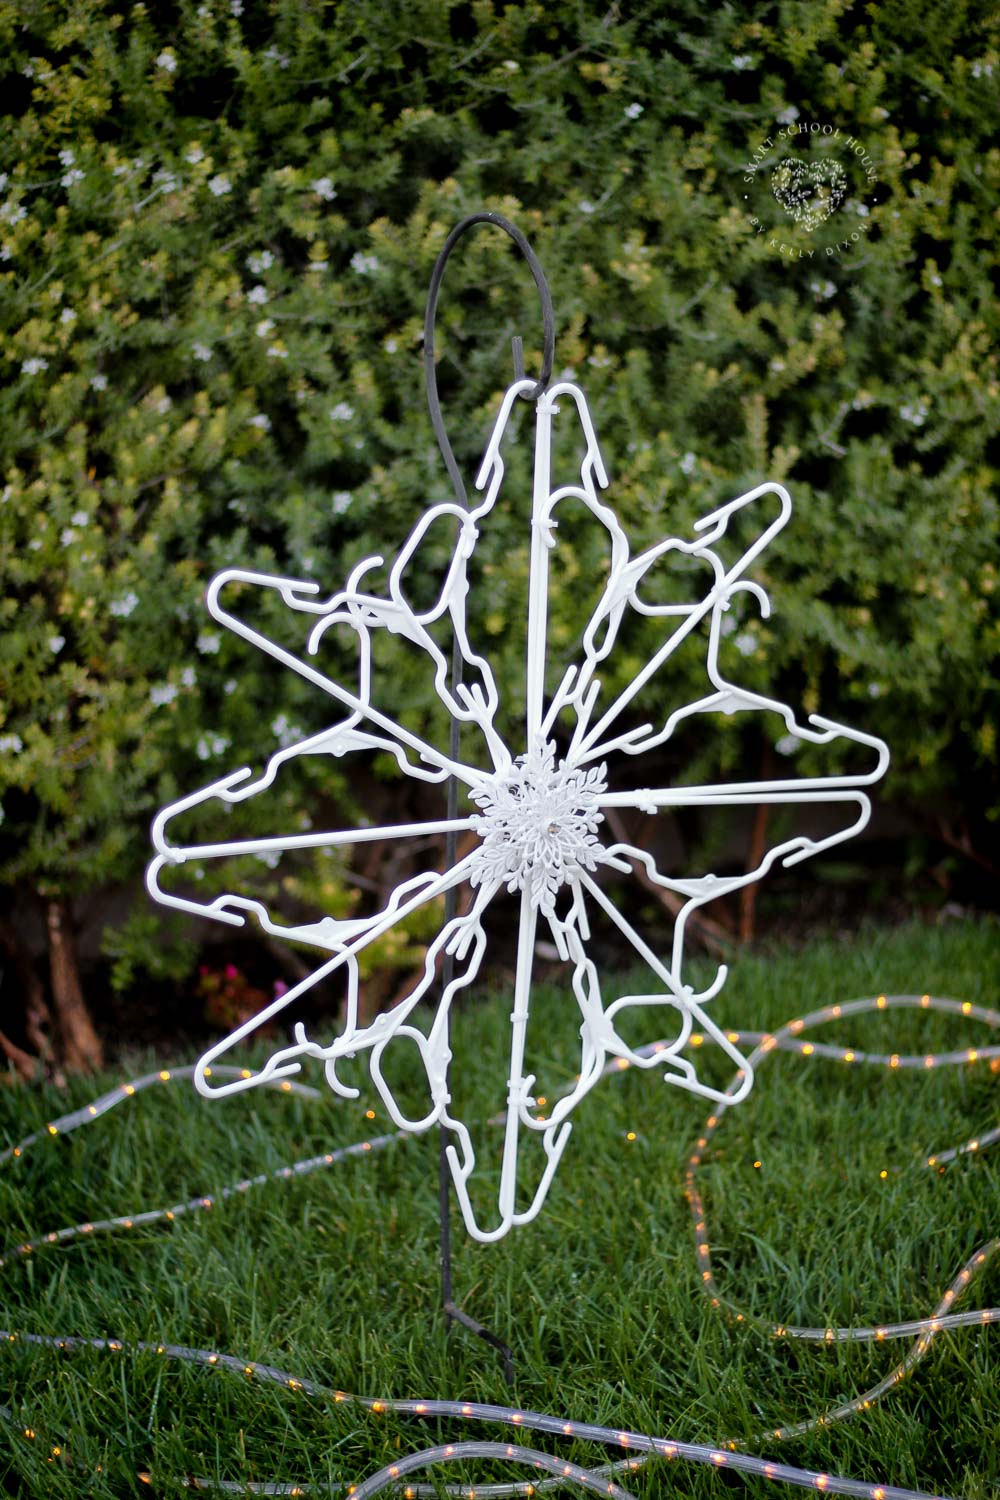
Did you know that you could use colored plastic hangers for this DIY craft too? I’ve seen them spray painted silver, white, and even dusted with glitter! Add bells, ornaments, wreath pics, or even decoupage fabric around it. Surround them with battery operated string lights and tinsel. Let your creativity flow! You can create snowflakes that coordinate with the rest of your holiday decor because the possibilities are endless. THAT is what we love about this snowflake hanger craft!
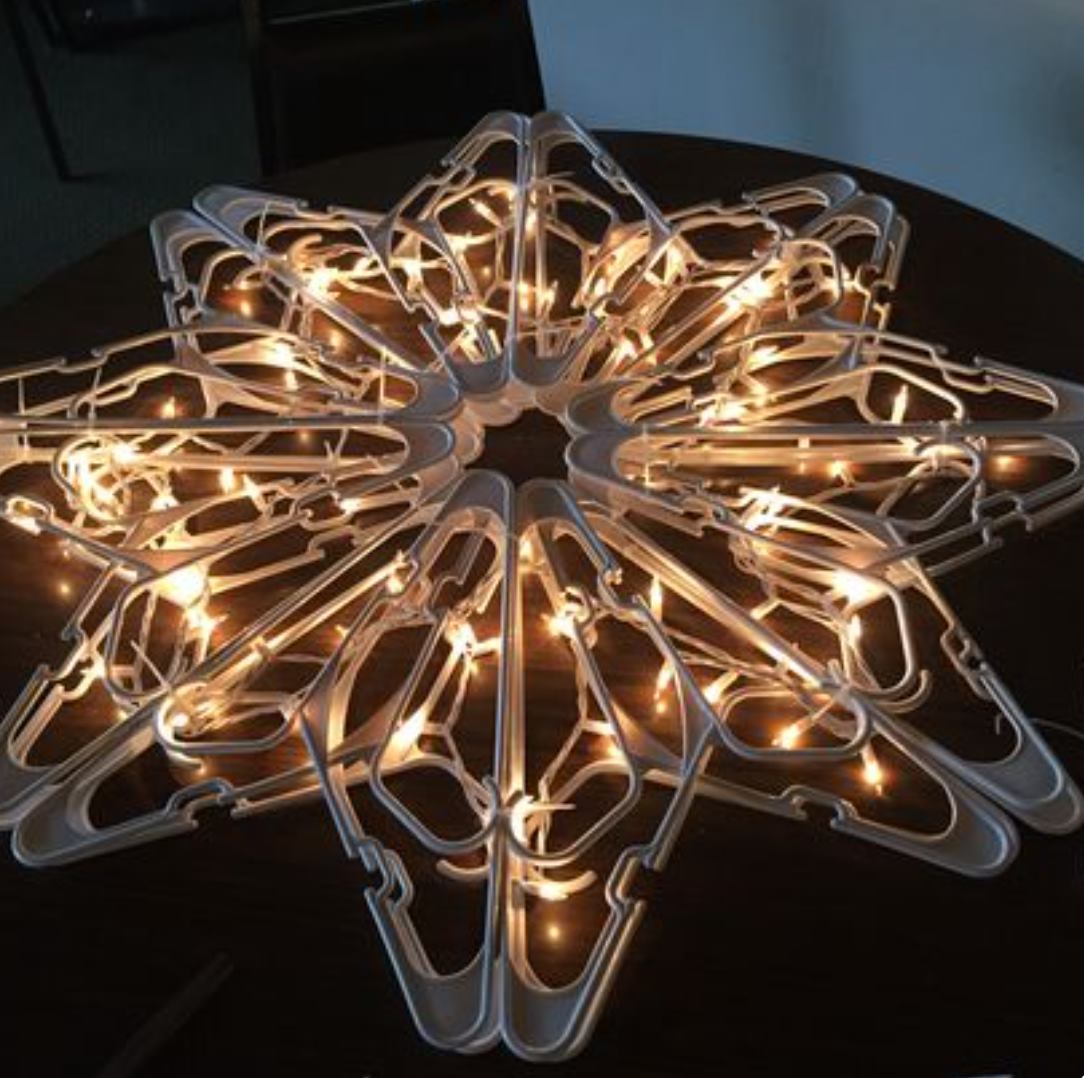
One Smart School House reader (@FloodPuddles on Pinterest) shared her finished snowflake! She said she attached two snowflakes together and then wrapped lights around that. So neat! I imagine you could use a small string of Christmas lights or even batter operated fairy lights to achieve this look.
More DIY Christmas Decoration Ideas by Smart School House to Try Next:
-
Giant Christmas Ornaments
-
DIY Ornaments Made with a Ball
-
Fish Bowl Snowman
-
Mason Jar Lid Snow Globe
-
Paper Plate Lollipops
-
Cardboard Box Snowman
-
Christmas Soap Bottles
Christmas Recipes to Make with the Snowflake Hangers:
-
Snowball Cookies
-
Christmas Tree Pull-Apart Bread
-
Marshmallow Polar Bear Paws
-
Cheese Wreath
-
Grinch Skewers
-
Strawberry Santas
-
Pretzel Christmas Trees
Directions for Making Snowflakes with Plastic Hangers
Hanger Snowflake
You Will Need
- 24+ white zip ties
- 12+ child size plastic hangers
- Hot glue
- Ornaments, lights, spray paint, tinsel, and other decor
Directions
- Connect two hangers with zip ties at their long edge with their hooks facing the same direction
- Repeat that 3 more times, for a total of 8 hangers
- Arrange all 8 hangers in the beginning of a snowflake pattern, with 4 snowflake “points”. I have all the hooks facing outwards. However, you can absolutely face hooks inward too!
- Once you have the arranged in a way you like, zip tie the 8 hangers together.
- Using at least 4 additional hangers to create a total of 8 “points” on my snowflake
- Zip tie each hanger down in a pattern you like. I have all 4 hangers facing the same direction, but again, there is no wrong way to do this!
- Using hot glue, add decorations to the hanger snowflake


