This post may contain affiliate links. Please read our disclosure policy.
Christmas is just around the corner and, if your family is anything like ours, then you probably enjoy counting down the days until Santa comes! Today’s DIY craft is just for people who look forward to the Christmas countdown in December. This DIY Christmas Countdown Candle is so neat and goes perfectly with an Advent Calendar! With just a few simple supplies, you can transform a regular wax candle into any countdown creation you can dream up! If you would prefer to use our little design, I have one for you to print at home. Making a Christmas Countdown Candle might become a tradition in your family!
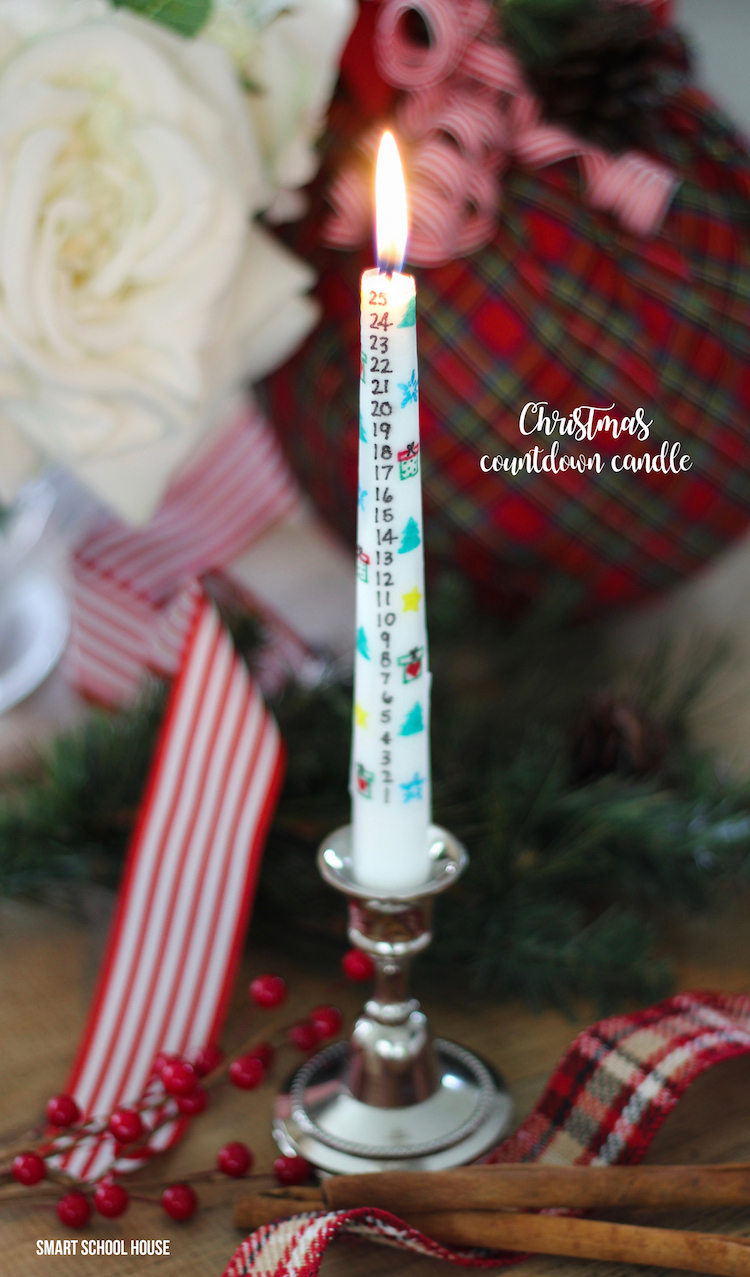
Christmas Countdown Candle
To make a Christmas Countdown Candle, you will need fine point Sharpie markers (like these) as well as white tissue paper, wax paper, and a candle! I used an 8 inch candlestick, but you can use whatever you prefer:) A small candle like the one we made will melt faster, so if you want the candle to be lit for awhile, consider using a larger candle. Bigger candles are also easier for little kids to decorate.
Note: Adult supervision is always required around candles. Let the kids do the artwork only:)
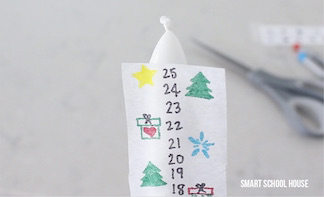
You will also need tape, scissors, and a blow dryer. Finally, you’ll need to design your candle! You can freehand your artwork, make your own on your computer, or download and print ours for free here! Simply be sure to add a countdown and some festive drawings. You can’t go wrong!
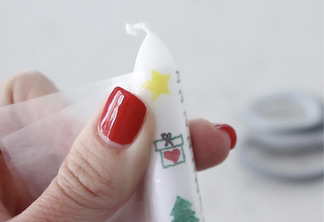
Wrap the tissue paper around the candle so there aren’t any wrinkles and it is snug without ripping it. Wrap a piece of wax paper over the tissue paper on the candle (as seen in the video). Use a blow dryer in up and down motions over the wax paper. Work slowly and be careful around your fingers! Blow dyers can get hot, but there is no rush:) Just firmly hold the design in place, moving your hands as needed, and gently let the heat of the blow dryer melt the tissue paper into the candle.
You will see your design turn darker and almost shiny. That’s when you know you’re done! Gently remove the wax paper. If any part of the tissue paper hasn’t properly melted into the candle, put the wax paper on again and apply a little more heat from the blow dryer.
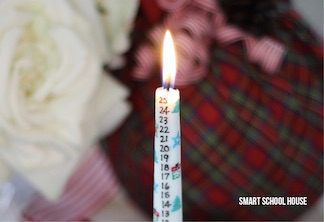
Place the candle in a holder, have an adult light the top, and let the candle melt down 1 number each night until December 25th! Isn’t it magical?! *Remember: candles aren’t for kids to light or be around without constant adult supervision.
If you love Christmas crafts, you might also like:
-
Giant Christmas Ornaments
-
Paper Plate Lollipops
-
Fish Bowl Snowman
-
Candy Train
-
Candy Sleigh
-
Strawberry Santas
-
Candy Cane Reindeer
DIY Christmas Countdown Candle

You Will Need
- Markers. I used Ultra Fine Point Sharpies (like these), but younger kiddos can also use washable markers!
- White issue paper (like the kind you put in a gift bag)
- 8 inch candlestick. I got ours in the candle isle at Michaels. Any size wax candle will work though!
- Wax paper
- Tape
- Scissors
- Blow dryer
- A design. You can freehand your artwork, make your own on your computer, or download and print ours for free here!
Directions
- Print a design and cut it out.
- Tape the design face down onto the tissue paper.
- Turn the tissue paper over and trace the design with markers. If you want, you can skip the tracing part and just draw straight on the tissue paper.
- Gently remove the tape and the design off of the back of the tissue paper and cut the tissue paper down to size so it will fit on your candle.
- Wrap the tissue paper around the candle so there aren’t any wrinkles and it is snug (without ripping!)
- Wrap a piece of wax paper over the tissue paper on the candle, as seen in the video.
- Use a blow dryer in up and down motions over the wax paper. Work slowly and be careful around your fingers! Blow dyers can get hot, but there is no rush:) Just firmly hold the design in place, moving your hands as needed, and gently let the heat of the blow dryer melt the tissue paper into the candle.
- You will see your design turn darker and almost shiny. That’s when you know you’re done! Gently remove the wax paper. If any part of the tissue paper hasn’t properly melted into the candle, put the wax paper on again and apply a little more heat from the blow dryer.
- Place the candle in a holder, have an adult light the top, and let the candle melt down 1 number each night until December 25th!


